Blender is a powerful 3D creation suite that offers everything from modeling, rigging and animation to physics simulation, camera tracking and even video editing and compositing capabilities. And what’s even more amazing: it’s absolutely FREE!
In this Absolute Beginner tutorial I will take you through everything you need to know to get started!
So what are you waiting for? Get Blender for free and start creating some awesome stuff!
The Interface
When you first launch Blender you will see the default layout. The interface for Blender is segregated into different panels. Each panel contains a body as well as a header, also sometimes referred to as the toolbar. The header for each panel is a horizontal menu bar that can sit either at the top or at the bottom of the panel. This can be a little bit confusing but it will make more sense when we talk about splitting panels further down.
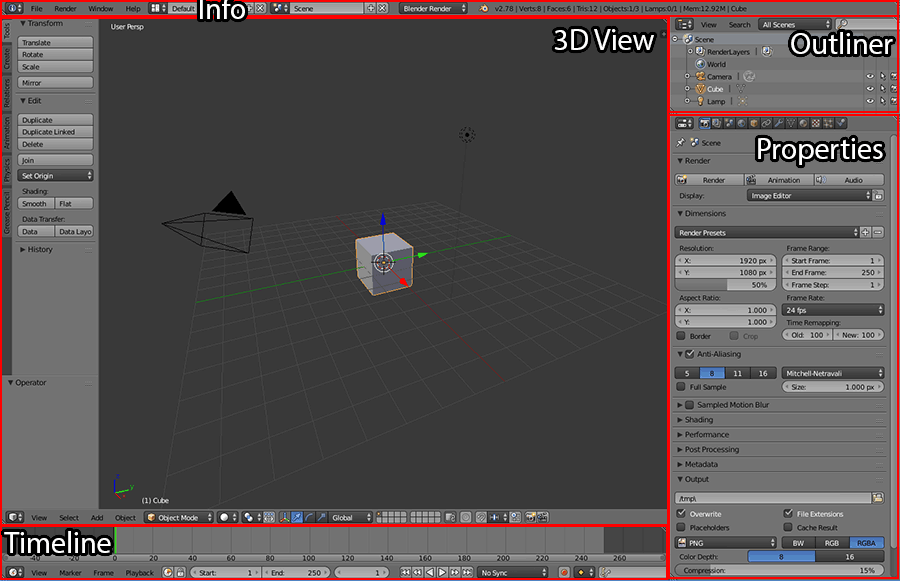
At the very top of the interface you will find the Info panel. By default, only the header of the Info panel will be visible and in this header you will find the main menu of Blender.
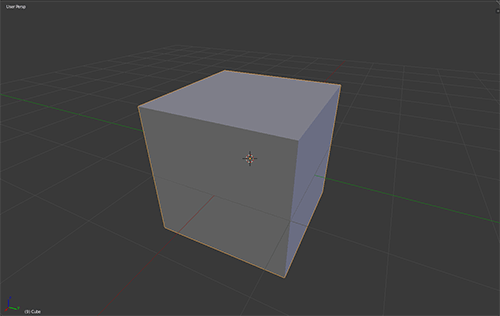
Right in the center of the screen you will see the 3D View panel. This panel is likely where you will spend most of your time in Blender as it shows you a 3D representation of your scene. In here you can create, place and modify all of the objects in your project.
In the top right corner of the interface for Blender you will find the Outliner panel. The Outliner is a tree view of all the elements in your scene. The Outliner allows you to easily select, expand and collapse as well as group and parent nodes in your scene.
Just below the Outliner you will find the Properties panel. This panel shows you all of the properties for your project as well as for any currently selected objects.
Finally, at the very bottom of the interface you will find the Timeline panel. The Timeline contains playback controls as well as a header with options to work with keyframes and markers.
Splitting & Joining Panels
Blender allows you to easily customise the interface to suit your particular needs. You can change the contents of each panel by clicking on the left most icon in the respective header and changing the Editor Type. This will essentially change the type of the panel and display the information you want within it.
You can also change the number and size of all of the panels within Blender’s interface.
For that, each panel contains 3 diagonal lines in the top right as well as the bottom left corner. If you click within this area and drag into the panel from the left or right, you can split the panel horizontally. If you click and drag into the panel either upward or downward, you can split the panel vertically. The new panel will be a duplicate of the panel you split. Here is a screenshot of my interface after I split the 3D view both horizontally and vertically.
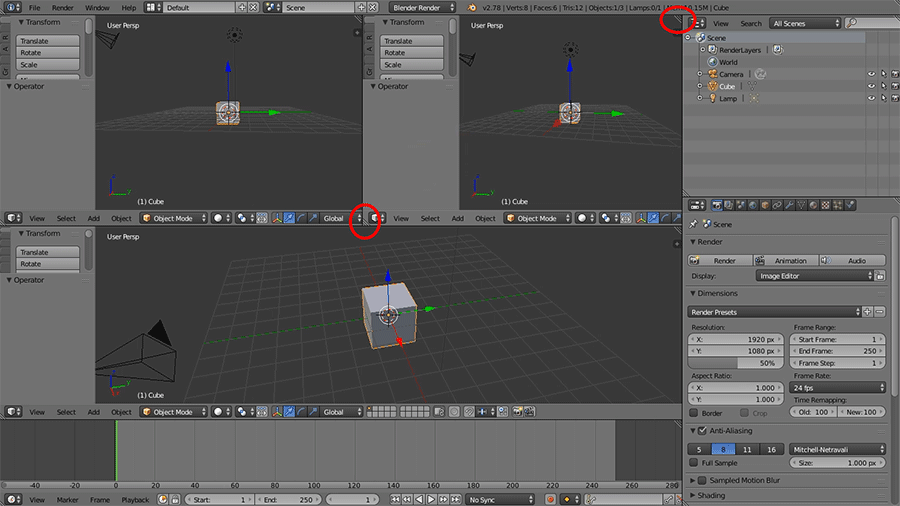
In order to join panels, simply click on the 3 diagonal lines and rather than dragging into into the panel, drag over an adjacent panel. An arrow will appear showing you which panel will be collapsed. If you let go now, the two panels will be merged.
Using The 3D View
To navigate around the 3D view in Blender, you can click and drag with your middle mouse button to rotate around your current focus point. If you hold down the SHIFT key while dragging with the middle mouse button you will move around the viewport. You can zoom in and out using the mouse wheel.
A useful shortcut for navigating around your 3D view is the PERIOD key on your numpad. Pressing this key will focus the camera on the currently selected item. You can then orbit around the selected item using your mouse as described above.
The 3D Cursor & Creating Objects
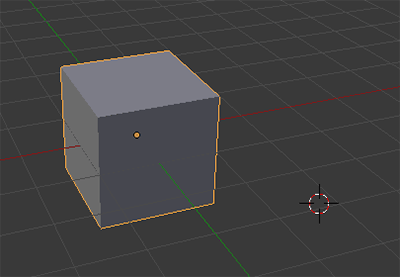
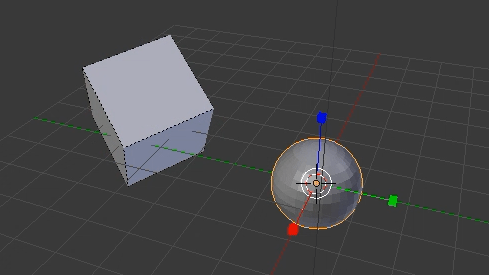
In Blender, you select objects in the 3D view using the right mouse button. The left mouse button moves the 3D cursor around your scene. The 3D cursor is important because it defines the location where new objects will be created. If you want to return the 3D cursor to the exact origin in your scene in Blender, simply use the keyboard shortcut SHIFT + C.
In order to create new objects in Blender, on the left side of the 3D view you will find a number of tabs: Tools, Create, Relationships, Animation, Physics and Grease Pencil. If you select the Create tab, you will see a large number of elements you can create.
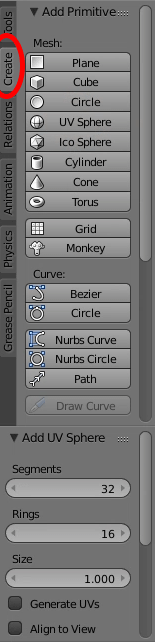
Simply click the button for the element you want to create and a new object will appear at your current 3D cursor location.
Transforming Objects
In order to move, rotate or scale the objects in your scene, you will find a number of transformation modes at the bottom of the 3D view.
Simply select your object (using the RMB) and then chose one of the available transformation modes. You can now use the transformation gizmo to move, rotate or scale your selected object.
You can also use the shortcut keys G, R and S to quickly access the Grab, Rotate or Scale actions. Notice that this works slightly different to the transformation modes. For one, the transformation gizmo will not appear. You can simply click and drag with your mouse to move, rotate or scale your object instantly. While moving your objects around in grab mode, you can also press the X, Y and Z keys to lock the movement to the x, y and z-axis respectively. This will allow you to control how exactly you are moving your objects about the scene.
Applying Materials
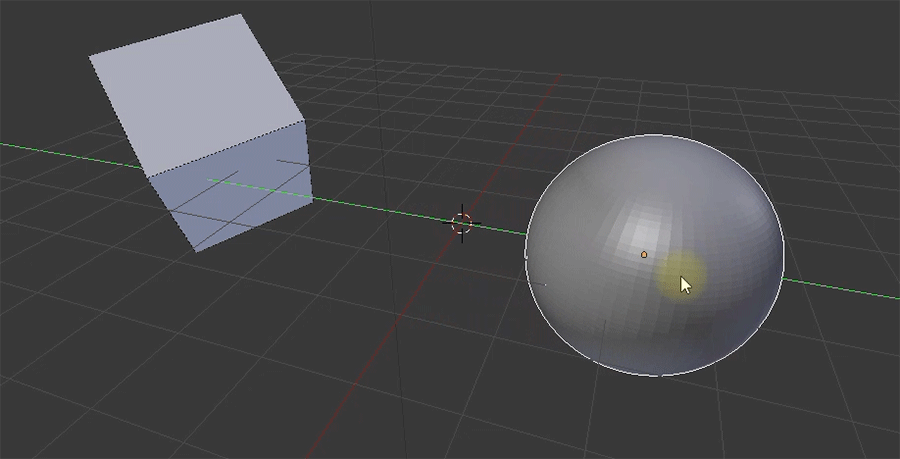
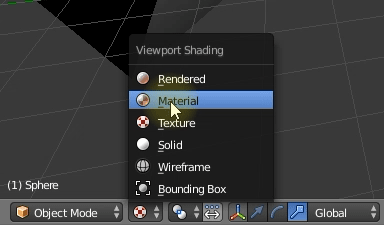
By default, all objects you create in Blender will be created with a simple gray default material. You can view the materials applied to your objects directly in the 3D view by changing the display mode over to Material from the header at the bottom of the panel. There are also other useful options available such as viewing your objects in Wireframe, Texture or (preview) Rendered mode.
Once you have an object selected in your scene you can view and modify its material in the Material tab within the Properties window.
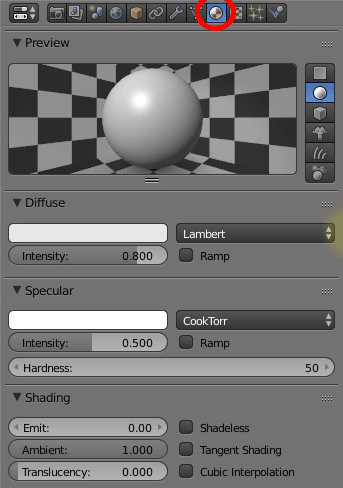
You can change the look and feel of your material by tweaking its diffuse and specular (shininess) colours as well as various other settings. There is so much more to working with materials, like the powerful Node Editor available in Blender, but this should be enough to get you started.
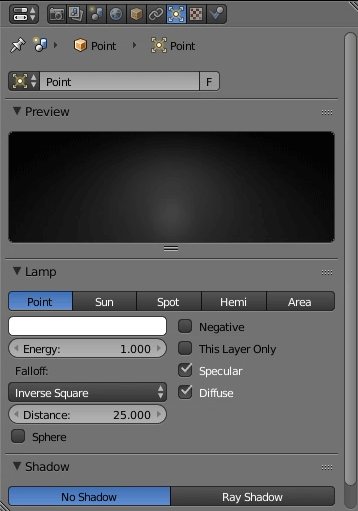
Creating Lights
You can create lights in Blender the same way you create any other type of object. Simply come into the Create tab on the left side of the 3D view, scroll down a little bit and you will find a section called ‘Lambs’. From here you can easily add different types of lights into your scene. You can then move them around and position them exactly where you want them to be.
In order to adjust the settings for your lights in Blender, simply select them and then go into the Lights tab in your Properties panel. Here you can change things such as the colour and the strength as well as other important options, such as whether this light will cast shadows or not. By default, new lights in Blender do not cast shadows to keep rendering time down.
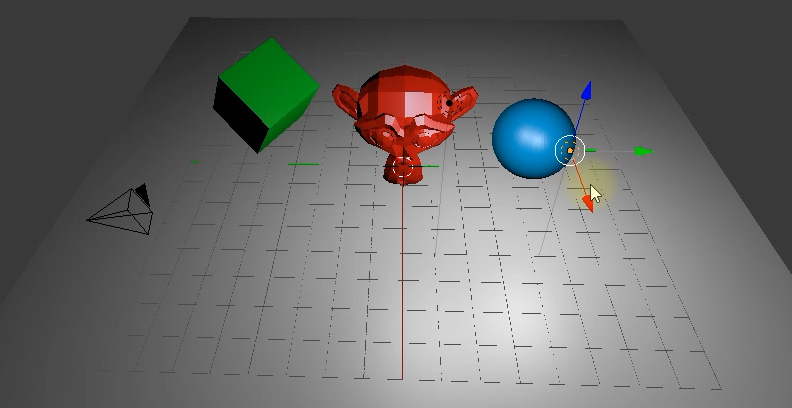
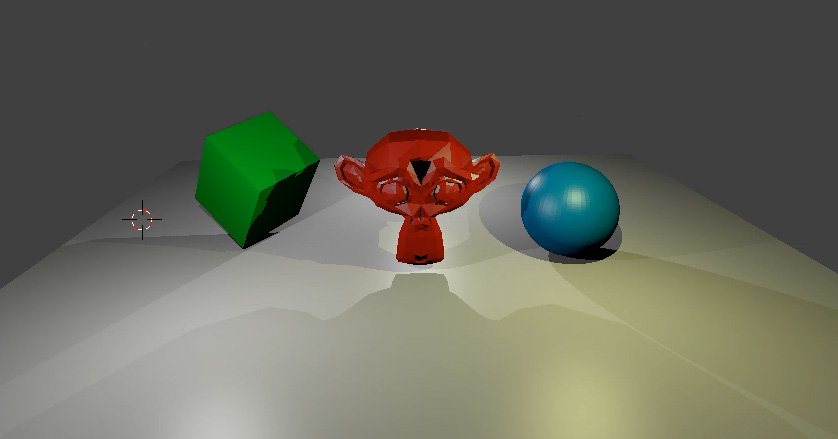
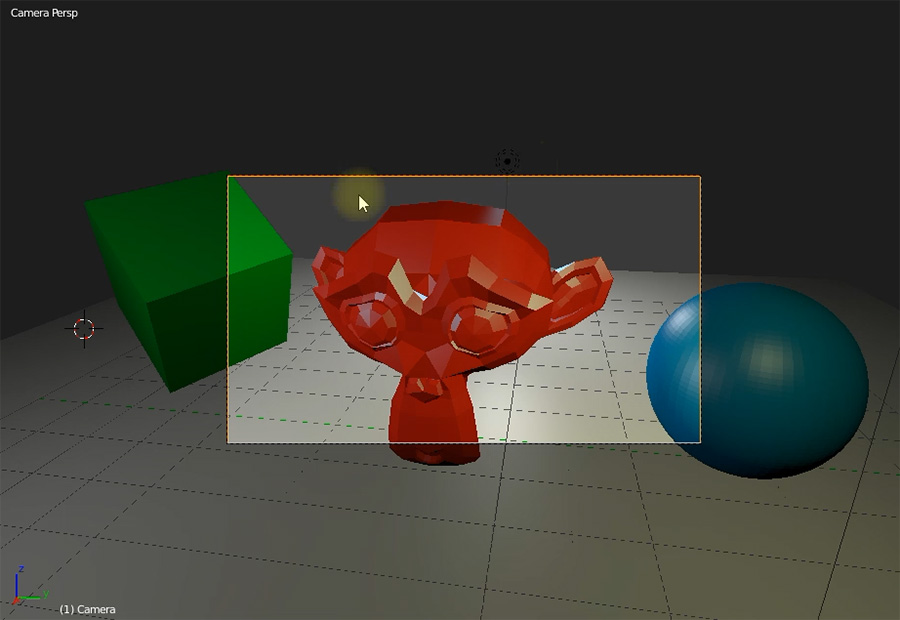
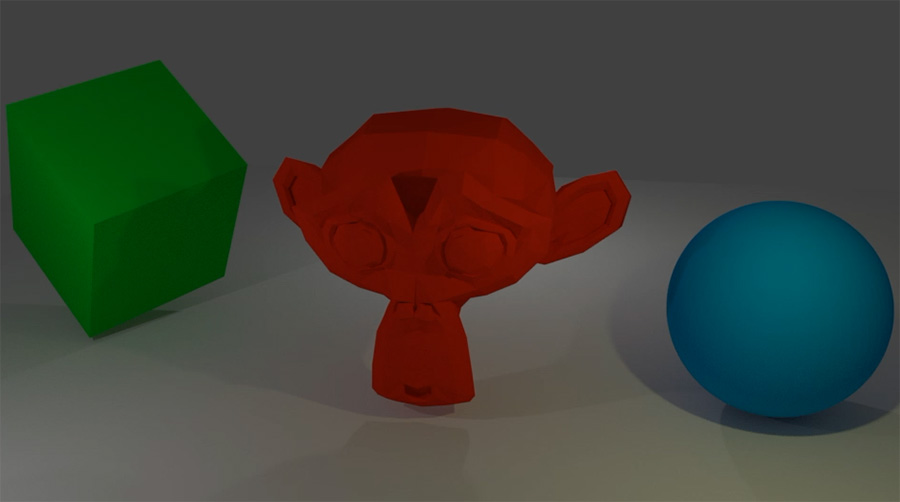
In order to see what your scene would look like rendered, you can switch the display mode of your 3D View over to Rendered. Here is a my simple scene with a couple of lights illuminating a green cube, a red monkey head and a blue sphere. Note that I have enabled shadows for all 3 lights in my scene.
Creating & Placing Cameras
You can render your scene in Blender by pressing F12 on your keyboard.
When you create a render in Blender your 3D View panel will automatically be replaced with the Image Editor panel. To return back to your 3D View, simply hit ESC on your keyboard. You can also change the editor type of the panel back to the 3D View.
Note that when you trigger a render in Blender, your scene will be rendered from the currently active camera. This is not the same as the perspective you see while you are working in the 3D View.
By default when you create a new scene in Blender, it will contain a cube as well as a single light and a camera. This camera is, by default the active camera that will be used to render your scene. If you don’t have a camera in your scene you can create one the same way you create anything else in your scene: using the Create tab on the left side of the 3D View.
You can move the camera around to where you want it to be so that your scene renders as expected when you press F12.
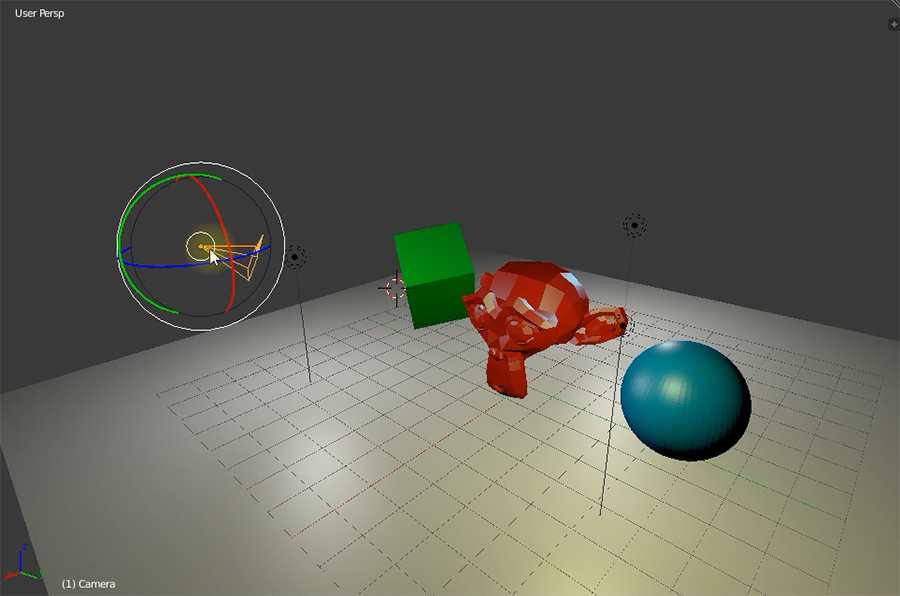
Moving the camera around without being able to directly ‘see through it’ may be a bit challenging. An easy way to position the camera in your scene is to enter Camera Perspective by pressing 0 on your numpad. You will now see your 3D scene through the eyes of the camera. The yellow rectangle displayed is the crop area of the camera. It shows you exactly what will end up in your final render. Note that if you move around the 3D View using the mouse, you will automatically drop out of this camera view.
While in camera perspective you can use the shortcut SHIFT + F to activate First Person Mode. This will allow you to move your camera around like in a first person shooter using the keys A, S, D, F, Q and E.
Rendering
We already talked about rendering out your scene by pressing the F12 key on your keyboard. This key is actually just a shortcut for the Render button that you will find in the Render tab within the Properties panel. In this tab you can render out the current frame, your current animation or the audio for your Blender as well as adjust a plethora of options for rendering your scene.
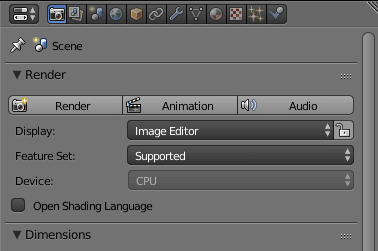
In this tab you can also define the output settings for your render. However, Blender will not save the image to your disk by default unless you are rendering out an animation.
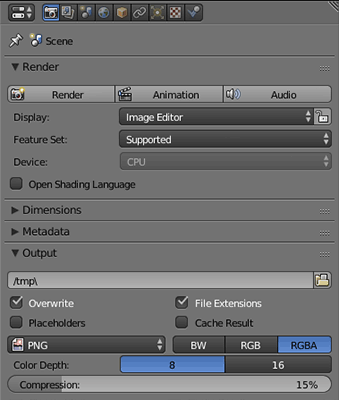
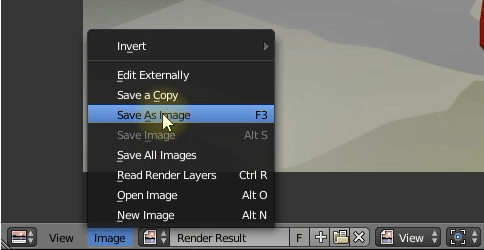
In order to save the current frame to your disc, first you have to render your scene, either by pressing F12 or by pressing the Render button. This will replace your 3D view with the Image Editor panel.
In the header of the Image Editor you will find options to save the output under Image –> Save As Image. This will bring up a file dialog where you can define the output path for your file and click on ‘Save’ to write it to disc.
Different Render Engines
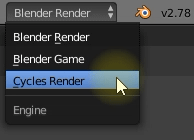
Blender supports multiple different render engines that you can use to render your scene. By default the Blender Render engine is selected. This engine is fairly old and does not take a physically realistic approach to rendering. This makes it less accurate, but also a lot faster than the newer Cycles Render engine.
The Cycles Render engine has been developed in 2011 and is a very powerful, ray-trace based render engine that takes a physically realistic approach to the way lights and objects interact. This does make it a lot slower than the older Blender Render engine, but the images will come out looking a lot more realistic.
You can change the render engine that Blender uses in the header for the Info panel. In the default layout, this option is located at the top of your application window.
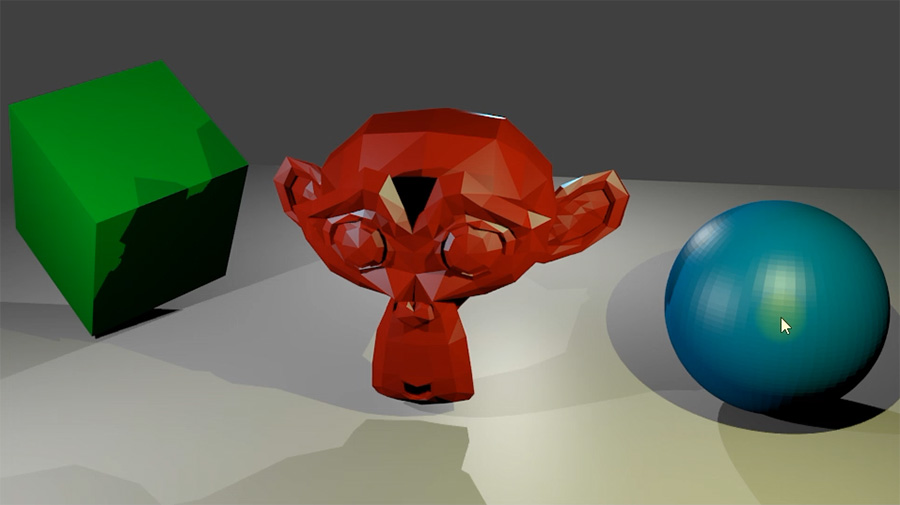
If you render your scene with the Cycles Render engine selected, the image will look very different from a render created with Blender Render. Notice the soft shadows and the much more organic look of how lights and objects interact in the scene.
Have Fun!
I really hope you will enjoy working with Blender! It is an amazing 3D software package and I do plan to make many more tutorials for all the cool things you can do with it. Leave me some comments down below if you would like to see tutorials on anything in particular.
For now, I hope you enjoyed this one!


12 Responses
Thank you very much for this excellent introduction to Blender. It was paced perfectly for a new user like me to begin to understand quite a complex software package.
Thank you so much for the feedback! It’s great to hear that you found the tutorial useful!
You could’ve used better graphics though but overall a nice tutorial.
Try submitting it to hackr, maybe they’ll like it.
https://hackr.io/tutorials/learn-blender
Thanks for the pointer. Hackr looks primarily like an aggregator for programming courses. There’s still tons of other places that I haven’t yet posted my videos on that I’d likely do first :)
This is a great introduction. A lot of beginners give up quickly because they think Blender is too complicated, but with a tutorial like this anyone can get the basics. I also enjoy dabbling with Blender Python, like this domino effect: http://slicker.me/blender/domino.htm
Thank you for the comment! The domino effect is pretty cool – and yeah, there’s tons of great things you can do in Blender REALLY easily. I’m so excited for Blender 2.8 coming out! Tons more tutorials to create!
I LOVE that you lay everything out in text and stills format as well! and your humor intro is a winner!
Thank you for the awesome feedback :)
Hi there! I just started to follow your brilliantly fantastic tutorials. Regarding Blender I am on 2.80 version. It seems the default layout is vastly different from your tutorials (Blender 2.78 version) making it a bit more difficult to follow your tutorials. I just started so I am at very beginning and your first Blender tutorial. Am i correct that the layout is different or am I losing my mind? Thanks!
You are not at all losing your mind :) Blender 2.8 got a HUGE UI update so a lot of things changed. I have yet to update my beginner course for Blender 2.80 – something that’s still on my todo list. For the time being, I got a crash course for it here that might (maybe) help: [youtube id=”f92r93t2HKE”]
HI loved video i guess i need to get 2,8
so many differences in 2.9 things like face made panels eve A selects
i fail to even select an edge things like ctrl tab does not bring up edge mode
Im just a confused beginner
Hi, this video actually still uses Blender 2.78 – the big UI changes came with version 2.8.
I have yet to make an updated tutorial, just haven’t found the time yet unfortunately.
TAB changes in and out of Edit mode, CTRL+TAB to bring up the ring/mode menu. 1/2/3 change between vertex, edge and face modes :)