A little while ago I joined forces with Rag from Shutter Authority to create a Minecraft In Real Life VFX short film.
The short film is packed with visual effects and I have started to create tutorials to show you how you can add them to your own film projects. In the first tutorial, I will show you how to create a cool 3D scan effect in Adobe After Effects!
Want to follow along with the tutorial? Download the files here: 3D scan tutorial files.
Getting Started
Creating a 3D scan effect will require you to create a 3D track for your footage. You should be able to use almost any footage, just make sure that the video does not contain any crazy camera movement or overly blurry frames.
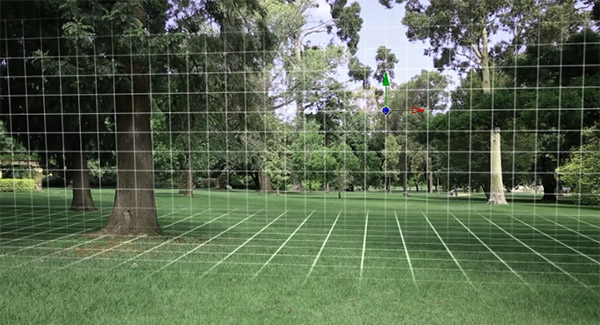
Here is the clip that we used to create this effect: a simple pan-tilt-zoom shot taken in the Royal Botanical Gardens in Melbourne.
Tracking The Footage
The first thing you will need to do is apply the 3D Camera Tracker effect, available in Adobe After Effects since version CS6. If you do not have this effect available, you may have to get a 3rd party tracking tool such as Mocha.
Once the 3D Camera Tracker has solved your scene you should be able to see the track points that were calculated for your shot. If you cannot see the track points, make sure you have the 3D Camera Tracker effect selected. Larger track points are closer to the camera and smaller ones are further away. However, if you used the Park.mp4 sample file for this tutorial, you may notice something strange.
Some of the track points on the tree trunk and on the ground are much smaller than track points that should be further away. While the 3D Camera Tracker in Adobe After Effects usually does a good job of tracking your shot, sometimes, the automatic Solve Method selected does not give you correct results.
The shot we took in the the Royal Botanical Gardens is what is called a pan-tilt-zoom. In a pan-tilt-zoom, the camera is (mostly) stationary and does not move up, down, forward, backward or sideways. The shot therefore has no parallaxing and the 3D Camera Solver will not be able to calculate the distance of the elements in your scene.
One way to solve the problem is to tell the 3D Camera Tracker to apply the ‘Tripod Pan’ Solve Method by changing the settings in the Advanced tab of the effect.
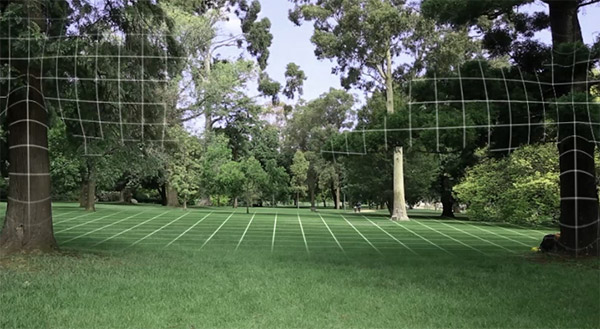
After solving the scene using the Tripod Pan solve method, all of your track points will be the same size. Because there is no depth information in a pan-tilt-zoom, the 3D Camera Tracker considers all track points to be equidistant to the camera and therefore they will all have the same size. You will also notice the ‘No depth from a tripod pan solve’ warning when you hover your cursor over the track points. Don’t stress, that is OK. We won’t be needing depth information for this type of shot anyway.
Creating The Grid
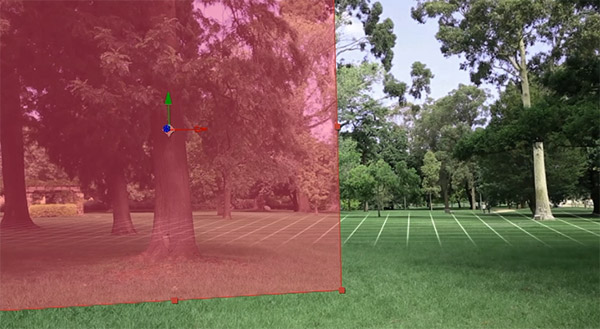
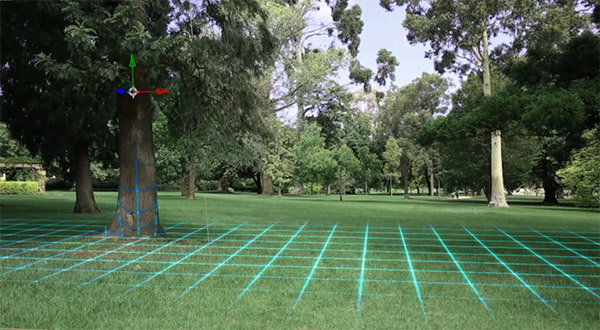
Once you have tracked your scene, select a couple of track points on the ground and create a 3D plane and camera. Adjust the positioning of the plane so its sits flat on the ground. If you do not know how to do that, make sure you check out my tutorial on working with 3D in Adobe After Effects.
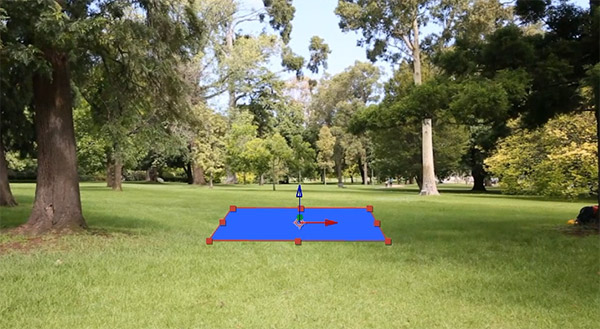
Next, we need to create the actual grid scan effect we want to track into this shot. For this, create a new composition. Ensure the resolution is set to around 2 times the resolution of the shot you want to create the 3D scan. This will ensure that the final effect doesn’t come out pixelated or blurry.
Add a new solid into the composition and then apply the Grid effect to the layer. To change the cell size, you can change the Size From parameter to ‘Width Slider’ in the effect settings. This will allow you to freely adjust the grid spacing to your liking.


Next, create another layer at the top of your composition and apply a long, horizontal mask to it to create the scan itself. Feather the mask out a little bit to soften the edges of the 3D scan. Then set the track matte option of the layer at the bottom, which contains the Grid effect, to ‘Alpha Matte’.
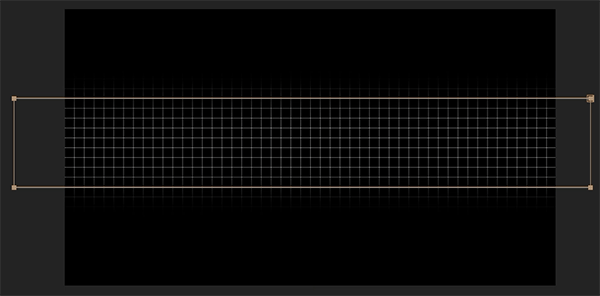
Now animate the mask to sweep vertically across the grid from bottom to top. You can repeat this animation a couple of times if you like.

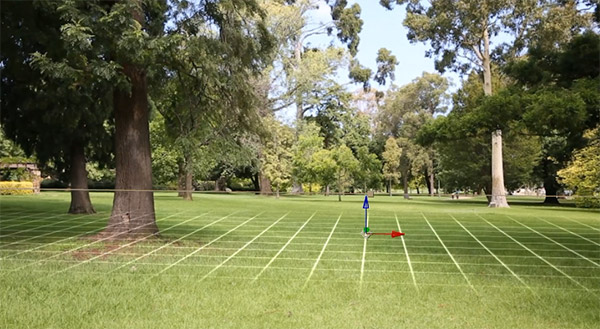
When you play back your composition you should now see a flat 3D scan happening as if looking down onto the effect from above.
Return to the main composition and select the solid layer you placed on the ground of your scene. While holding down ALT on your keyboard, or OPTION on the Mac, drag the new grid composition we just created onto this solid layer to replace it. You should now see the 3D scan effect over the ground in your shot. You may have to adjust the positioning of the grid effect a little bit to make sure it sits nicely in your scene.
Colour Grading The Footage
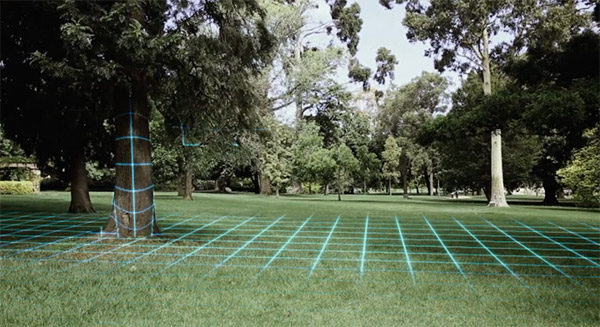
Next, and this step is optional, I like to use Curves or Hue/Saturation effects to tweak the colour of the park footage so the effect looks a little bit more ‘techy’. I made the shot a little bit darker and tinted it slightly green.
The effect should look pretty cool already, but I do want the 3D scan to trace up the shape of the trees in the foreground to give it more depth and realism. For that, we first need to create track mattes for the trees.
Creating Track Mattes For The Trees
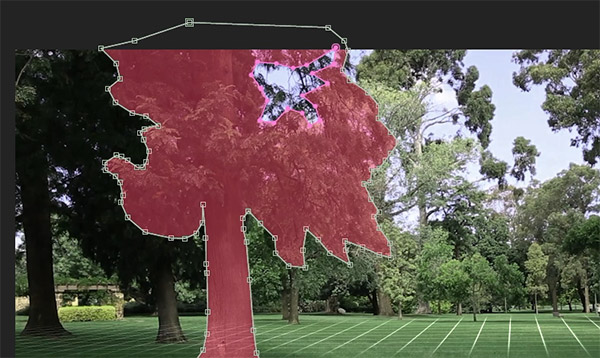
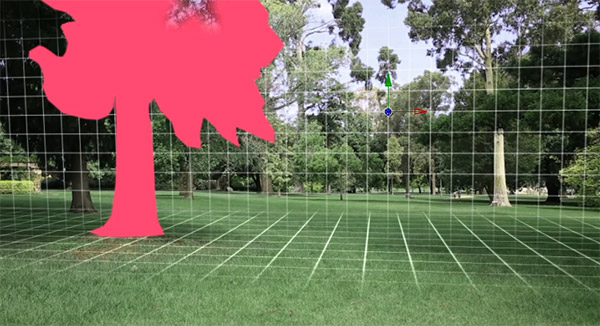
In order to do that, simply select the base footage and re-select the 3D Camera Tracker effect to reveal all of the track points. Then select a number of them to create a plane that sits over the tree on the left side of the shot.
It is important that you open up the Solid Settings and increase the resolution of this layer up. I ended up setting it to 2000 x 2000 and then scaled the layer back down to cover the extent of the tree. This will prevent the edges of the track matte from appearing pixelated once we mask it out.
Now, using the pen tool, draw a mask onto this layer to cut out the shape of the tree. I ended up adding a small mask to cut out the hole in the branches for the tree as well so the 3D scan effect will not appear there.
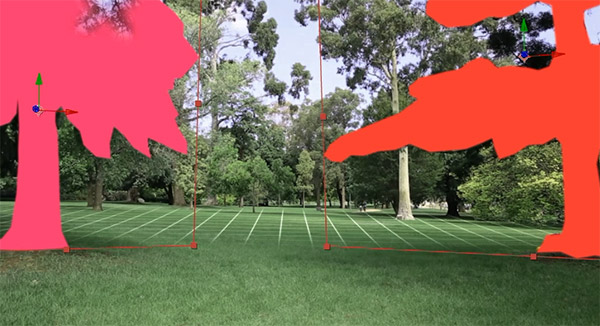
Repeat the process for the tree on the right side of the shot. You can also do this for all other trees in the background if you wish. Personally I felt the two trees in the foreground were enough to achieve the effect I was looking for.
Creating The Scan Effect For The Trees
Now that we have the track mattes for our trees, it is time to create the vertical 3D scan effect. You can either duplicate the grid layer on the ground or create a new vertical solid in your shot and replace it with the Grid composition we created. Rotate the layer if needed so that you end up with a vertical grid effect tracked into your shot.
If you want to, you can pre-compose both of your tree layers and enable the ‘Collapse Transformations’ switch so you can work with them together. However, keeping the track mattes and the vertical 3D scan layers separate will give you more flexibility.
Make sure the vertical 3D grid layer sits below the track matte for the left tree and then set the track matte option to ‘Alpha Matte’. You should now see the 3D scan trace up the tree on the left side of the shot. You may have to adjust the timing of the vertical grid layer a little bit to have the 3D scan effect appear in time with when the scan hits the trunk of the tree. Then, simply repeat the process to add a vertical 3D scan effect to the tree on the right.

Refining The Scan Effect For The Trees
While this already looked pretty cool, I felt the 3D scan effect going up the trees looked a little bit flat. A simple way to make this look a tad better is to apply the Bulge effect to the grid layer for the trees. You can adjust the width and height as well as the depth of the bulge effect to roughly match the shape of the grid to the shape of the tree.

Simply duplicate the bulge effect a couple of times and place it over different parts of the trees to give them some shape. It may not look perfect, but it does give the 3D scan effect a lot more form.
If you want it to look more realistic, you may have to create proper 3D models for your trees, render out animated wire frame scans and track those into your scene. However, given the 3D scan effect is rather quick, the approximation using the Bulge effect should be sufficient for most film projects.
Adding Glow To The 3D Scan Grid
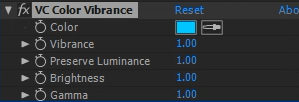
Next, let’s make the 3D scan stand out a whole lot better within the shot. First, I decided to apply the VC Color Vibrance effect to the grid layers and change the colour to a light blue. VC Color Vibrance is a free effect from Video Copilot that you can just download and use for your own projects.
Next, make sure you change the Blend Mode of all the grid layers in your composition to ‘Add’. I ended up adding a little bit of a Glow effect as well to make them stand out even more and give them a bit of a hologram feel.
Final Colour Grading
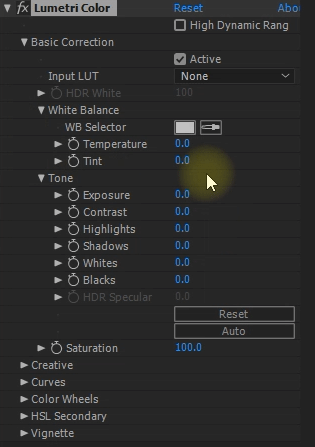
Finally, to blend all of the layers in your composition together a little bit better, I always recommend to apply some form of colour grading on top. Simply create a new Adjustment Layer and place it at the very top of your composition. Then apply a Curves, Hue/Saturation, Levels or the new Lumetri effect available in the April release of After Effects CC 2017 to it. Adjust them to your liking to achieve the look you are after.
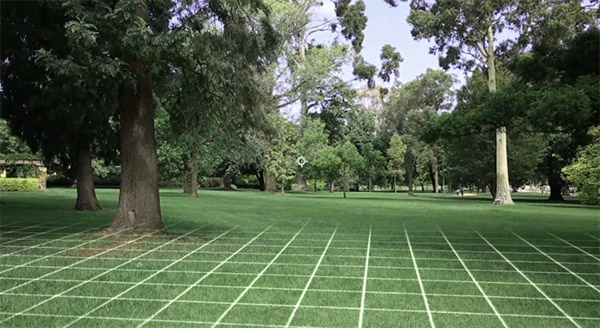
This final colour grading is similar to toasting your sandwich. It processes all layers in the same way and therefore gives all of them some similarity which will bind them together much better. Here is a screen shot of the final 3D scan effect.
You can add this 3D scan to any other shot using the exact same technique. Just make sure you add individual 3D grid layers for every surface you have in your scene.