When I started my own YouTube channel about 10 years ago, I knew nothing about how to create a great looking intro animation.
I knew what I wanted it to look like in my head, but I had no idea how to get there.
I didn’t want to spend any money. But I wanted it to look professional. I also wanted it to be fully custom. 100% me.
10 years later and I am now able to create any custom intro animation I want 😊

My own journey took me down the path of learning and then teaching Adobe After Effects.
After Effects is an industry leading video compositing program. It’s a great tool for creating video effects, motion graphics and animations. It wasn’t easy, but it was always exciting and satisfying.
However, there are many other ways to create or get a great looking intro animation for your YouTube channel. Learning tools such as Adobe After Effects is just one of them 🙂
Here are some of the different ways you can get yourself a custom YouTube intro animation:
- You can create an intro animation using a free intro maker online.
- You can download pre-made title templates and customise them.
- You can pay a freelancer to create a custom intro for you.
- You can learn to create your own intro animations yourself using tools such as Adobe After Effects.
Let’s talk about of these options in a little more detail and talk about the pros and cons of each.
Using an Online Intro Maker
One of the easiest ways to create your own custom title is to use an online video maker. Tools such as Canva or Animaker make this job easy.
Note that I am not affiliated with either one. However, I tried both on my own journey to created a professional looking YouTube intro.
Online video makers are browser based and usually offer a lot of free title templates that you can use, sometimes even without signing up.
You simply pick from a number of different backgrounds, graphics, videos and text to build your own custom title. You can change the position of your elements and arrange them in a way that you like.
Then you add animations, music and sound effects and export your title into a video file that you can use within your favourite video editing tool.
Just as an example, here’s a screenshot of the Canva user interface:
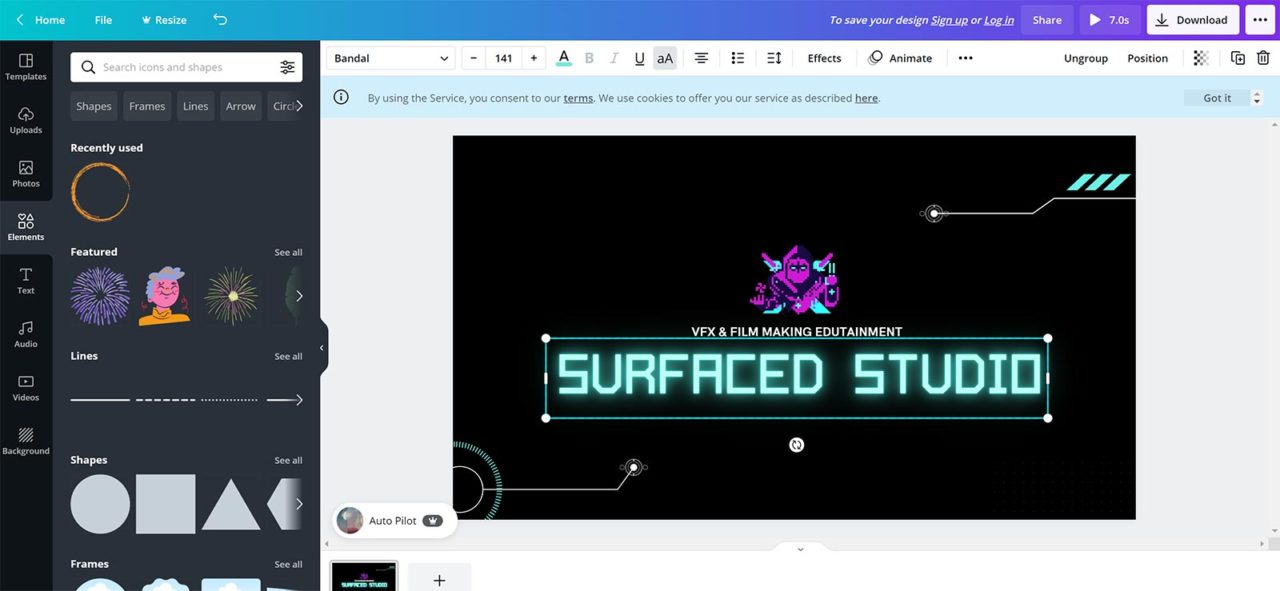
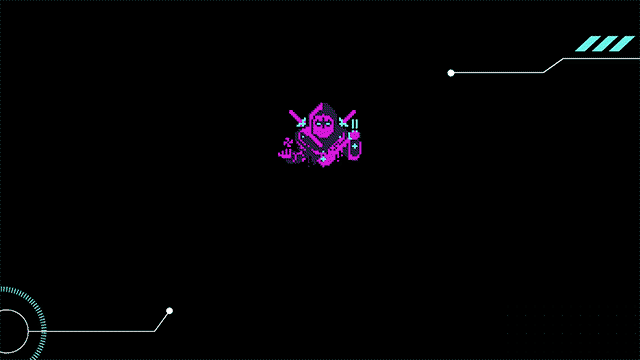
Online intro makers allow you to can create your own custom title within minutes. Here is one I created in Canva in about 5 minutes and then exported as a video file.
While an online intro maker is likely the easiest way to create your own custom title, there are a number of disadvantages to them.
Even if the tools offer a large amount of graphical elements, text styles and animations, they are limited. There will simply be some looks and styles and effects you will not be able to assemble using the available templates.
While a lot of online video makers offer a free plan, you are quickly pushed to a paid option.
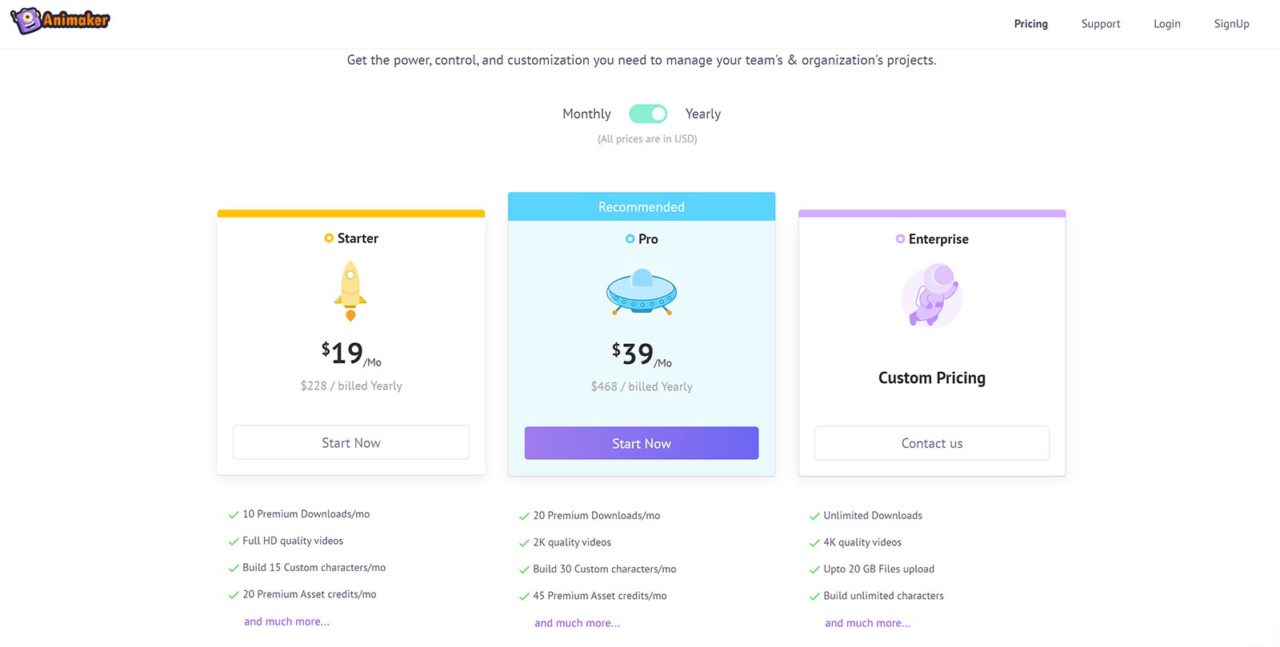
This then unlocks more elements to use for your titles. However, paid plans can range from A$164.99/year for a full-access plan on Canva to $19/month for 10 downloads/month with tools such as Animaker.
One thing I didn’t like about some of the online intro makers I found was that the ‘free’ template you are given to start with often includes elements you can only use on the ‘paid’ plan. When you then try to download the title you are asked to pay up because it contains pro elements.
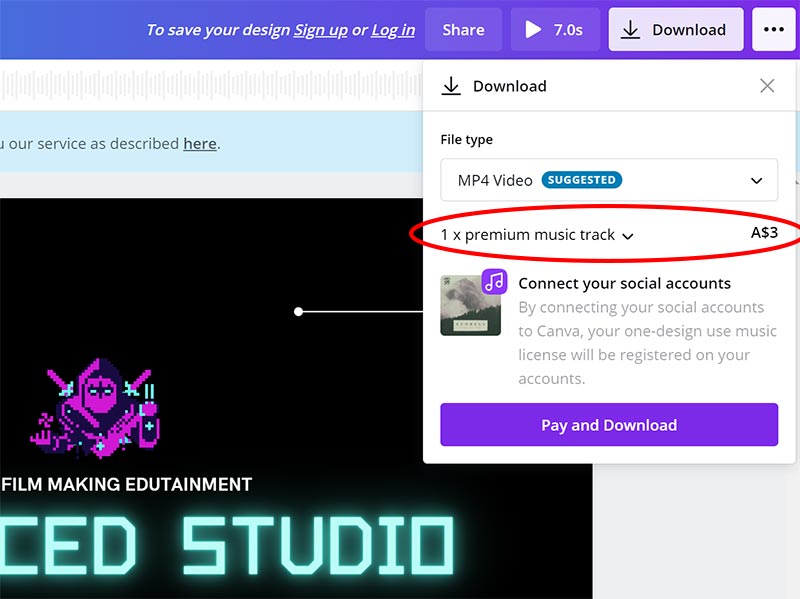
You can go back to your title and edit out any paid elements manually. However, the free tools will try to get you to sign up for their paid plan. Fair enough. That’s their business model.
Here’s a summary of pros and cons for using an online video maker to create your own YouTube intro title.
Pros
- Very easy to use, browser based so there’s nothing to install!
- Free & paid options
- Lots of graphics, images, videos, audio and text styles available to customise your title. You can often even upload your own content
Cons
- Limited customisability
- Usually quick to get you to move to a paid plan, either by restricting downloads or elements you can use
Downloading and Customising a Pre-Made Intro Template
Ok, so maybe you find the titles you can build with online intro makers a little too limited. Maybe you want something a little bit more professional looking.
Another great option to get a great looking YouTube intro title is to use a pre-made intro template.
These are pre-build title animations. They contain all the graphics, videos, animations, audio, advanced effects and a lot of things you’d expect from a professionally created title.
However, being templates, you can usually customise a lot of components easily. This almost always includes changing the text elements. Or choosing a different font. Or altering the colours, the animation speed and more.
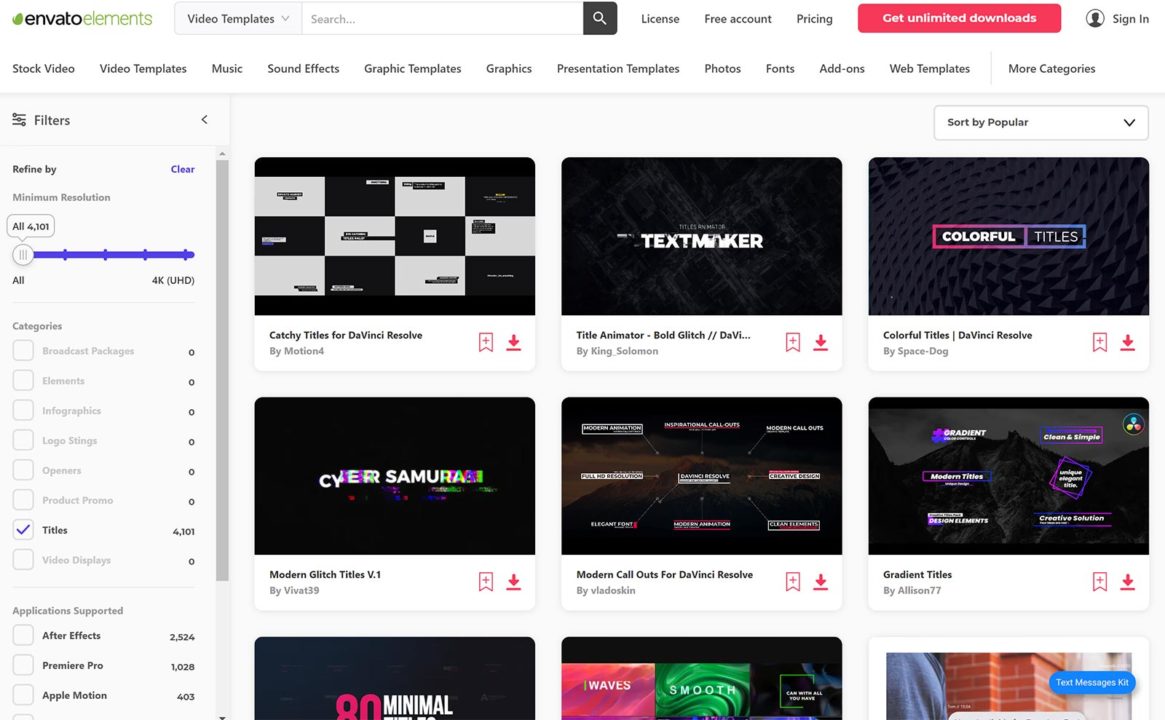
You can find thousands of these templates on all sorts of online stores such as Envato Elements, Motion Array, VideoHive, Storyblocks and others.
A subscription to Envato Elements for examples costs $16.50/month for unlimited downloads. Motion Array costs $29.99/month and Storyblocks costs you $49/month.
On paper this might look similar to what you get with an online intro maker.
However, because an online intro maker gives you a box of lego to build from, you can only build ‘lego looking’ houses (titles) with it. Pre-made templates usually look much more professional because they are custom built. It’s like your own house, but you get to customise the text above the door, the colour and the shape of the windows.
Yes, they are usually more limited in what you can customise about them. However, there are so many pre-made templates available online you can often find one online that captures the style and feeling you want for your title.
Fortunately, pre-made title templates are also usually quite cheap. You can purchase them individually or often as a pack from many online sites.
Be aware that pre-made templates are usually made for a specific editing program. That means you cannot use a template for Premiere Pro inside Final Cut and vice versa.
Therefore, before downloading and title template make sure you have the program required to use them.
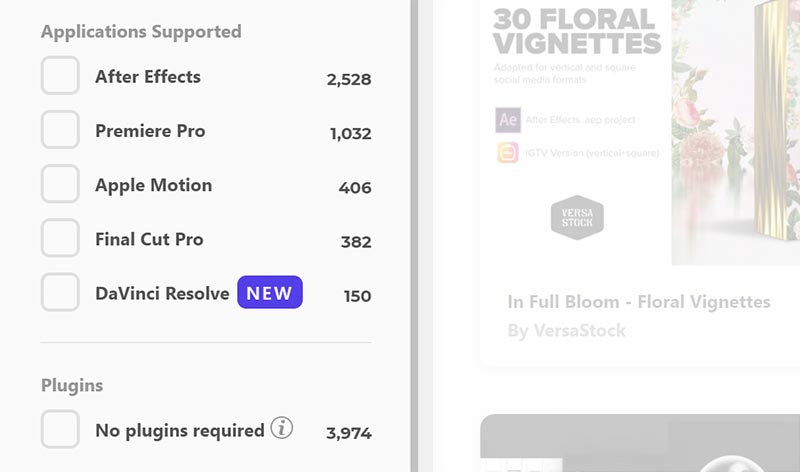
Here is a full list of the most popular video editing programs and the types of template files they support:
- Premiere Pro uses Motion Graphic Templates. These files have the .mogrt extension and are created in Adobe After Effects.
- Final Cut Pro uses Apple Motion templates. These files have .moef, .motn, .moti and .mot extensions and are created in Apple Motion.
- DaVinci Resolve uses DaVinci Resolve Templates. These files have the .setting extension and are created in DaVinci Resolve.
Where to find free pre-made title templates online
Most pre-made title templates will cost you money. However, there are a number of sites where you can find high quality text templates that cost you nothing at all.
You can find about 700 free Motion Graphics Templates for Premiere Pro on Adobe Stock Free.
Envato Elements offers a free subscription option that allows you to download up to 12 files of your choice for free – every month!
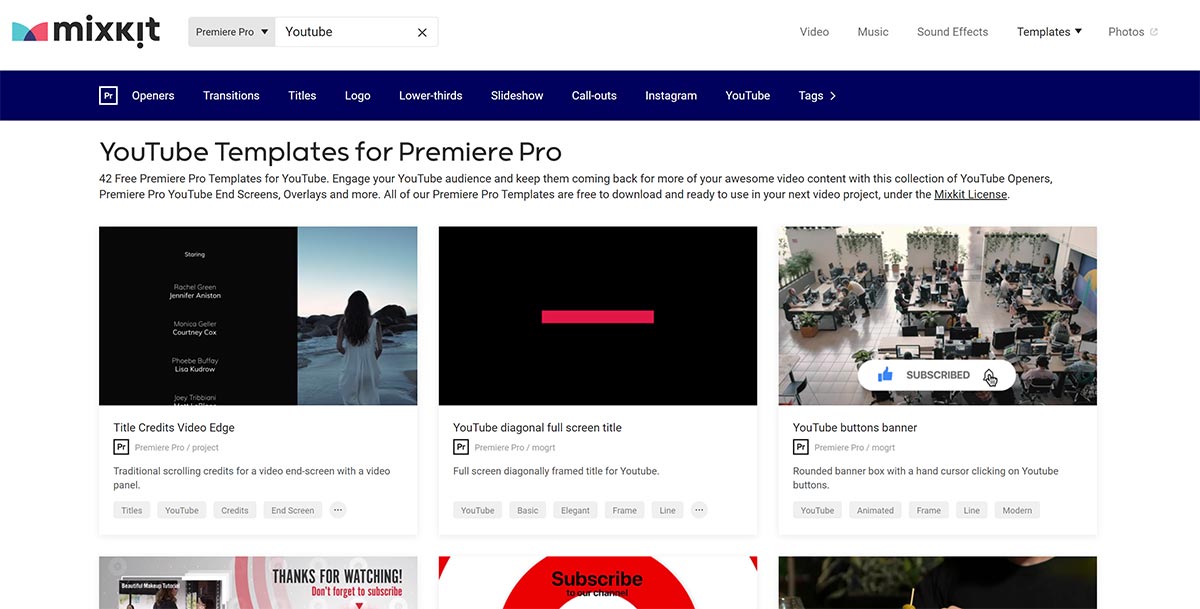
And finally, there’s Mixkit. Mixkit offers tons of free stock footage assets and is actually part of Envato Elements. On Mixkit you can also find about 200 free title templates. You can also find other animations, videos, stock footage and more so it’s definitely worth checking out 😊
Here’s a quick summary of the pros and cons of using pre-made text titles
Pros
- Professionally looking title animations and motion graphics
- Huge variety of pre-made titles available online
- Affordable. Approx $20 – $50/month for subscriptions, $10 – $50 per item on market sites.
- Free templates available online
Cons
- Limited customisability. Less ‘freedom’ than even with an online intro maker
- Requires you to own the video editing program that matches the templates
- Some title templates require additional plugins on top of the host application to work!
Finding a Freelancer to Create a Custom YouTube Intro
Ok, so maybe you don’t like the look of titles created with online intro makers. And maybe you can’t find any pre-made title templates that suit your brand.
The next option is to engage a freelancer to craft you a full custom intro animation from scratch.
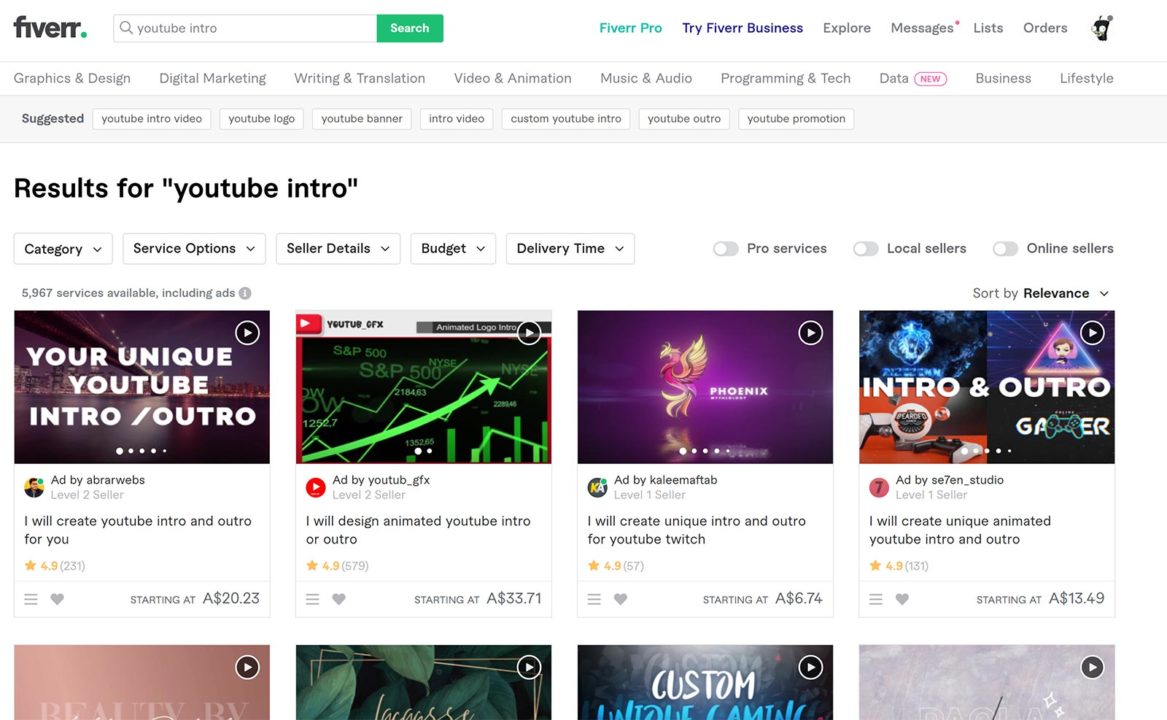
Now there are lots of different platforms available where you can find skilled freelancers to do your bidding. Fiverr and Upwork are among the most popular.
These platforms offer a large range of services to choose from. Most freelancers have a portfolio where you can see their recent work as well as user reviews so you can get a feeling for how satisfied the customers were with the final result.
If you can’t decide, you can also post a custom job online and freelancers will apply to you to win the gig.
Choosing a freelancer can be difficult. Should you go with someone cheap? Or someone who has a lot of good reviews but is expensive? How about someone who doesn’t yet have a large portfolio of completed projects?
It’s difficult to give any hard and fast rules and your experience may differ depending on which freelancer you choose. However, here are a few things to keep in mind that might help you narrow down your options.
Make sure you understand what’s included for the price
A lot of freelancers offer custom titles ‘starting from $6.74’. Most freelancers offer different tiers, depending on how complex you project is and how much control you want. A lot of the low priced tiers are often very limited.
Low tiers may include long timeframes, limited complexity and no or very few revisions should you not be happy with the initial result. You may also not get access to the source files at the lower tiers.
Having the source files allows you to make further changes later or pass them on to someone else to tweak the work.
When comparing multiple freelancers, be sure to compare their prices for the same work.
That freelancer ‘starting at $6.74’ may cost you $99 for the tier you actually want. Maybe you should have gone with the freelancer where their basic tier at $80 already gave you what you wanted.
Read customer reviews in detail
This might be obvious, but be sure to spend some time reading reviews of previous customers.
Was the freelancer very responsive? How did they handle feedback? Were they flexible to make changes that the customer wanted?
Past reviews, assuming they are reasonably recent, are the best indicator of what your experience with the freelancer will be like.
Choosing a freelancer can be challenging, but if you find someone worth their money, you can get a great looking custom YouTube intro for a fair price.
Here’s the wrap of the pros and cons for using a freelancing artist to create an intro title for you
Pros
- Professional looking custom title animation to your specifications
- Title will be 100% custom (unless the freelancer reuses their work)
- Lots of skilled freelancers to choose from, you can even get them to help you design your title
Cons
- Can be expensive for a single title
- Quality of freelancers can be a bit hit and miss, even with reviews
- 100% control, but limited revisions mean the freelancer still has some influence on your final title
Learning a Video Animation Tool to Create a YouTube Intro Yourself
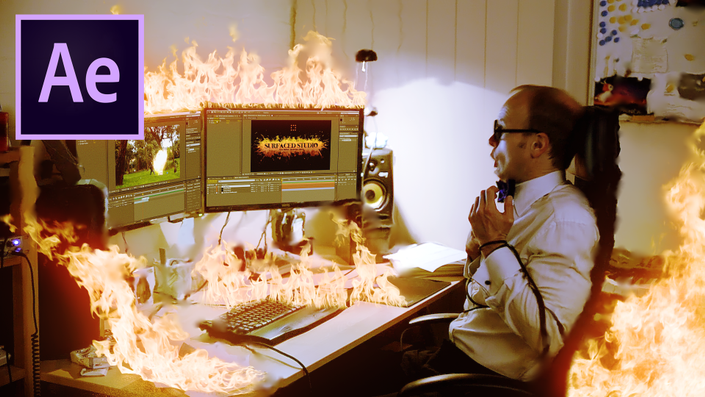
Let’s talk about the option that I ended up choosing: learning Adobe After Effects.
Adobe After Effects is a powerful, layer-based video compositing program. It is used by professionals and hobbyists all over the world to add video effects and create exciting motion graphics and animation.
However, it has a bit of a learning curve. It requires a fair bit more than pressing a few buttons or dragging and dropping elements onto a canvas to create a good looking title.
Adobe After Effects also costs either $22.99/month by itself or $52.99/month as part of the Adobe Creative Cloud. I personally am on the Creative Cloud subscription because it gives me access to all of Adobe’s products.
So why would someone go through the hassle of paying for and learning a complete new software program to create their own titles?
Because it gives you total freedom.
It enables you to create any title you can imagine.
You can use any style, colours, fonts, images, videos and audio that you like. Well, as long as you obtained them legally of course 😉
You can push the look and feel of your title as far as you like. From simple TV text title to full blown Lord of The Rings intro sequence.

One month later you changed you mind and want to tweak your title animation? No problem!
Want to create a completely new title from scratch? Your imagination is the limit!
Knowing a tool such as Adobe After Effects gives you 100% control over every aspect of your titles.
I’m a total control freak so 100% control is a big incentive to me. Also, creating my own title from scratch ensures that it’s unique. It’s 100% me.

On top of that, knowing how to use After Effects also enables you to add cool visual effects to my videos. Anything from cloning yourself to adding explosions, sparkles or 3D elements into my video!
Plus, in my opinion, After Effects is a whole lot of fun!
I got into it over 10 years ago and I love it! I’ve created hundreds of free tutorials for Adobe After Effects that you can check out if you’re interested 🙂
Or, if you want to take it one step further, I also have a completely free Beginner Course for Adobe After Effects that can help you get started easily.
But of course, there’s lots of easier options to get yourself a YouTube title video if you don’t want to go down the route of learning Adobe After Effects.
As always, let’s quickly summarise the pros and cons of learning and using Adobe After Effects to create your own YouTube intro titles.
Pros
- 100% control, 100% yours
- Create any title you can imagine. Once you know how to use After Effects 😉
- No need to pay anyone for changes or new titles
- You can even start to sell your own templates or create titles for others doing freelancing
Cons
- You need to dedicate some time to learning the software
- Adobe After Effects costs money. $22.99/month for AE alone. $52.99/month for the full Creative cloud
- Not the best tool if you want to work in 3D. For that, check out Blender instead!
From here it is up to you to decide which option works best for you ☺️
FREE Adobe After Effects Beginner Course


