Colour correction and colour grading are essential steps to make your video look professional. In this tutorial I will show you how to use some of the advanced tools in Adobe Premiere Pro to analyse and correct the colours of your footage.
The Problem
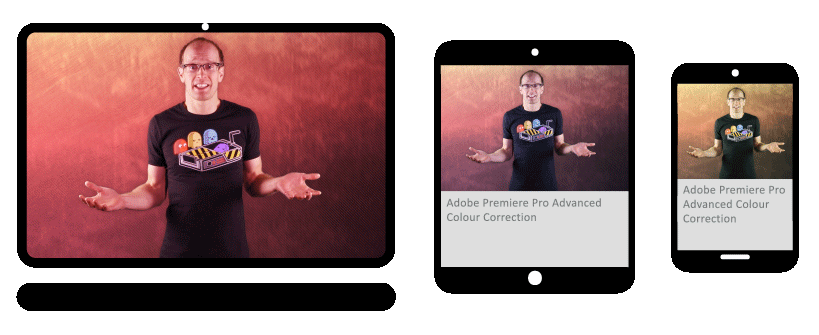
If you are producing online videos like myself, your audience will watch your creations on a large variety of different devices. All of these devices have different displays, each with their own unique nuances in representing colour. This means that the very same video may look a little bit too blue or too purple, too bright or too dark for some users.
You cannot control how the screens display your video and what colour imperfections they may introduce, but if you ensure that your video is properly colour corrected, chances are it will look good for almost anyone who watches it. But how do you know that your own monitor isn’t “lying” to you? How do you know if the video is in fact properly colour corrected?
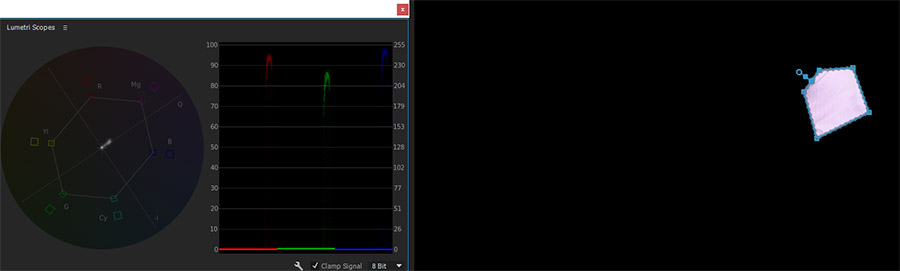
For this, you can use some of the advanced tools available in Adobe Premiere Pro like the Waveform Monitor, the RGB Parade and the Vectorscope to analyse the colour information in your video and make adjustments with much more accuracy.
The Waveform Monitor
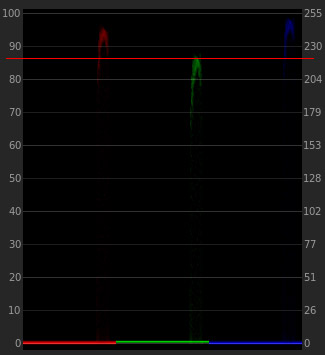
The waveform monitor displays the brightness (luma) information in your image. It represents your video from left to right, just like in your preview window, and distributes all pixels vertically on a scale from 0 to 100. Any pixels that lie on the 0 line are absolute black and any pixels that fall onto the 100 line are absolute white.
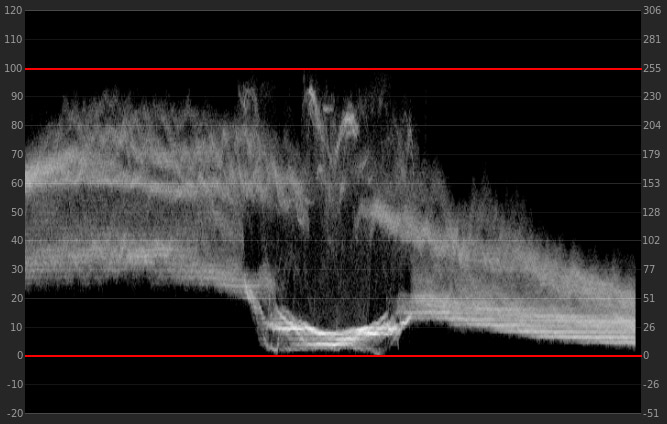
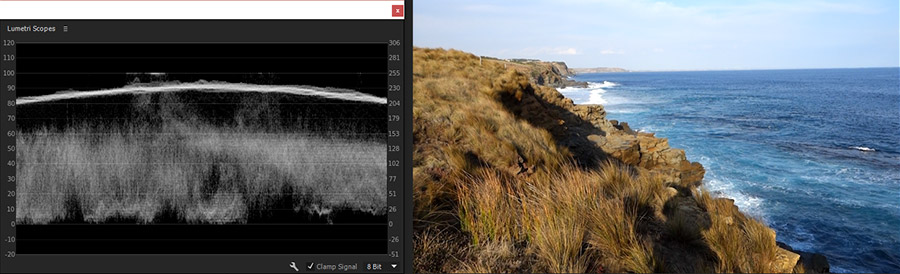
Here is an example video I took on Philip Island in Australia. In the waveform monitor you can see a few pixels clipping at 100, representing the tips of the waves. You can also see a prominent band of bright pixels spread across the image from left to right, which is our sky.
Ideally, you want your image to contain pixels across the entire spectrum from 0 to 100. This way you are utilising the entire dynamic range available to you. In our Philip Island video, we can clearly see that there is a gap at the bottom of the waveform monitor. We do not have a lot of dark tones in our image and it is lacking a little bit of contrast.

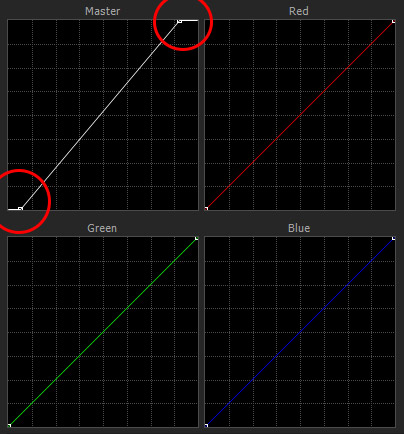
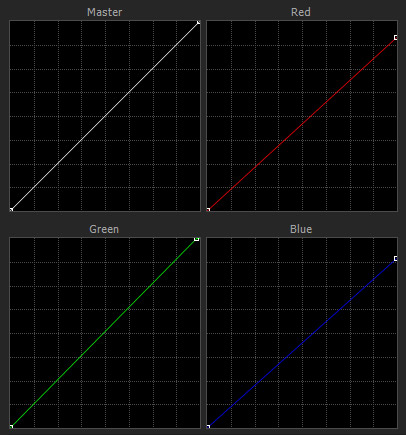
To fix this problem we can apply a Curves effect and make the dark colours a little bit darker. For this, we push the bottom left corner of the Master (luma) curve to the right. I also decided to brighten my image up a little bit more as there was a lot of space above the sky and I didn’t mind the tip of the waves clipping a little bit. I did this by pushing the top right corner of the Master curve towards the left a little bit.
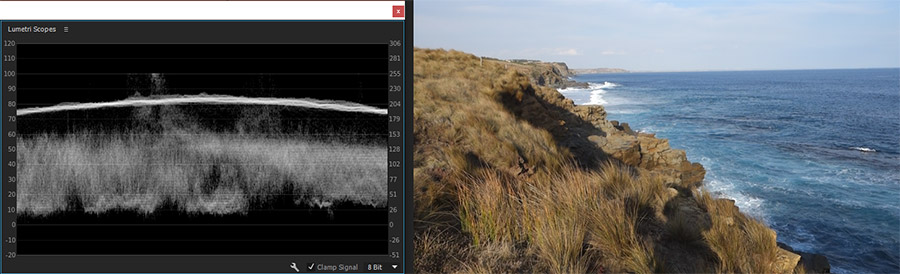
Our final image is now properly exposed and spans the entire spectrum on the waveform monitor from 0 to 100.
The RGB Parade
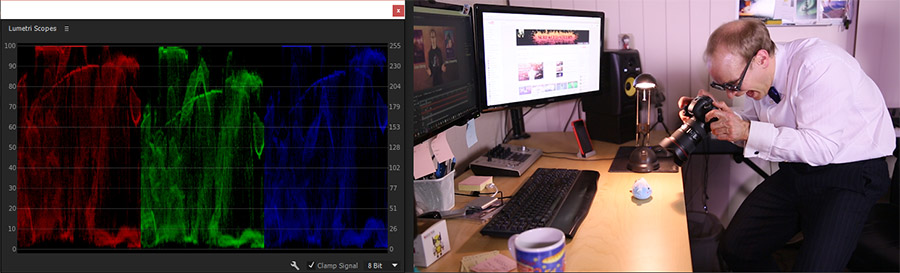
The RGB parade is similar to the waveform monitor in that it displays the brightness values of your pixels in your image, spread out left to right. The RGB Parade however contains 3 separate waveforms, one for each colour channel.
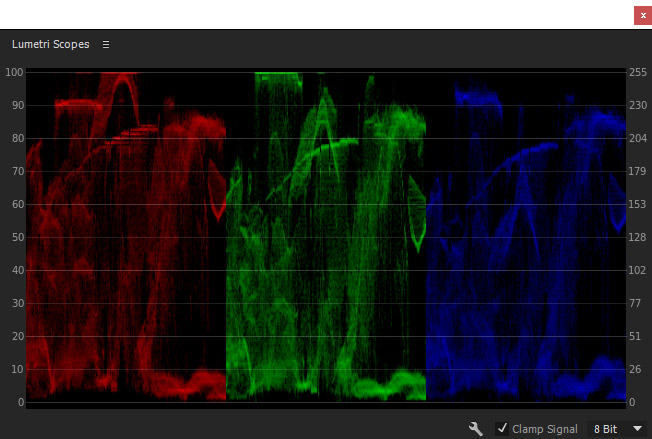
The RGB parade makes it easy to see how strongly particular colours are present in your image. It is great for revealing where certain colours may be represented overly strong, causing colour tints.
In the following image, the red and blue channel are clearly stronger than the green, introducing a bit of a magenta colour tint to the video.
It is important to note that having one channel stronger than another doesn’t necessarily mean that your footage has an unwanted colour tint. Your image may simple be a very red image, e.g. a sunset or a fire. Use your judgement when looking at the RGB parade and compare it to what you would expect to see from the image.
The Vectorscope
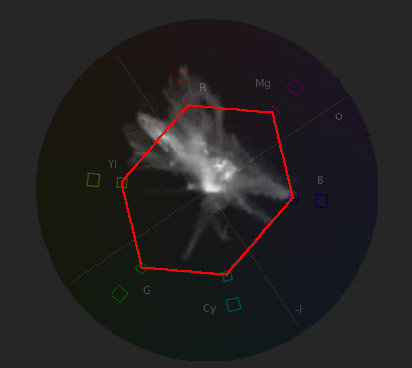
One of the best tools in Adobe Premiere Pro to show you the colour distribution of your video is the vectorscope. The vectorscope is a colour wheel with 6 colour markers for red, magenta, blue, cyan, green and yellow. In the centre you will see a point cloud showing the colour distribution of the pixels in your image. The further the pixels are away from the centre of the vectorscope, the more saturated they are. If you are viewing a greyscale image through a Vectorscope, all pixels would lie in the exact centre as they would have no colour whatsoever.
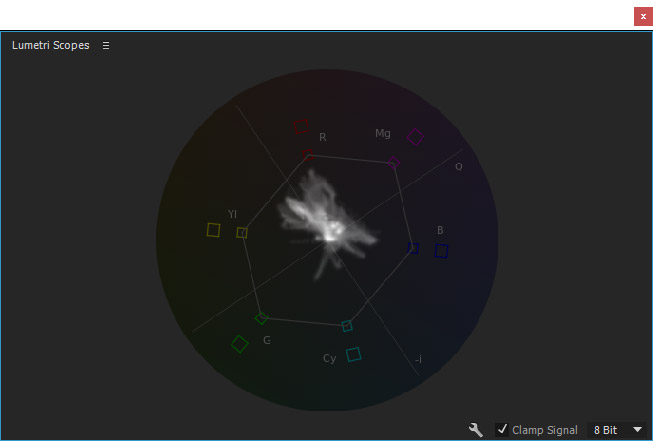
The border that connects the 6 colour markers in the vectorscope defines the broadcast safe colour range. If your pixels lie outside of this area, the colours may not be represented accurately when your video is broadcast. If that happens, reduce the saturation or adjust the colours of your video to bring the pixels back into the broadcast safe area
Now that you know how to read these tools, let’s use them to colour correct our video.
Fixing White Balance
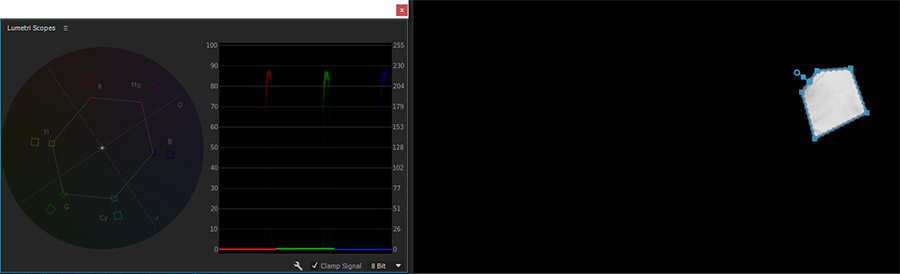
Since all scopes operate on the image they see in the preview window within Premiere Pro, we can use a mask or a garbage matte to mask out an area of the video that should be perfectly white. For example, we could mask out a section of a white shirt. The RGB parade and vectorscope will update automatically to show the colour information for only the masked out area.
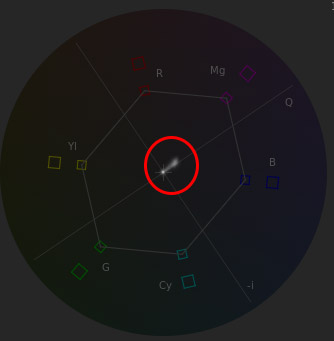
Note that we would expect the shirt to be pure white. However, the RGB parade shows that there is a clear magenta tint in the image because the red channel is strongest, then blue and then green. In a properly white balanced image we would expect the pixel distributions for all three channels to lie on the exact same line.
The same holds true for the vectorscope. We can clearly see that the pixels in our video are distributed towards magenta. In a perfectly white balanced image we would expect all points on the vectorscope to be exactly centred to indicate that there is no colour in the image. We can clearly see that the pixels in the image have a magenta tint.
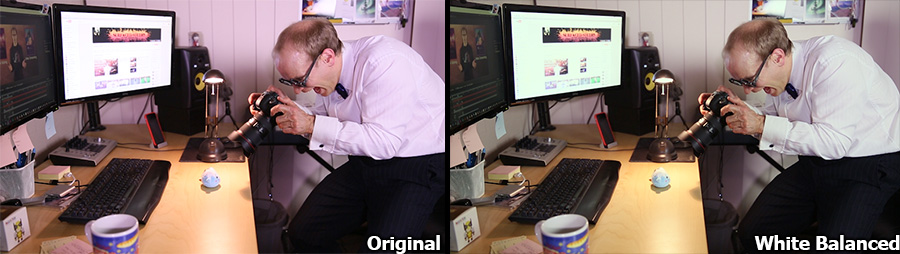
To fix the white balance, we can again use a Curves effect. We can bring down the red, lower the blue and slightly raise the green channel. This will level out the RGB parade and bring the vectorscope back to the centre.
The shirt in our video is now correctly white balanced. Both the RGB parade and the vectorscope show the expected pattern for an image that contains no colour; the RGB parade is balanced and all pixels in the vectorscope are centred.
If we remove the mask we can see that the final image has been properly colour corrected.
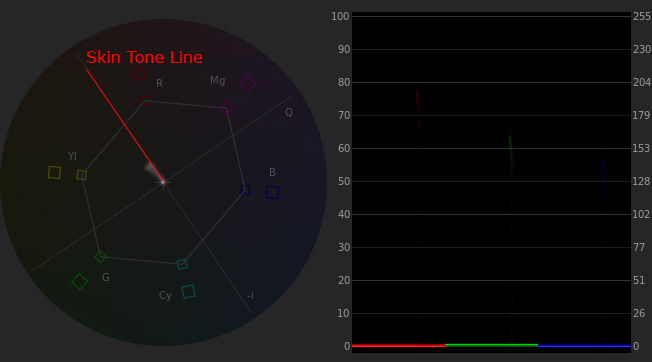
Fixing Skin Tones
Finally, whenever colour correcting a video with a person in it, it is advisable to check that the skin tones are correctly represented. For this we can use the vectorscope. Independent of skin colour, when you mask out a section of a person’s skin, the saturation pattern you will see is always the same due to the blood that runs underneath the skin. The following image shows the analysis of a video with only a section of the person’s skin masked out.
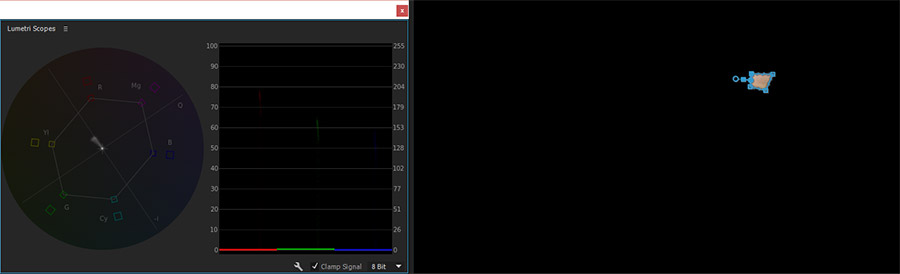
For properly colour corrected skin, the RGB parade should show the red channel as the strongest, then followed by green and then by blue. More importantly, in the vectorscope, all the colours should fall onto the line between red and yellow. This line is called the ‘Skin Tone Line’.
You can use all sorts of different colour correction effects like the Curves or the Fast Colour Corrector in Premiere Pro to make sure your skin colours fall onto the skin tone line. This will ensure that your skin colours are correctly represented in your video.
Colour correction is a real art form and it can be difficult to get the colours right depending on the contents of your shot. With a good understanding of the tools available and some practice you can ensure that your video will look a lot more professional no matter what device it is played back on.


