HitFilm Express is a free Non Linear Editor (NLE) that combines video editing and visual effects compositing capabilities in a single software package. It comes with over 140 inbuilt effects, transitions and presets. If you are looking for way to get into the exciting world of film making and visual effects, you have to check this out!
Note: this tutorial was originally created for HitFilm 4 Express. Earlier this year, FXHome released HitFilm Express 2017. While it offers better performance and some additional effects, the workflow explained here should still work.
What are you waiting for?
Go get yourself a free copy of HitFilm Express!
How to Get HitFilm Express Free
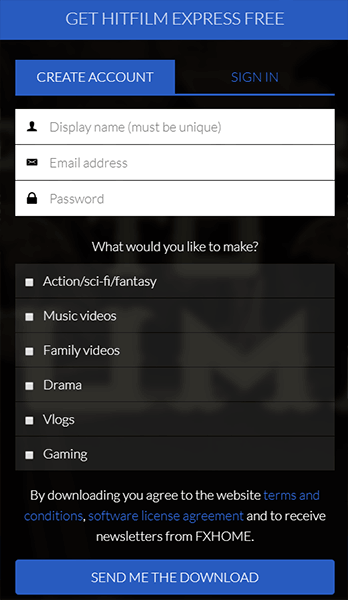
Visit the HitFilm website and then click on the ‘Get HitFilm Express Free’ link. You will have to create a new free account. You may also be asked to share information about HitFilm on your social media account. However, you can skip this screen and go straight to the download. If you enjoy the product though, why not give them a shout out? :)
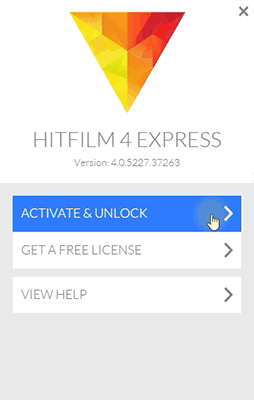
Once you downloaded and installed your copy of HitFilm Express, you will be asked to activate the software. Simply log in with the account you created earlier and you should be good to go.
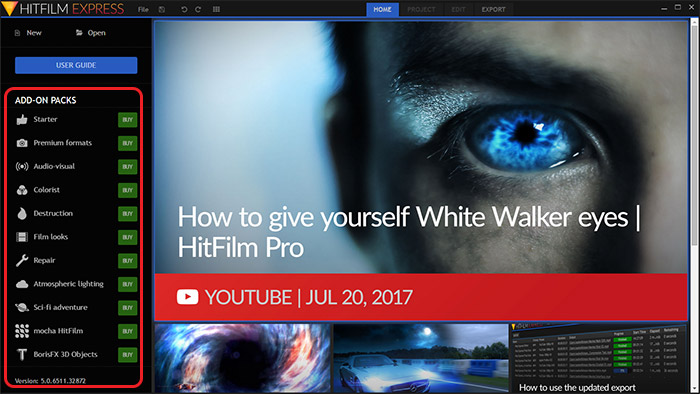
After you unlocked the software, you will be presented with the startup screen. This screen lets you browse the latest tutorials, install add-on packs (which cost a little bit of extra money) or start a new project. For now, simply click on the ‘New’ button.
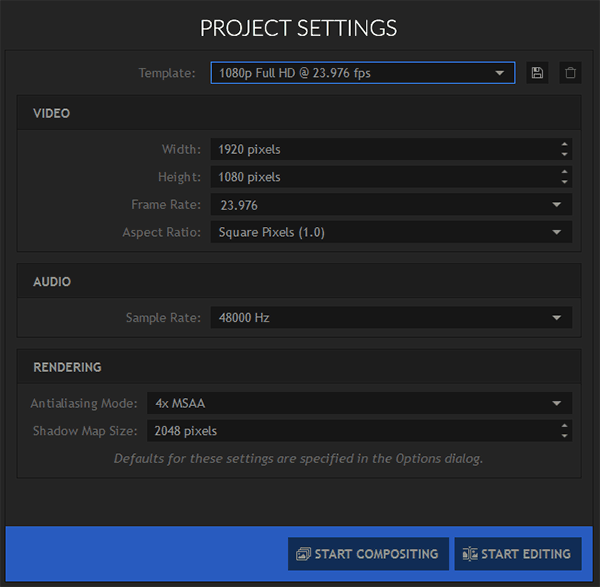
The first screen you will see is the Project Settings screen. Here you can specify the resolution and frame rate of your video project as well as the audio settings. Once set up, you can go straight to compositing (VFX) or editing.
The Basics of HitFilm Express
The interface of HitFilm is broken up into a number of different panels.
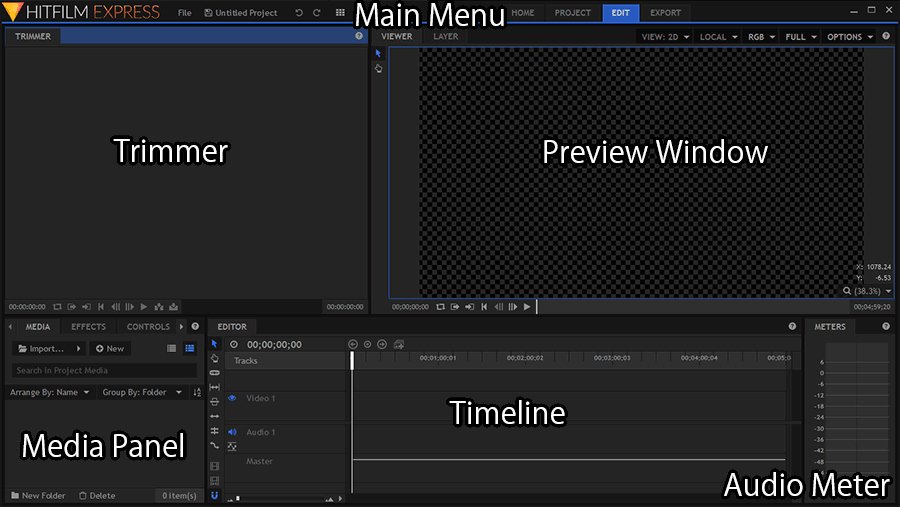
- Main Menu – Here you will find all of the options to manage manage your project, change its settings and export everything into a video file.
- Trimmer – The trimmer provides a convenient way to quickly trim down your (potentially lengthy) footage and extract only the pieces you want out of them.
- Preview Window – Here you will see a preview of your editing timeline or your Composite Shots. The frame displayed is the frame at your current timeline indicator.
- Media Panel – The media panel contains all of the video, images and audio files you import into your project. You can use it to manage and organise your files.
- Timeline – The timeline displays all of the layers in your main editor timeline or within a Composite Shot. Composite Shots are required if you want to work on VFX and layer multiple video layers on top of each other.
- Audio Meter – These meters display the audio levels during playback so you can make sure you get no clipping.
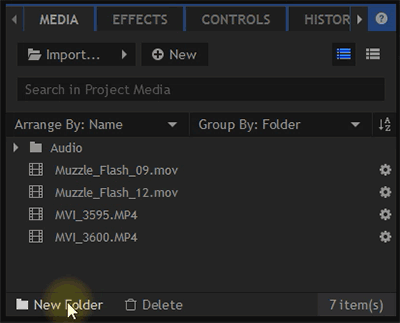
In order to import footage into your project, just click on the ‘Import’ option in the Media panel. You can also drag and drop files from your Explorer or Finder directly into the Media panel. At the bottom of the panel is a little folder icon that allows you to create folders in your project to keep your imported media organised.
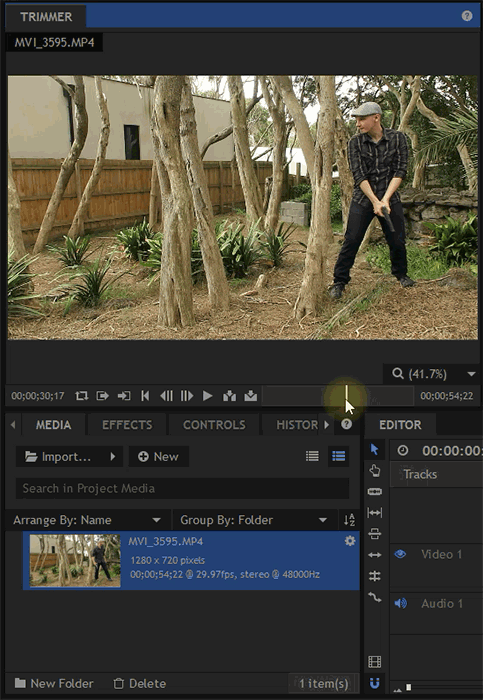
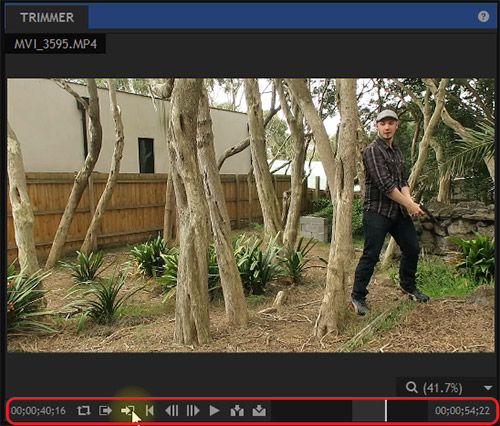
When you select a video file in the Media Panel, you will see a preview of it in the Trimmer panel. The Trimmer gives you an easy way to scrub through your imported source material.
You can place images, video and audio files in your timeline simply by dragging and dropping them from your Media Panel.
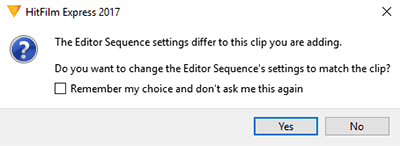
If you drag and drop a video file onto your Editor Timeline and it does not match your current project settings, HitFilm will show you the following warning. Simply click ‘Yes’ if you want HitFilm Express to change the sequence settings to match your video file.
The Trimmer actually does more than just preview your footage. You can use the controls at the bottom to define a start and end point for what you want to extract. Then simply drag from the Trimmer’s preview window onto your Timeline to drop the trimmed clip onto it.
Editing in HitFilm Express
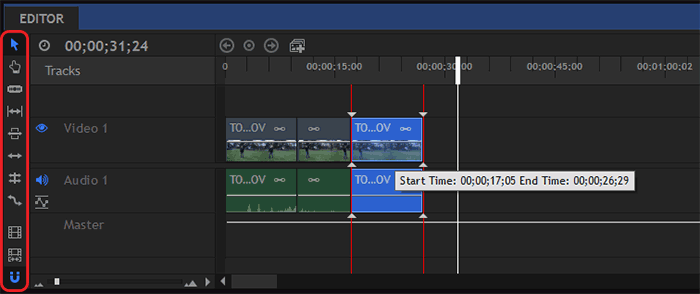
On the left side of the timeline window you will find a number of tools. These allow you to move, cut, delete, stretch and adjust the clips on your timeline. Use these tools to put together the overall edit of your project.
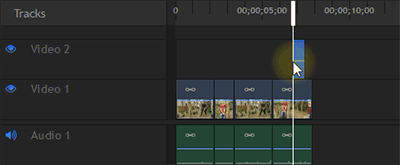
You can actually place multiple layers on top of each other within the Editor Timeline. This is useful for placing images or text with transparent background on top of your video and create titles or other overlay effects.
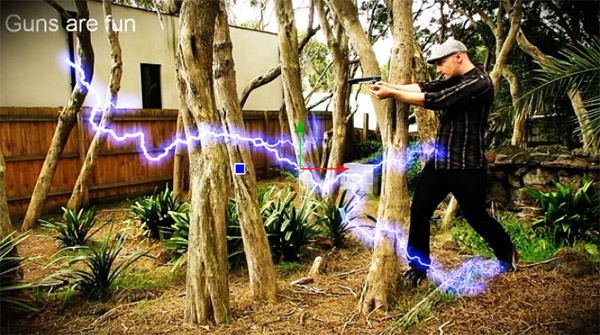
Here is an example of multiple video and audio layers in the Editor Timeline. I placed a Muzzle Flash stock footage element with a transparent background on top of a clip of me shooting a fake gun.
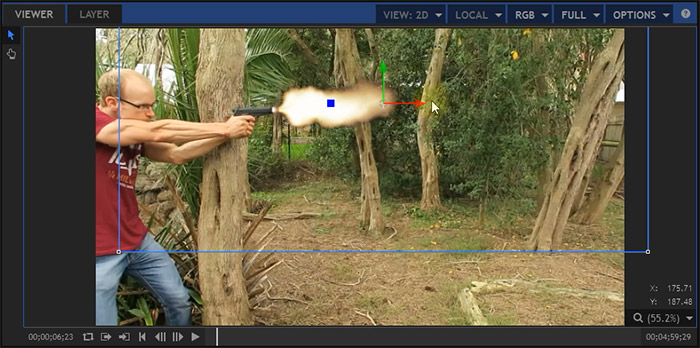
Finally, I also added a gunshot sound effect in the Audio track below. You can simply drag and drop sound effects and music tracks to the Audio tracks in your Editor Timeline. To adjust the volume, simply click and drag on the horizontal line in the audio file.

In terms of ‘editing’, this is where HitFilm’s capabilities end. Any more complicated layering of different video and image elements, applying effects and blending different layers together falls under ‘compositing’. Fortunately, HitFilm Express can do that too!
Compositing in HitFilm Express
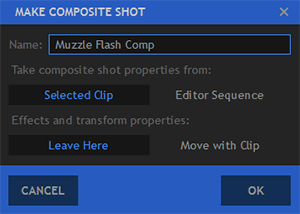
In order to composite multiple layers on top of each other you need to create a ‘Composite Shot’. You can do that from the ‘New’ menu in the Media Panel. You can also right click on a clip on your Editor Timeline and select ‘Create Composite Shot’.
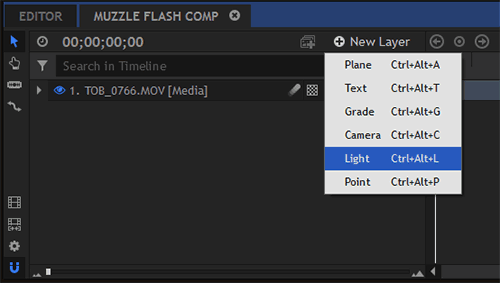
Within a Composite Shot you can create a large number of different layers that help you create cool visual effects and motion graphics. These include Lights, Plane, Text, Grade and Point layers as well as a 3D camera.
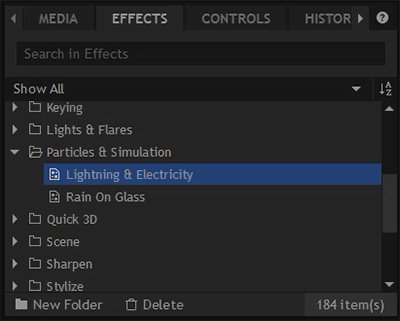
On the left hand side of the timeline, behind the Media tab, you will find an Effects panel. This panel contains a large number of video and audio effects that you can apply to any of your layers simply by dragging and dropping.
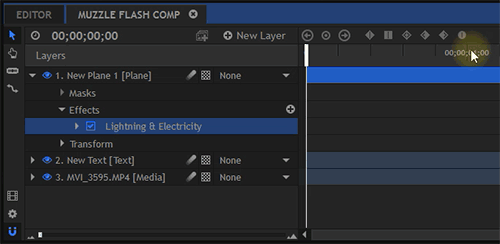
Next to each layer you will find a little triangle. You can click on these triangles to expand your layers and reveal their properties. These include settings for for size, position, opacity as well as any effects you have applied. You can then tweak all of these settings to your liking.
You can change the blend mode of your layers in the layer properties or in the Controls panel that you can find below the Media and Effects panels. You can create masks using the Pen tool, apply effects and do all sorts of other cool things to build up interesting visual effects.
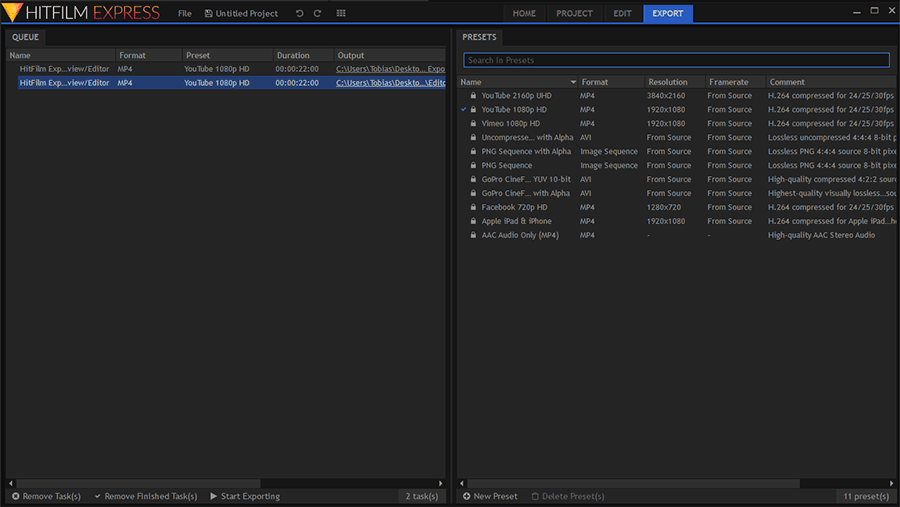
Once you are done, you likely want to export your project. For that, click onto the ‘Export’ tab within the main menu bar of HitFilm Express. This will open up the Export Queue. The Export Queue is new in HitFilm Express 2017. Simply add your editor timeline or a composite shot to the queue, apply one of the presets from the right hand side and hit export!
HitFilm is a great tool that allows you to do both video editing and visual effects compositing. While you can upgrade to the Pro version, the Express edition offers everything you need to get started.


2 Responses
The content is very informative. I am saving this page for future reference.
I have a question: The interface of HitFilm is not showing the trimmer, how do I get it back?
Thank You
Try to reset your Workspace :)
Also, make sure you check out my (much) newer version of the tutorial here: https://www.surfacedstudio.com/tutorials/hitfilm/hitfilm-express-12-for-absolute-beginners/