Mario’s Magic Mushroom VFX Short Film Colour Grading
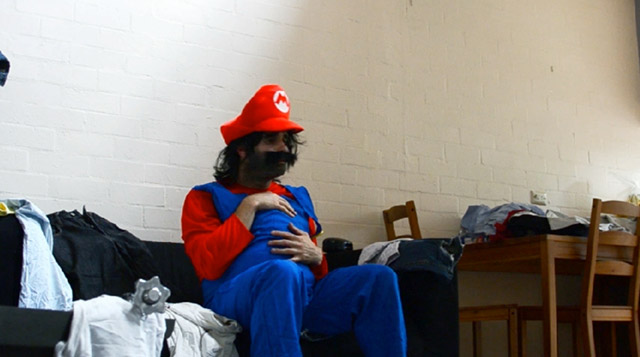
Here is a clip from the VFX short film Mario’s Magic Mushroom. It’s the scene of fat Mario getting off the couch to reach for the mushroom.
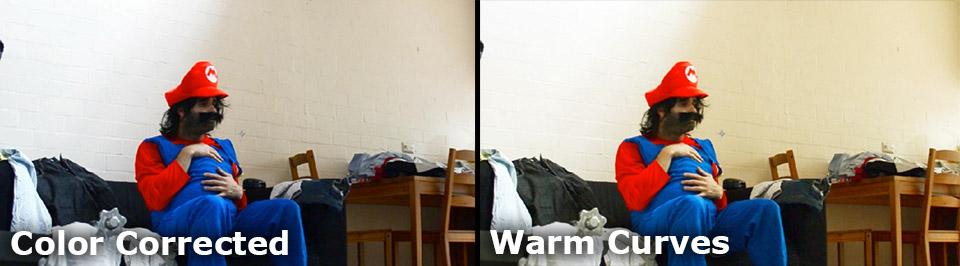
I wanted to give the footage a thick, warm yellow tint and I decided to add some glow to the highlights of the footage to enhance the feeling of Mario being a little bit spaced out.
For that, first apply a Curves effect to your later (or, ideally to an Adjustment layer). I brightened up the mid tones of my footage and then pushed up the red and the green channel considerably.
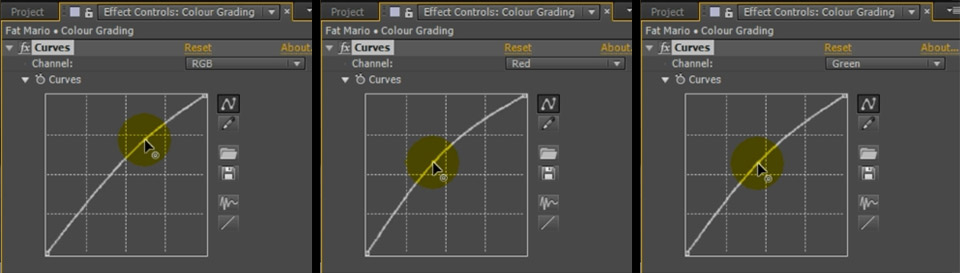
This gives the footage the strong, yellow tint that I am after and make the footage feel a lot warmer and more friendly.
I have to admit the main reason for wanting to add a Glow effect is to show you that colour grading does not have to be limited to simple colour adjustment effects. You can be as creative as you want in achieving the desired look. So let’s be creative and duplicate the base footage layer. Rename the top layer to ‘Mario Glow’.

Since I only want the highlights of the footage to glow, let’s first remove everything except but the bright areas in the Mario Glow layer. For this, apply a brightness and contrast effect and increase the Contrast to almost 100%. Then lower the Brightness by an equally large amount.
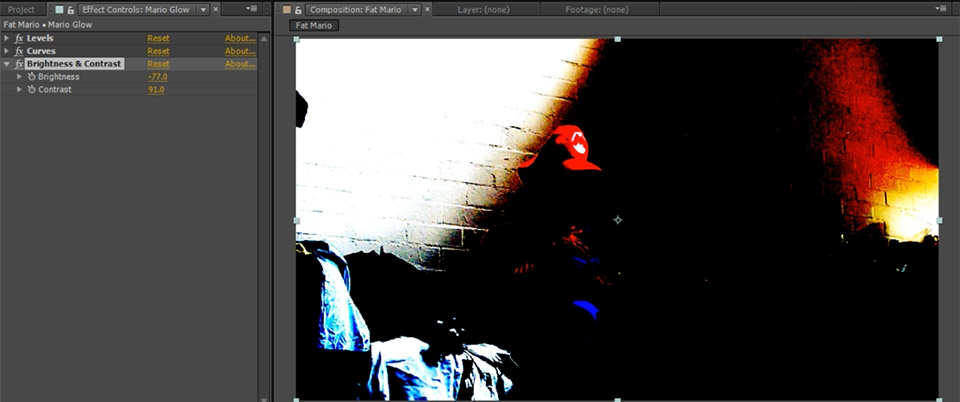
This should remove all but the very bright areas of your footage.
To create a spacey looking glow, search for and apply a ‘CC Fast Radial Blur’ to the layer. Increase the Amount property to your liking to create rays of light shooting out from the centre of the footage. I set mine to around 90 to create fairly strong directional blur.
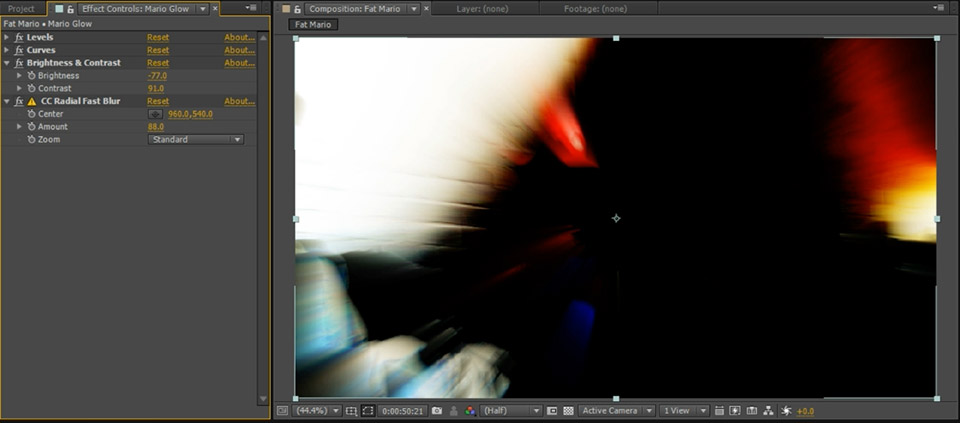
To blend this blurry streaks with our base footage, simply set the blend mode of the Mario Glow layer to ‘Add’.

This will apply the Glow effect on top of our scene, creating a very unusual, warm and almost psychedelic effect.

Be as Creative as You Want!
Remember, there are no hard rules when it comes to colour grading. You can use any type of effect to alter the look and feel of your footage to enhance the emotional impact you want it to have. From simple colour adjustments to duplicated layers and all sorts of other crazy effects – be creative, have fun and start taking your videos from the plain out-of-camera look to fully cinematic.


One Response
Thanks for helping me learn more about color grading. I actually had no idea that it could help achieve an emotional impact you want from the footage. Perhaps it could also be important to understand the basics of color theory to understand when certain colors should be used.