Learn how a cool animated TYPEWRITER EFFECT with Adobe After Effects. Once completed, I will show you how to export the video with a transparent background. This will allow you to place the text on top of your existing footage.
Using Premiere Pro
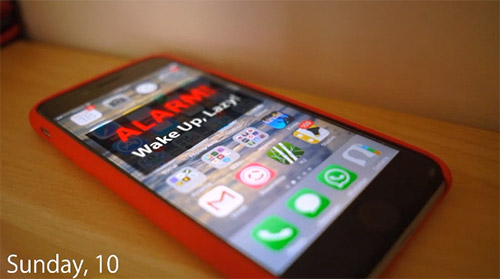
You can see the typewriter effect in many YouTube vlogs, Hollywood movies and TV shows. Date and time appear, as if written by a typewriter, over the top of the video.

The April 2017 release of Adobe Premiere Pro introduced a new Type Tool. This tool replaces the former Title Editor with the new Essential Graphics panel. The Essential Graphics panel allows you to more easily create text animations directly in Premiere Pro. You can also create and re-use them as templates.
You can create a typewriter effect directly in Premiere Pro by keyframing a mask on top of your text element. However, this is a rather tedious process. You also can’t easily change the text without having to re-create the animation. Therefore, we are going to create this effect using Adobe After Effects instead.
Using Adobe After Effects
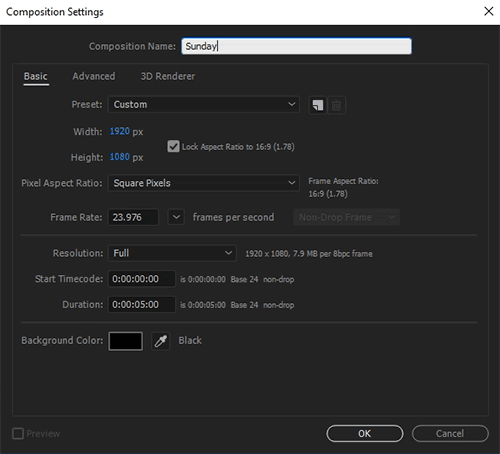
With a new project open, you first need to create a new composition. Make sure the resolution and frame rate match the sequence you have in Premiere Pro.
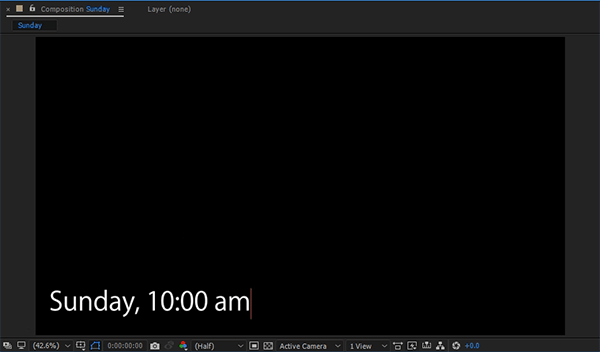
Now select the text tool at the top of the toolbar. Click into your preview window and type the text you want to appear.

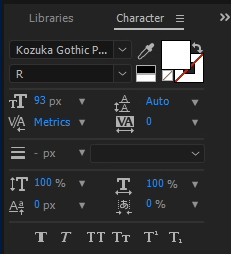
You can customise your font in the Character tab within Adobe After Effects. Here you can change the font, the colour, size and many other settings of your new text layer.
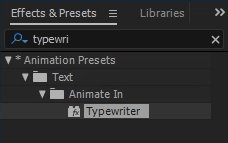
Now it’s time to create the actual typewriter effect. Go into the Effects and Presets panel and search for the ‘Typewriter’ effect. You should find the animation preset under Animation Presets -> Text -> Animate In -> Typewriter.
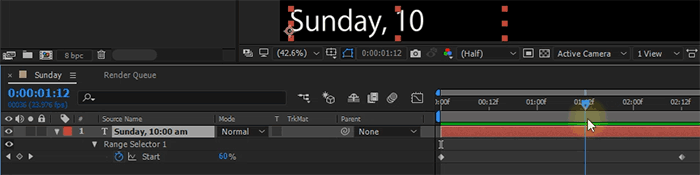
Make sure your timeline indicator is at the beginning of the composition. Then apply the Typewriter animation preset to your text layer. You can do this by dragging and dropping the effect from the Effects & Presets panel onto your text layer. If you now scrub through your composition, you should see the text animate as if written out by a typewriter.
If you expand the layer you will find an animated Range Selector property on your text layer. This controls the actual typewriter effect. You can tweak the keyframes to adjust the timing of the typewriter effect to your liking.
Rendering on a Transparent Background
Chances are you will want to place your typewriter effect text on top of some other footage. Right now, the background of your composition will likely appear black. If you enable the Transparency Grid at the bottom of your preview window however, you can see that the background is actually transparent. Black is just the default background colour for your preview window.
There are different options for bringing our typewriter effect back into Premiere Pro with a transparent background. Live Text Templates were introduced in After Effects CC 2014. Motion Graphics Templates first appeared in CC 2017. The method I will show you hear will work for any version of After Effects. We will simply export the Composition as a video with a transparent background.
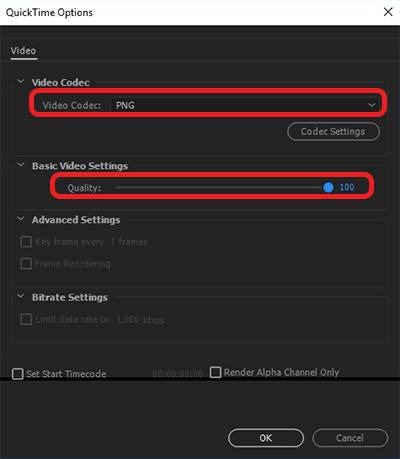
Add your composition to the Render Queue. You can do that by selecting Composition -> Add To Render Queue. Then open up the Output Module settings. Here you can define the format and the codec for your video. Set the Format to something that supports an Alpha (transparency) channel. Personally I like to use QuickTime.
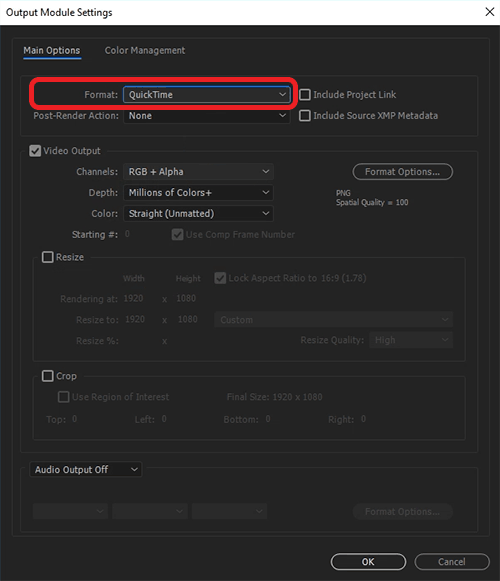
Now open up the Format Options dialog. In here, again, ensure your Video Codec option is set to a codec that supports an alpha channel. My personal preference here is the PNG codec. Set your quality to maximum to avoid losing too much quality during the export process.
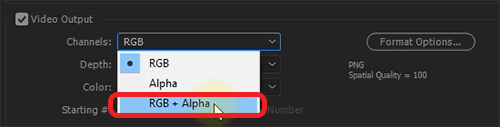
Then, return to the main Output Module settings. You should now be able to change the Channels option to ‘RGB + Alpha’. This ensures that both the colour channels (RGB) as well as your alpha channel (transparency) are exported correctly.
Once you have rendered your typewriter effect title into a video file, you can import it back into Premiere Pro or any other video editing software you are using.
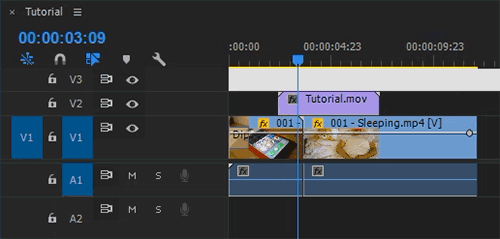
Because the video we exported contains an alpha channel you can place it over any of your footage and it should all work nicely.