Along with the brand new version of After Effects, a new version of Adobe Premiere, Premiere Pro CC 2014, has been released to the Adobe Creative Cloud on June 18. In this blog post I will show you some of the coolest new features now available in Premiere Pro CC 2014.
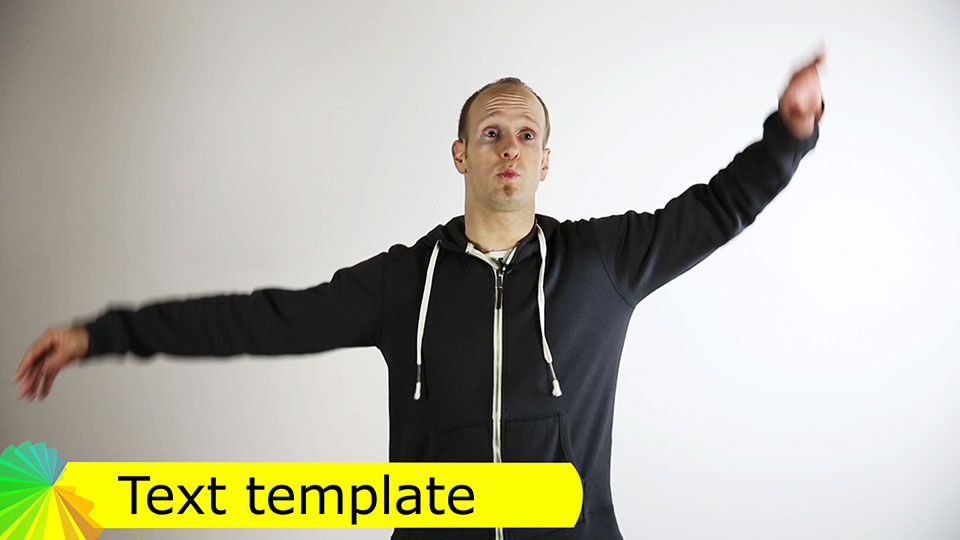
Live Text Templates
The Live Text Templates feature allows you to import After Effects CC 2014 compositions that contain text layers and then, within Premiere Pro CC 2014, change these text elements to customise and re-use your compositions. This gives you the power to create great looking custom titles and lower thirds.
I have already covered how to use Live Text Templates in my blog post on the new features in Adobe After Effects CC 2014 and won’t repeat it here.
Master Clip Effects
One of the most exciting new features of Premiere Pro CC 2014 is the introduction of Master Clip Effects. Imagine you are working on a complex film project and have tons and tons of edits like in the sequence below.
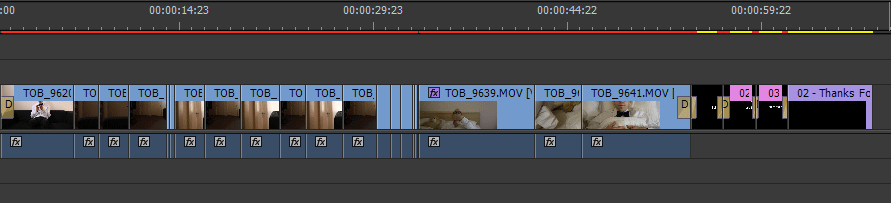
Having many edits is itself not the problem, the real problem comes in if you want to apply any effects, especially for colour correction or colour grading, to these clips. Since many of these clips come from the same base footage, they all need to receive the same colouring effects and you might find yourself copying and pasting the same effects all over the place to ‘sync up’ the looks of these clips.
What’s worse is if you decide to change any of the effects you will have to apply the same changes to all clips that come from the same base footage to keep them matching up. To make this easier, Premiere Pro CC 2014 introduces Master Clip Effects.
Master Clip Effects are applied to the so-called project instance of a clip, the source footage element in your project. Effects applied to the project instance of a clip will be applied to all clips that derive from it.
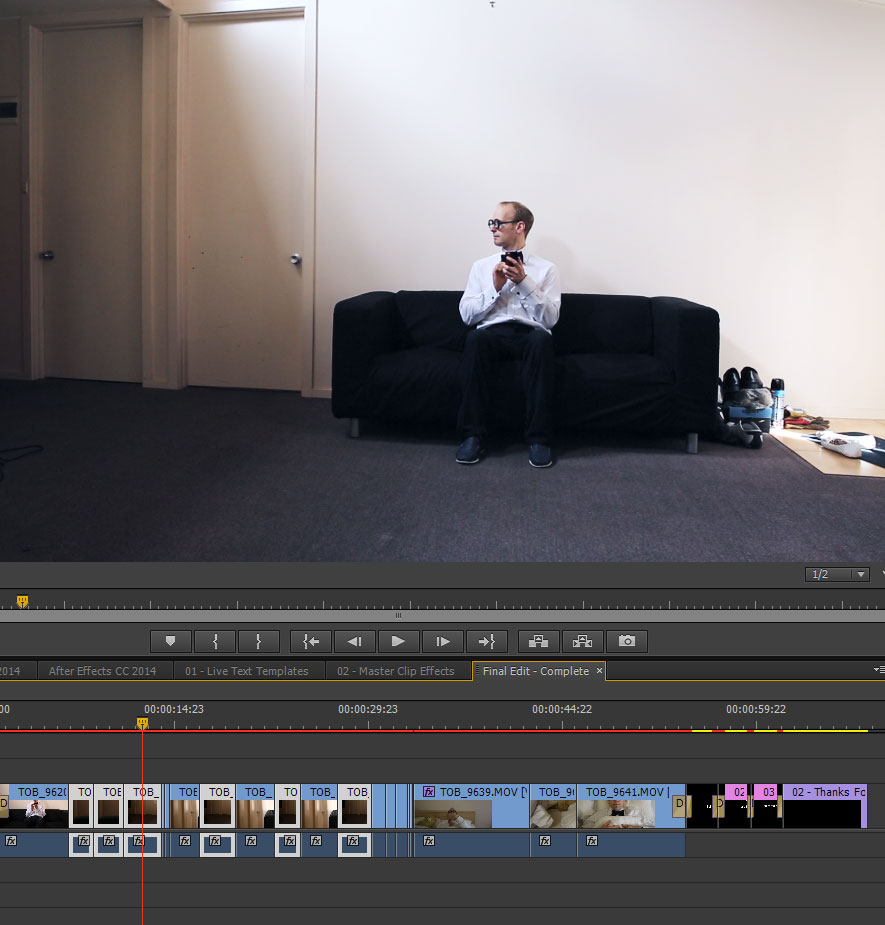
To apply a Master Clip Effect, ensure that no individual clip in your timeline is selected (this is important!) and then locate the base footage in the Project window and double click on it.
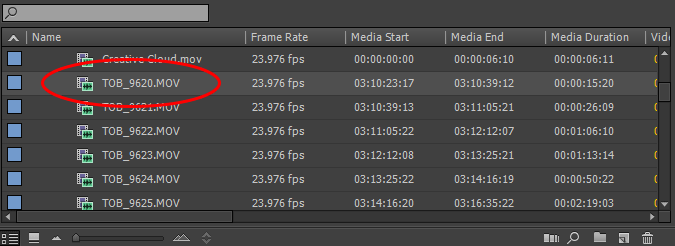
This will open up the project instance of this footage item in the Source Monitor. Go over to the Effect Controls tab. With only the project instance of this clip selected, this tab will show you the Master Clip Effects applied to it. Any effects you apply here will be applied to any clip anywhere in your project that utilitses this base footage.

I am really happy that Premiere Pro CC 2014 offers this feature as it is making my life a lot easier. I just wish I had it available for all my previous video projects!
Effect Masks
Premiere Pro’s features regarding masks have always been rather limited, providing only a limited set of ‘Garbage Mask’ effects that were rather tedious to use. Combined with Adjustment Layers there was some basic functionality to apply effects to selected parts of the footage, but fortunately Premiere Pro CC 2014 has borrowed some of the features of After Effects CC 2014 and now also supports Effect Masks.
Here is a clip of me shooting someone off screen.
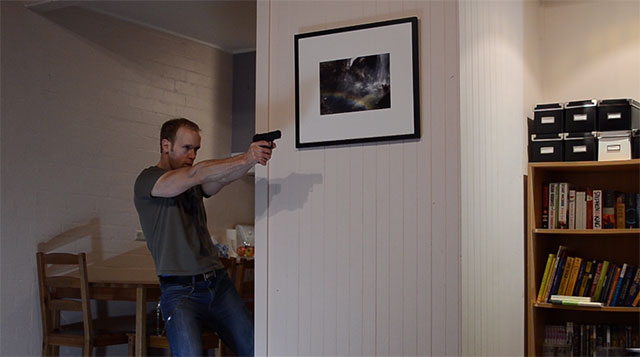
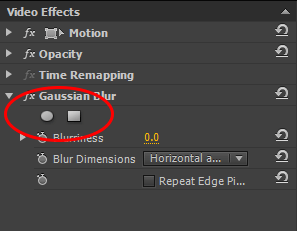
If we wanted to blur out the face of the shooter to protect his identity, we want to apply a blur effect only to his face. In the Effects tab you can find a Gaussian Blur effect. If you apply this blur to the footage and increase its strength, the entire scene will be blurred out. In Premiere Pro CC 2014 you will find a circle and a rectangle icon just below the effect name in the effects tab.
These controls allow you to add circular or rectangular Effect Masks to the clip and control where this particular effect will be applied.
To blur out only the face of the shooter, simply select the circle mask and draw a circle onto the footage, right over his head. The Gaussian Blur effect will be restricted to the contents of the mask.

You can change the mask shape or alter its basic properties like Mask Feather, Mask Opacity and Mask Expansion. You can also invert the mask to apply the effect to everything except the contents of the mask.
Effect Masks & Tracking
An additional feature included in Premiere Pro CC 2014 is the ability to easily track effect masks to follow the movement of the objects they are applied to. For this, you will find some basic playback controls next to the Mask Path property in the effect mask.
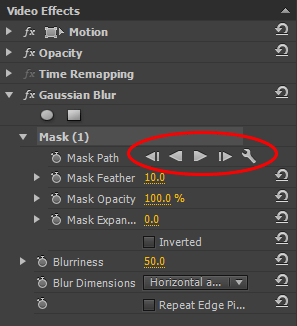
You can use these controls to track the mask forward or backward and have it follow the face of the shooter in our little example. This might take a little bit of time depending on the power of your computer and it depends on the elements you are trying to track.
So far I have been pretty impressed by the accuracy of the tracking in Premiere Pro CC 2014 and it’s nice not having to leave Premiere to achieve these type of effects.
Other New Features
There are many other new features available in Premiere Pro CC 2014 like new output formats, improved Mercury engine performance, Typekit integration, auto saving to the cloud and much more. For a complete list check out the the official Adobe Premiere product page.
Premiere Pro CC 2014 is definitely a big improvement over the last version and I’ve upgraded almost the moment it came out. I don’t think I will be looking back.


