Got a new year’s resolution for 2018 to finally learn how to use Adobe Premiere Pro?
To help you learn how to use Adobe Premiere Pro, I have re-organised some of my best tutorials to create a complete beginner course on Udemy. Check it out by clicking on the course title or thumbnail below!
Adobe Premiere Pro For Beginners – Video Editing Basics
To say THANK YOU for all your support
Use coupon code SURFACED20 to get 20% OFF!
Expires 31-01-2018
If you don’t know what Udemy is, it’s an online training portal where you can purchase on-demand online training. Once purchased, the courses are yours to keep – forever :)
Adobe Premiere Pro is an industry leading video editing software. You can use it to edit anything from your home videos to professional grade movies. It includes powerful tools for editing your footage, creating transitions and effects, adding titles and animations and working with audio.
What will I learn?
This course is meant for Absolute Beginners of Adobe Premiere Pro. I will not assume that you have used the program before and we will go through all of the basics, step by step. All of the exercise files are provided as part of the course material. By the end, you will be able to use Adobe Premiere Pro to edit your own film projects.
I have structured the course logically from the very basics to more advanced topics. Here are all of the things that are covered in my Adobe Premiere Pro Beginner course.
The Basics of Adobe Premiere Pro
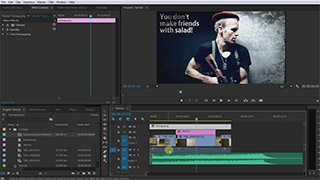
The very first lesson will cover the absolute basics of Adobe Premiere Pro.
You will learn how to set up a new project and import your media. We will cover how to create Sequences and bring your clips into them to start editing everything together. I show you how to use the basic editing tools and apply video transitions to your clips.
Then, we look at adding video effects and working with titles to overlay onto your footage. Finally, we will cover how to export your project to a movie file so you can share it with your family or upload it to YouTube.
By the end of this lesson you will have a basic understanding of the entire workflow for Adobe Premiere Pro.
Advanced Editing in Premiere Pro
When working with Adobe Premiere Pro, most of your time will be spent editing. In this lesson we look at some of the advanced editing tools available to make that job easier.
First, we will look at using the Source Monitor to more easily select parts of your source footage. We will then explore the Ripple Delete tools as well as the Rolling and Ripple Edit tools.
Next, you will learn about slip and slide, two very useful features that make it easier to adjust more complex edits with ease. Finally, I will show you how to use the Rate Stretch tool to speed up or slow down your video in Adobe Premiere Pro.
How To Create & Animate Titles in Adobe Premiere Pro
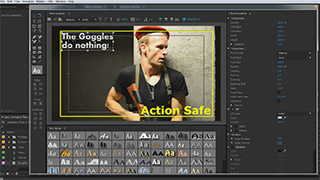
Titles are essential for professional looking video projects. They are used for intro sequences or credits and are essential for overlaying visual elements onto your base video.
In this lesson I will show you how to create titles in Adobe Premiere Pro. This includes adding text or shape elements and working with simple effects. We will use video transitions to add some simple animations. Then we will take things a little bit further and work with custom keyframes to really bring our titles to life.
New Working with Audio in Premiere Pro
If you ever muted an intense movie, you will know that audio is crucial for an emotional experience for your audience. Adobe Premiere Pro supports a large range of audio formats and comes with some powerful audio editing features.
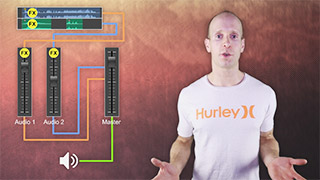
In this lesson I will show you how to import and use music and sound effects in Adobe Premiere Pro. We will look at creating additional Audio Tracks and using the Audio Track Mixer to blend everything together.
I will cover how to use keyframes to control the audio volume and how to apply audio effects such as reverb and delay. Finally, we will look at creating sub-mixes to easily control groups of tracks together.
Premiere Pro Advanced Colour Correction
Colour Correction is the task of fixing up bad colour or dull looking footage to really make your image pop. In this lesson I will show you 3 of the most powerful tools in Adobe Premiere Pro for correcting the colour in your footage.
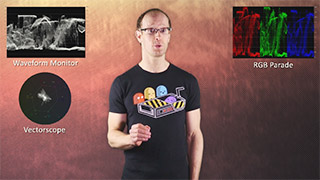
First, we will look at the Waverform Monitor. The Waverform monitor shows you the luma (brightness) distribution in your image. It is ideal for analysing and correcting the exposure of your image.
Then we will look at the RGB Parade. The RGB Parade looks similar to the waveform monitor, but with 3 different displays, one for each colour channel. This tool is great for adjusting white balance and identifying incorrect colour tints and hues in the image.
Finally, you will learn how to use the Vectorscope. The Vectorscope shows the colour distribution in your image. It is great for adjusting for colour shifts and fixing up the skin colour of your actors.
Advanced Audio – Send Effects
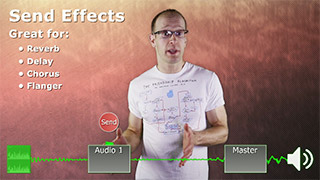
In this lesson I will cover how to use more advanced audio effects in Adobe Premiere Pro.
We will first explore what ‘Send’ effects are and how they differ from ‘Insert’ effects. I will show you how to set up Auxiliary FX tracks and how to mix the effects on that channel back into the overall audio. As part of this lesson you will also learn about routing audio signals and how to use group tracks.
How To Get Cinematic Look With Lumetri Colour in Adobe Premiere Pro
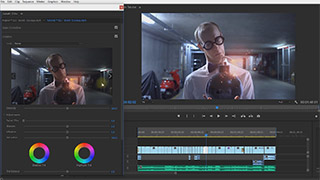
Since CC 2015, Adobe Premiere Pro includes the Lumetri tools. The Lumetri tools make it really easy to colour correct and colour grade your footage.
In this lesson I will show you how to use the Lumetri tools in Adobe Premiere to give your footage a cinematic look. While this lesson does not fully apply to earlier versions of Premiere Pro, the concepts discussed and the steps involved should still be applicable to earlier versions :)
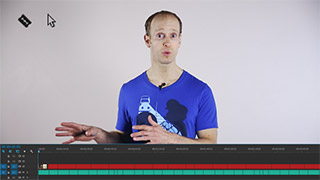
Top 10 Keyboard Shortcuts for Premiere Pro
In this lesson I will show you some of the most useful keyboard shortcuts in Adobe Premiere Pro.
Adobe Premiere Pro is a complex NLE (non linear editing system) and the more keyboard shortcuts you know, the faster your editing will be. I will show you some of the most common keyboard shortcuts and how you can use them to speed up your workflow.
I hope you will find this course useful and easy to follow along. As always, please leave me some feedback, comments or suggestions and I will do my best to improve the content of this Udemy course!


One Response
nice