In the first part of VFX Vlog #9 I talked about how to choose the best tutorials to ensure you advance your After Effects skills. In the second part I will discuss how to export your video from After Effects and cover some common problems you may encounter.
Exporting Your Video
I am going to demonstrate the options you have with a simple composition that I used for my HitFilm 2 Muzzle Flash tutorial on my YouTube channel.

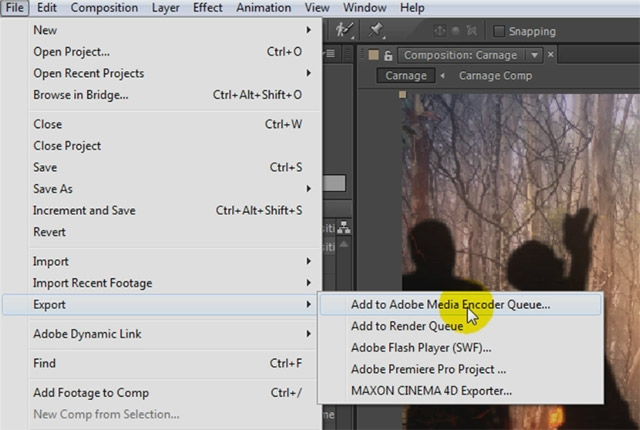
If you try to export your project via the File –> Export menu, you will be given a number of options. I personally have never used the Adobe Media Encoder, but I have heard good things about it. However, in this tutorial we won’t be covering the media encoder. Personally, I always export my video using the Render Queue in Adobe After Effects and there is an option to add your video to the Render Queue in the main menu.
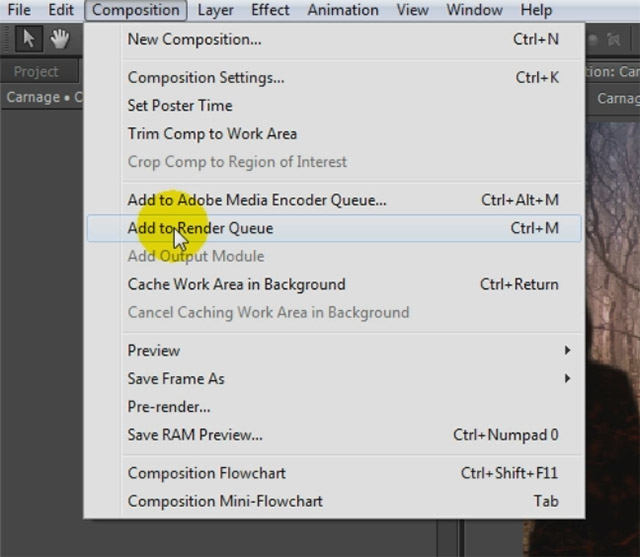
Alternatively, you can also simply select Composition –> Add to Render Queue to add the currently active composition into the render queue. I find this the simplest option and of course you can use the shortcut Ctrl+M to make it even easier.
Once you add your composition to the render queue, After Effects will open and display the render queue and all currently active and completed items in it. Here is a screenshot with only my ‘Carnage’ composition added.

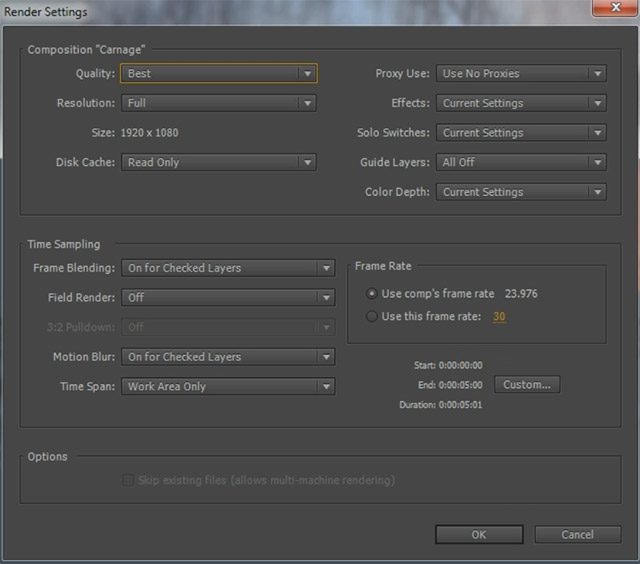
For each item in the render queue, After Effects offers you 2 separate sections to configure your export: Render Settings and the Output Module.
Render Settings
In the Render Settings dialog you define the quality with which After Effects will render out the contents of your composition. All of this happens before the video gets converted into a final video file – which we will get to in a moment. The Render Settings dialog has options for Quality (Best or Draft) and the resolution of the rendered composition. There are a number of other settings in there that I usually don’t change much. I only like to double check that the Frame Rate settings match the frame rate of my composition and that I am exporting the desired time range.
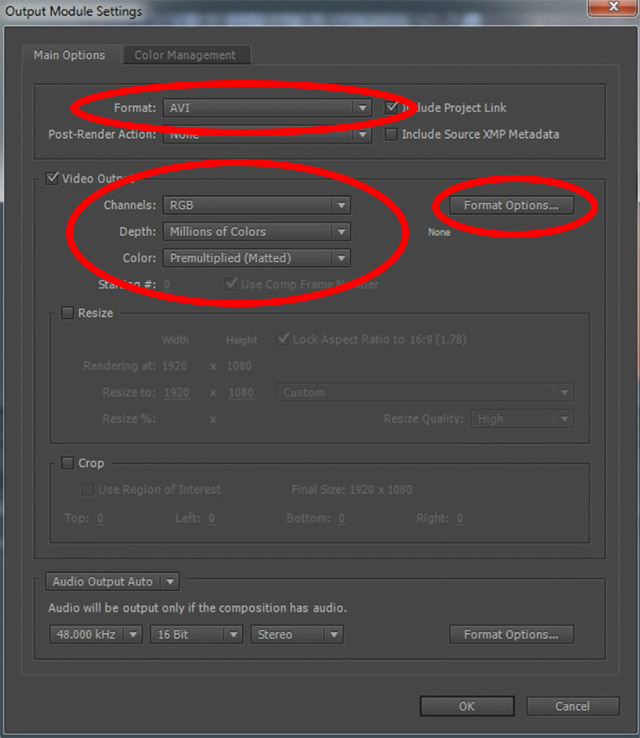
The Output Module
Once After Effects has rendered your composition (using the settings from the Render Settings dialog), it will pack them into a final output file – or many files if you are exporting as an image sequence. You can specify the output format and compression options in the Output Module Settings dialog.
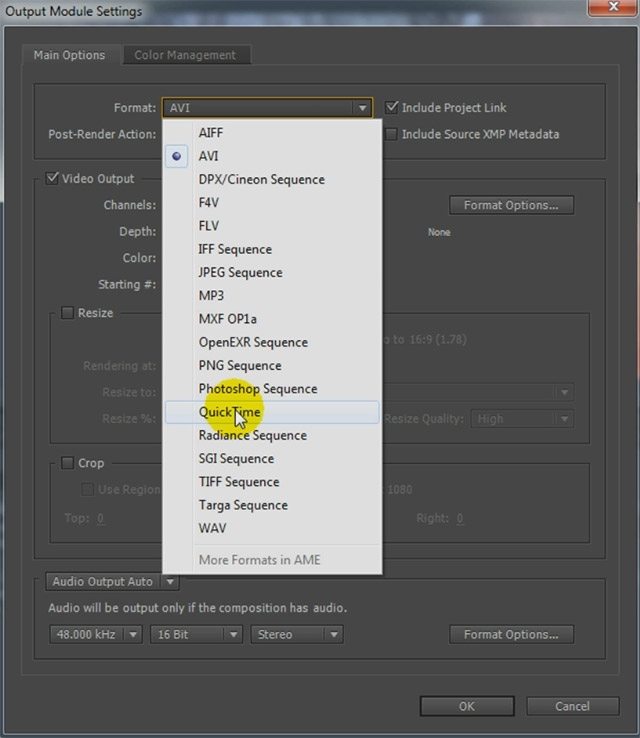
You first select the format of the output. You can choose between different video or image formats. Note that this has a bearing on the file size as well as the quality of the final output. Different formats also offer you different Format Options to manage compression.
Next, you choose which channels of your video you want to output and what colour depth to use. Unless you intend to import the clip back into After Effects and need an alpha channel, I usually just export as RGB and leave the other settings as they are.
Over on the right hand side you will see a ‘Format Options…’ button. This button will take you to options specific to the video format you have selected and it will be greyed out if the format you chose does not have any extra options.
I always like to export as QuickTime movie. It offers good compression settings and allows you to export your video with a decent file size and great quality.
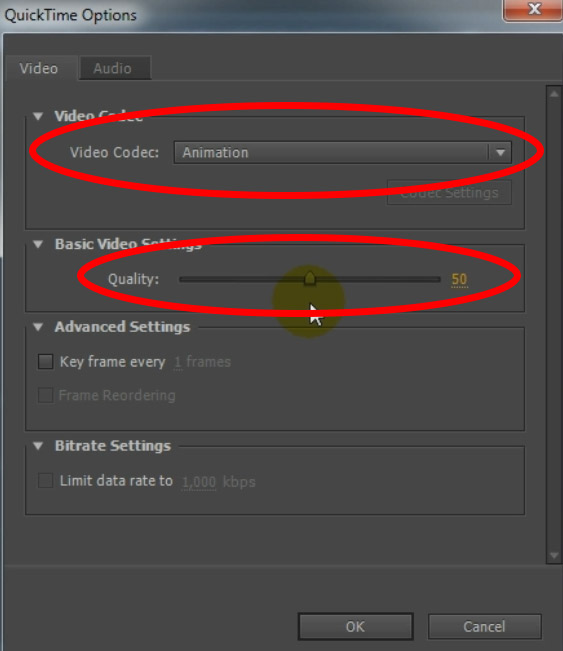
QuickTime also offers a number of options that differ for every format. You can open the options dialog by clicking on the Format Options button on the right hand side. Here are the options for the QuickTime format.
The two settings that have the biggest impact on the final file size and the quality of your export are the Video Codec and the Quality settings. The best (and most space efficient) settings I have found is using the H264 codec at around 50%. It’s up to you to play around with what settings you prefer and what is most suitable to your needs.
Exporting Audio in After Effects
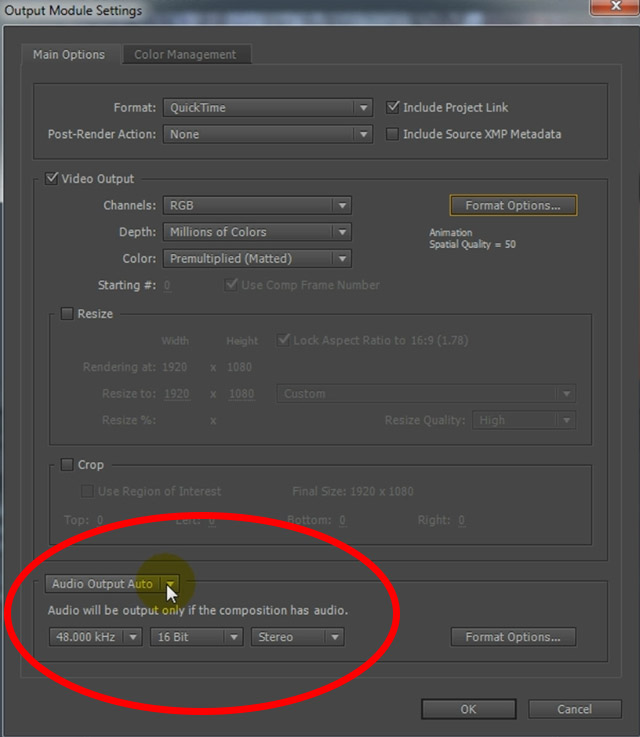
So many people come to me asking me why they don’t get audio exported from After Effects! After Effects is not meant to do audio editing and therefore does not export audio by default. If you want the audio track to be exported into your final video, you will have to check the Export Audio options at the bottom of the Output Module dialog.
Note that these look slightly different on earlier versions of After Effects, where they are displayed as a checkbox you need to tick. If you do not enable this option, your final video will be exported without sound.
I hope this little tutorial has helped you understand how to export your compositions from After Effects and how to control the quality as well as the type of output file you end up with.


10 Responses
how to view the quick time settings while rendering the aftereffects project
What do you mean with ‘view the quick time settings’? You can find codec settings under the ‘Format Options’ tab if that’s what you mean
I enabled audio, but when I rendered my video, it still had no audio, What can I do to fix this, Thanks.
Does the audio play when you use RAM preview?
hey Tobias. thank you for all the great work here and on Youtube.
about rendering H.264 in CC 2014 and above:
actually using H.264 format option in the Quicktime format menu is
an old H.264 compressor that many users don’t even see as an option to begin with. it’s file size is about 10x bigger, the quality even at 100% is not that good compared to the usual H.264 (older versions of Ae previous to CC 2014, or H.264 in AME) and the controls are very few.
it is better to work with AME to handle your H.264 exports.
if you don’t mind, I have provide this link of “Ae vs. AME Rendering Workflow” tutorial especially for old time Ae users who are used to the way the Render Queue works to make a soft transition to start working with AME:
[youtube id=”HWzRgxRqUUs”]
thanks
Hi , i have made a mix about 29 minutes ,
If i render my project , my music plays just 5 minutes ?
so my finnaly file , quiktime or AVi, plays 5 minutes music instead of 29 minutes , what do i wrong ?
there are 4 projects files in the q Queue , most i selected all the files ? or is this automatic ?
Thansk for helping me out
regrds jean
where is compression option please revert me
What do you mean?
How to export in H.264 Mp4 format ???
The latest version of After Effects (2018 15.1) has removed H264 from After Effects. If you want to keep using H264 you will need to use Adobe Media Encoder: [youtube id=”zw12mLrQbhw”]