Day For Night Video Conversion – Adobe After Effects Tutorial
Converting A Day Shot To A Night Shot
If you love shooting films, sooner or later you will come across a situation where you will need to film a scene that happens at night. However, there is a major obstacle to deal with if you try to actually film after the sun has gone down: lack of light.
Shooting in low light situations usually leads to blurry and grainy footage due to the longer exposure time required and the fact that your camera is likely to switch to a very high ISO. Not to mention you can’t really see what is going on when it’s dark and it will be difficult to navigate around.
Therefore a lot of scenes in movies that occur at night, are actually shot during the day and then post processed to look as if it was night. This is a surprisingly easy process and I will walk you through the steps you need to follow to convert a day shot to a night scene. Note that you don’t need Adobe After Effects for this, any video editor that offers you control over the colour of your footage should do the trick.
Before you pull up some old footage you want to convert, there is one important thing you need to watch out for when you shoot the footage you plan to convert: it has to be a cloudy day and the sky should not be visible.
If the sun is out, you will most likely see harsh shadows in your shot. Sometimes you can play it off as strong moonlight after the conversion, but it doesn’t usually work well. Even with a cloudy sky, you want to avoid showing the sky directly. The sky will be much too bright to pass for a night sky so try to keep your camera’s aim low.
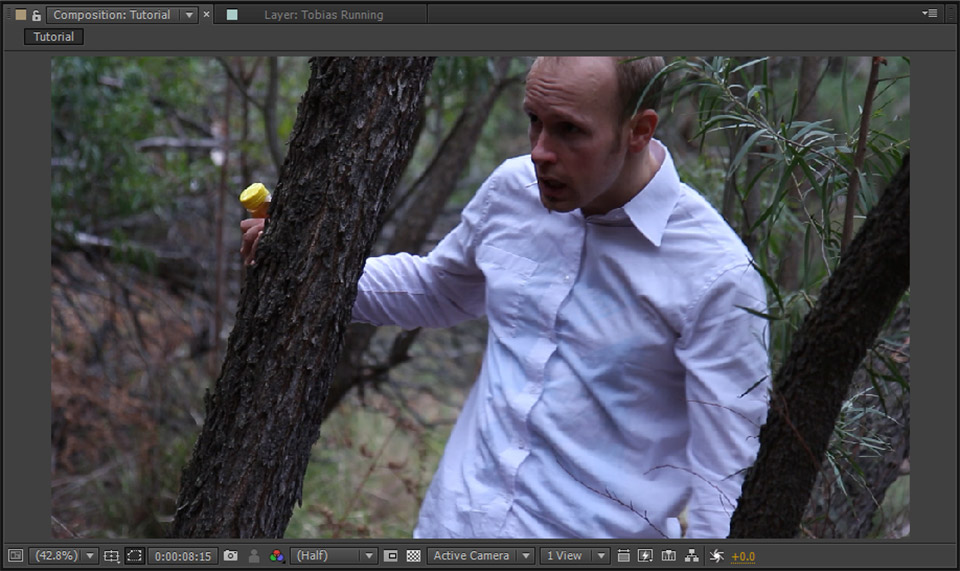
Here is the shot we will be converting. It is a simple scene of me running through the forest:
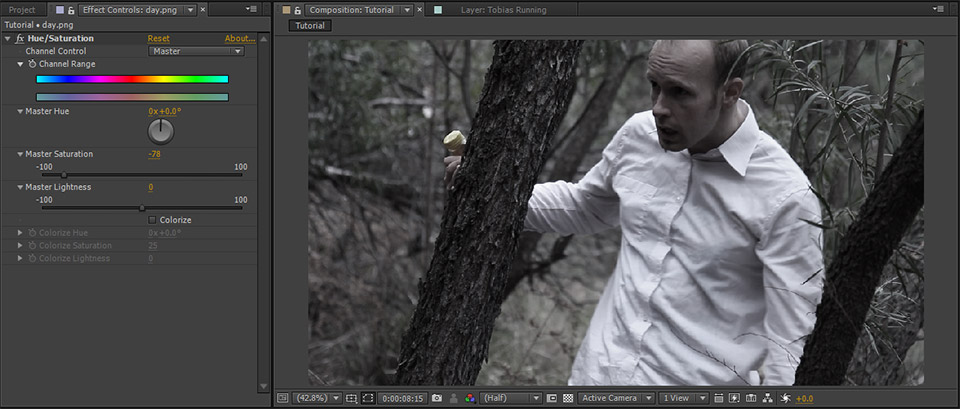
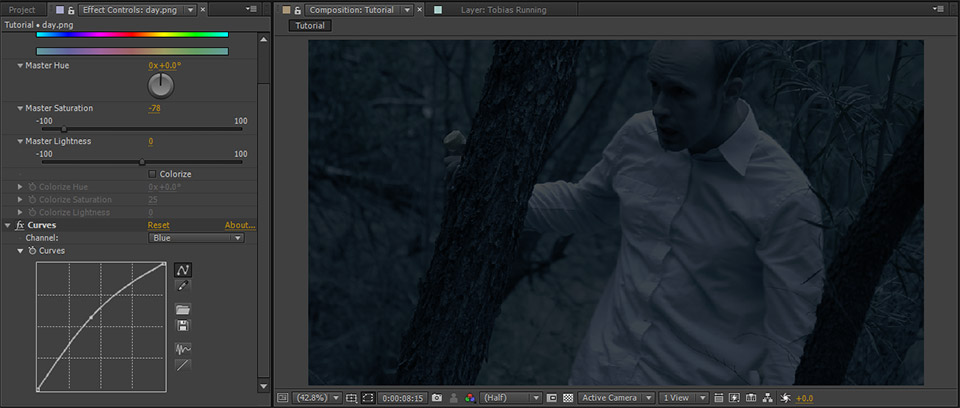
The first thing you need to do is desaturate your footage. When there is no light, there is usually also very little colour and we want to simulate that effect. In Adobe After Effects you can simply apply a Hue/Saturation effect to your clip and lower the Master Saturation by around 80%.
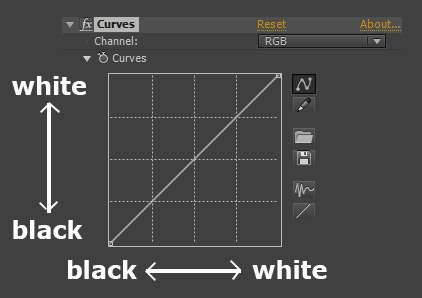
Next, we want to darken the footage dramatically and also tint it blue. There are a myriad of options available on how to achieve this, but I always like to use the Curves effect in Adobe After Effects.
The Curves effect lets you modify the input and output colour of your footage with a graphical curve. The horizontal axis represents the input colour from black to white and the vertical axis represents the output colour from black to white. A straight line indicates that black will be mapped to black and white will be mapped to white.
In the RGB channel (luminance), crush down the top end of the curves, the bright areas of your footage, to darken them considerably. This will also lower the contrast in your image which is consistent with a night scene.
Next you need to tint the footage blue. With the Curves effect this can be achieved in 2 simple steps:
- Go
over to the Red Channel and lower it - Go over to the Blue Channel and increase it

And that’s that! Your footage should now look like it was shot at night. Of course you may have to tweak these settings to suit your scene.
Dealing With The Sky During Day For Night Conversion
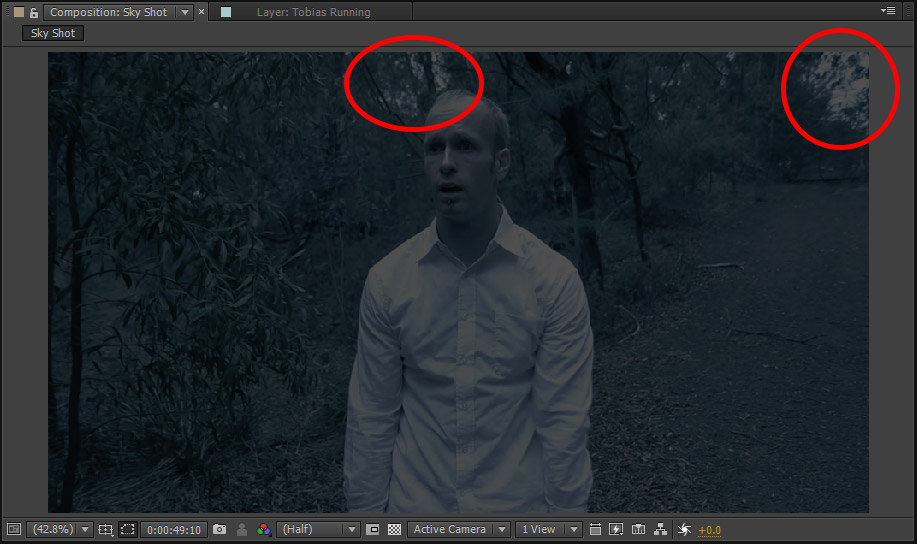
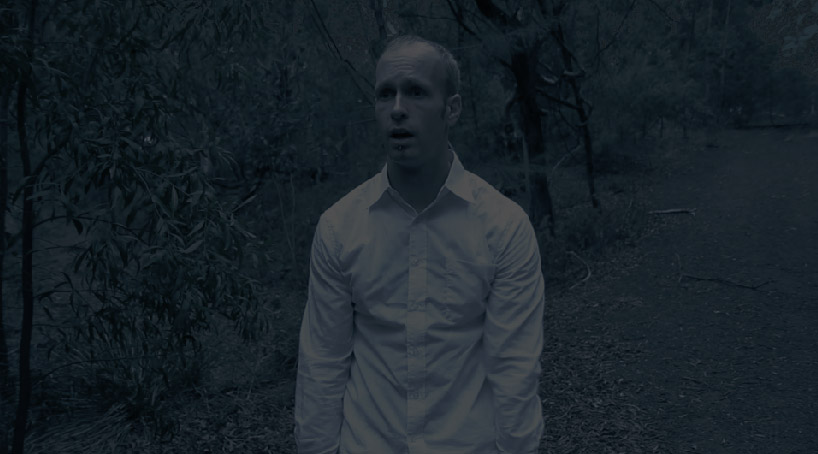
While you should avoid showing the sky in a shot that you want to convert from day to night, sometimes that’s hard to avoid. In those cases you will have to deal with the snippets of the sky that made it into your shot. In the scene below you can see the sky through the trees.
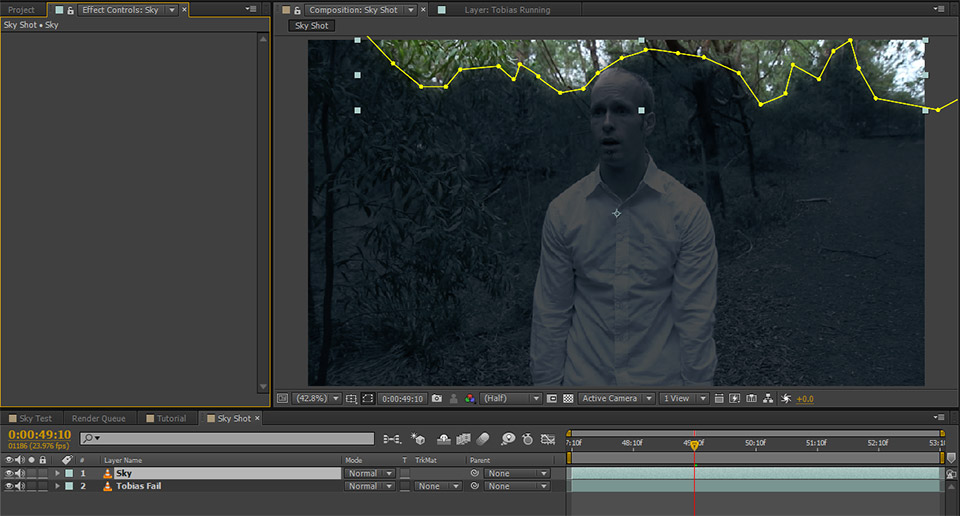
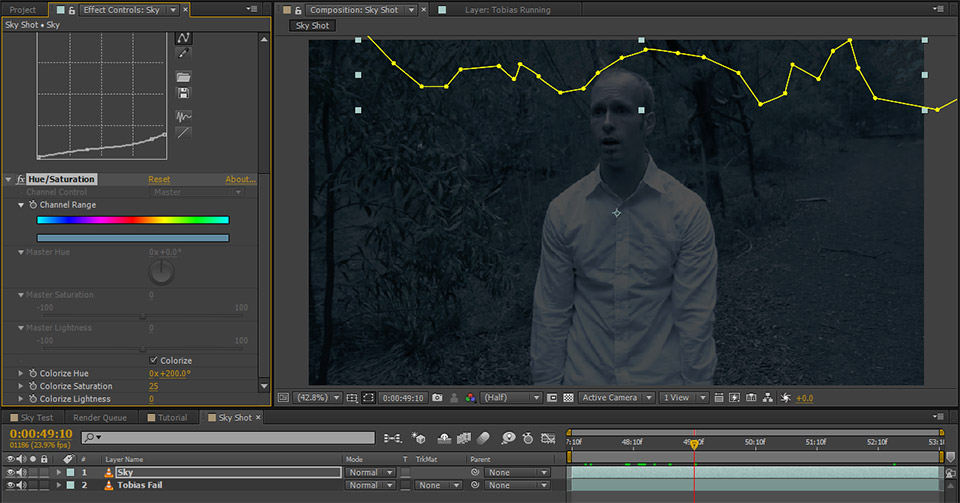
Since I am wearing a white shirt, we can’t simply key out the bright areas of the footage or I will end up with a hole in my chest. I will instead cover it up. I have duplicated my base footage, called the copy ‘Sky’ and removed all effects from the layer. I then applied a mask to only the bright areas of the footage. The bright areas below are where I cut out the sky layer.
Next, I applied an Extract effect in Adobe After Effects to the layer. This effect allows me to remove all except the bright (or the dark) colours. I have lowered the Black Point to around 190 and increased the Softness to try to isolate only the bright areas of the sky as cleanly as I can. I want my Sky layer to only contain the bits and pieces of the sky that I want to cover up.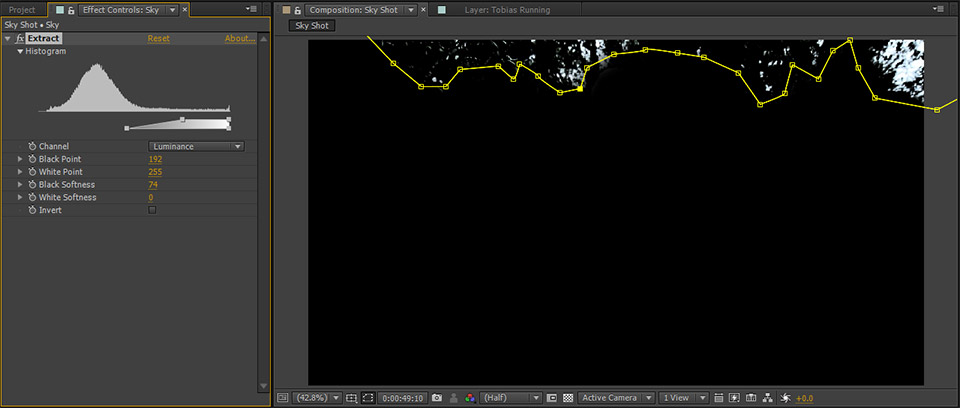
Finally, just like with the Day For Night conversion, apply a Curves effect to the layer and crush down the bright areas of the footage. Tint the layer blue just like you did with your base footage. Since we are dealing with the bright sky in this instance you may have to crush the colours even more drastically.

When placed on top of your base footage, the Sky layer should cover up all the bright areas of the sky with nice dark ones instead, making it look like a night sky. I decided to also add another Hue/Saturation effect to my Sky layer to bring a bit more blue into it. Feel free to add any other effects you need to make the cover layer for the sky blend in nicely with your scene.
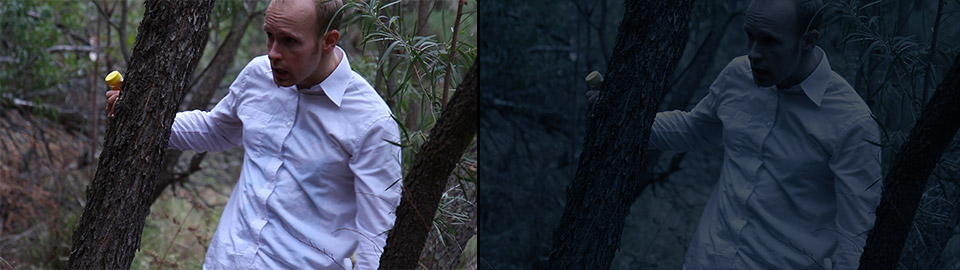
And there you have it! A scene shot during the day, with accidental sky, converted to look like it was shot at night.


6 Responses
I’ve always wondered how they do this in movies. Here is my answer. I’ll try this for sure in my videos. Thanks a ton ! This will help me a lot !
I love your videos….Thankz i am just a beginner….your videos help a lot.I would like to learn how to make superhero’s effect(mainly wolverine’s)…
Tobias, I think you’ve come up with a pretty good solution to digital day for night. In the days of analogue film – aside from “stopping down” in camera – we used red filters over the camera lens when working with B&W film, & laboratory coloured filters in the printing when working in coloured film, to create day for night.
The only alternatives I’d bring to your footage (above) would perhaps be to add a tad more colour from the original footage; a digital blue gel overlay, & perhaps some subtle vignetting.
How to download the software
You can get After Effects from the official Adobe website. However, this technique can be done in many free tools (HitFilm, DaVinci Resolve, etc) as well. It’s not specific to AE
YOU ARE THE BEST, NOW I CAN MAKE MY OWN ACTION FILM.