Roof Destruction with After Effects and Cinema 4D - Part 2

In the first part of this tutorial I showed you how to set up your scene, green screen a person and use stock footage elements to create a cool roof destruction effect. This is the final effect we ended up with in part 1:

Now let’s take this destruction VFX to the next level and add some cool debris elements into our scene and animate them in Cinema 4D with realistic physics! If this concept scares you a little bit, I recommend checking out my 6 part 3D Integration VFX tutorial series.
Creating Roof Destruction Physics with Cinema 4D
This is not going to be a detailed tutorial on how to use Cinema 4D. You can find tons of great Cinema 4D tutorials over on Greyscalegorilla. I will assume that you are fairly comfortable with the program and will take you through the steps involved in creating some cool debris for our roof destruction effect!
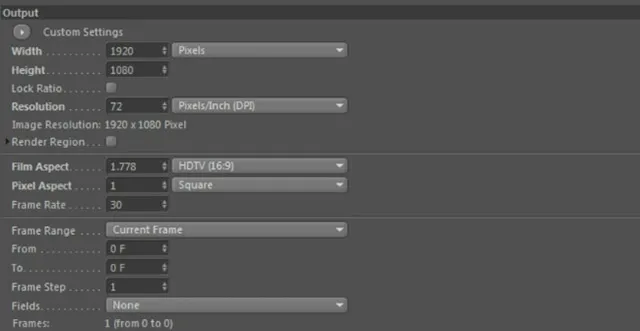
Fire up Cinema 4D and create a brand new project. Before doing anything else, open up the project settings and make sure they match your After Effects composition. My footage was shot at 1080p with 30 FPS.
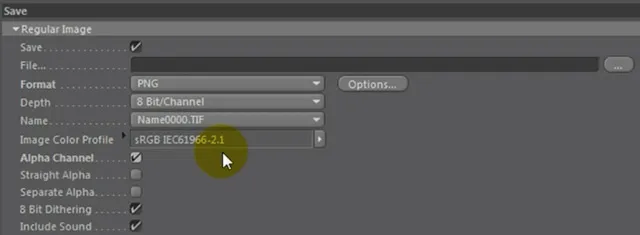
Which format you use to export your rendered elements is up to you. Just make sure that you have the Alpha Channel option enabled so the footage does not end up being pre-matted. I have chosen to output my rendered debris elements as a PNG image sequence.
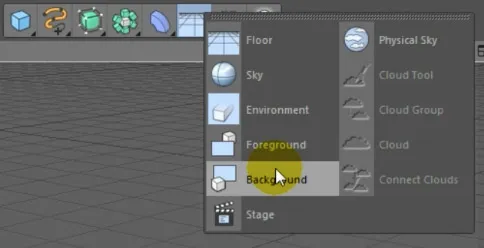
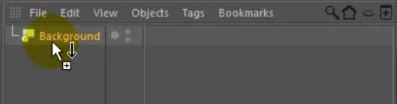
To make it easier for us to match up the 3D elements we will be creating with our After Effects composition, let’s first set up our viewport background to display a frame from our clip. Create a new Background element in Cinema 4D.
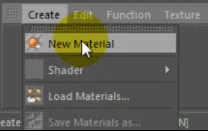
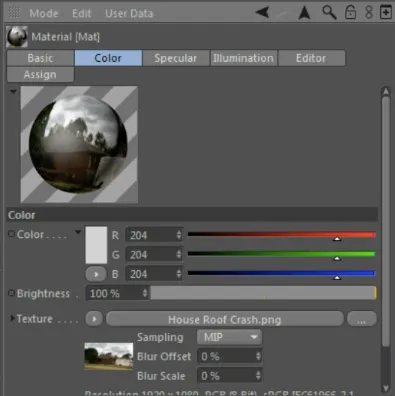
Go to the material toolbar and select Create -> New Material.
Finally, select the new material and go to your Object Inspector. I have exported a single frame of the roof destruction composition from After Effects as an image at 1920 x 1080 resolution. Select this scene background image as the material texture.
Now drag the new material onto the Background object we created earlier.
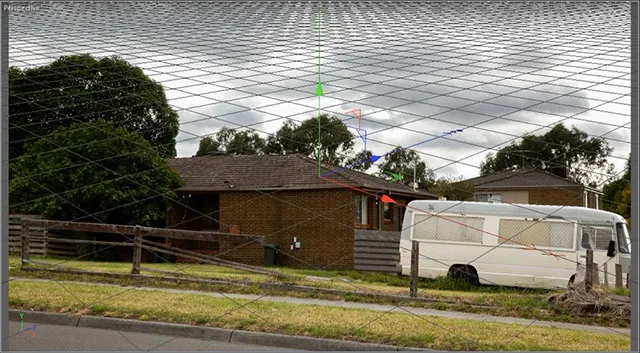
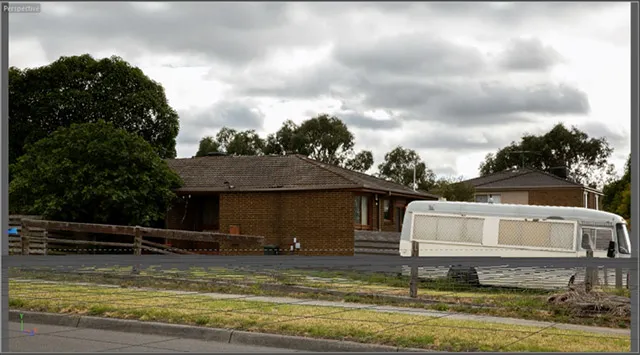
Your viewport background will now show the exact same scene as your After Effects composition.
Now we’re ready to roll and start adding 3D elements into this scene!
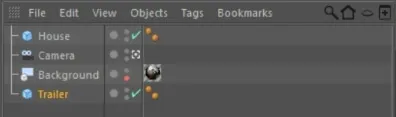
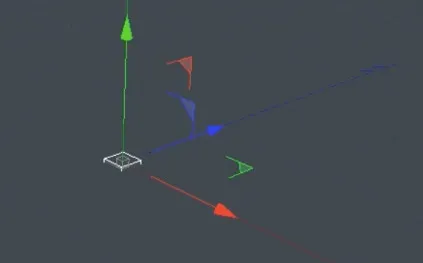
Before we start creating the geometry in our scene, we need to set up a camera to match the real camera we used to film the shot. Create a new camera in your Cinama 4D scene.
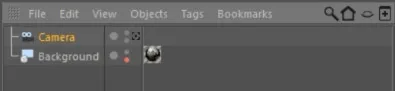
To enable the camera (and see the world through its eye), you have to tick the little target point next to the camera in the scene browser.

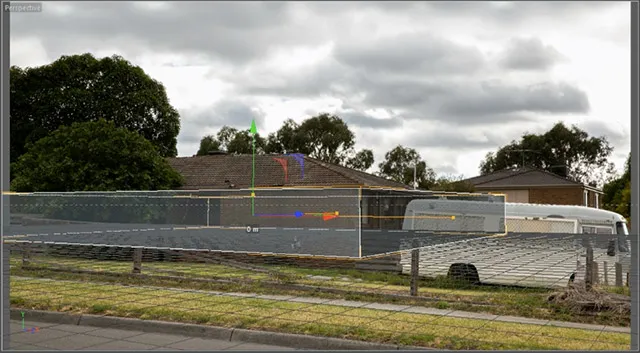
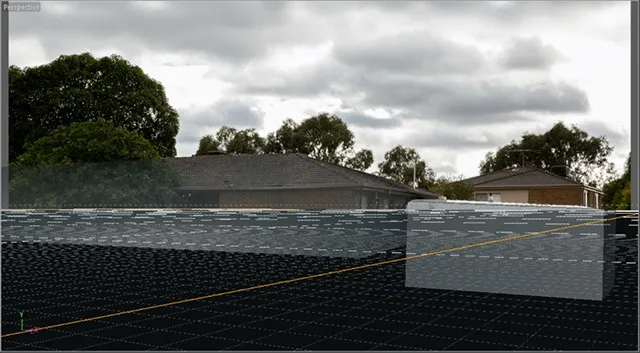
Now any changes you make in your viewport will be reflected onto the currently enabled camera. Move the camera so that the ground plane of your viewport lines up with the ground in your actual scene. Since we are going to work with physics and you’d want the debris elements to fall down, this is very important to get right!
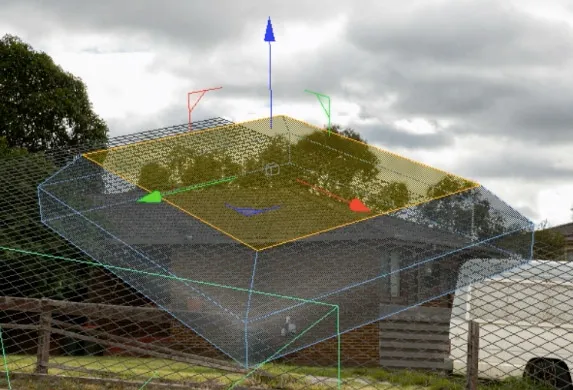
Next we need to set up some geometric shapes to represent the elements in our scene. We want the debris elements to interact with the physical shape of the house, the trailer and the ground and so we need to ‘rebuild’ them in Cinema 4D. This does not have to be overly precise - at least not for this simple effect - so I created a simple cube and stretched it to fit over the body of the house.
Important: since we are going to use physics in Cinema 4D, make sure that you model everything with the appropriate sizes. E.g. I made the cube for the house 2m tall, 16m deep and 20m wide. If you create your scene in the wrong scale, the physics simulation will not be accurate and the effect will look strange.
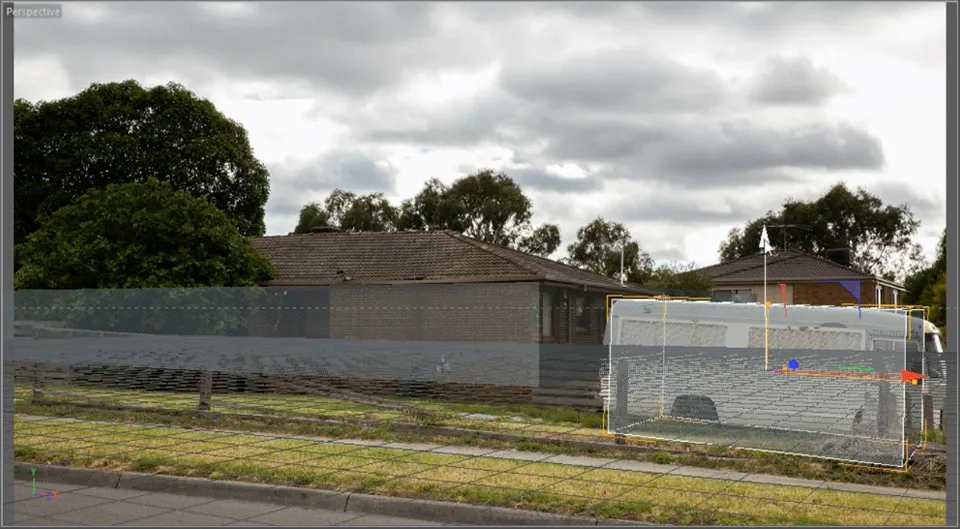
Duplicate this geometric primitive and reshape and move the copy until it sits exactly in the location where the trailer is.
Whenever you feel tempted to move the camera around to help you position these elements correctly in your scene, do remember to disable the camera before you start moving around in your viewport. Otherwise you will affect the position of the active camera.
I now want to add a roof to the cube I set up for the house. To achieve this, I am simply going to reshape the body of the house. Of course the way I am adding the roof is just one way of solving the problem and feel free to use any other technique if you prefer.
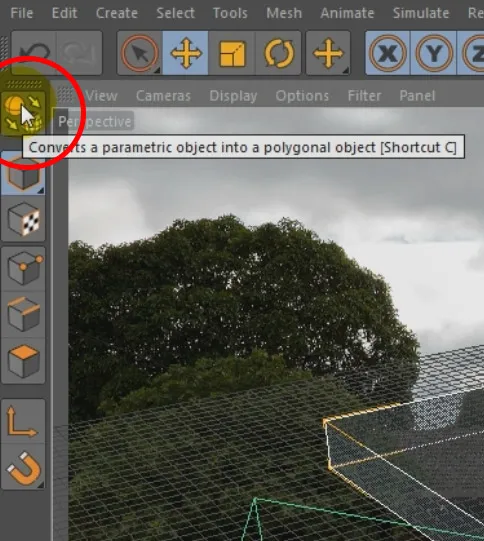
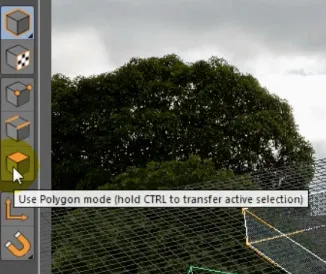
To reshape the house, simply select the cube and click on the ‘Convert to Parametric Object’ button in the toolbar. Then select the ‘Polygon Mode’ from the toolbar so we can make changes to the individual sides of the house.
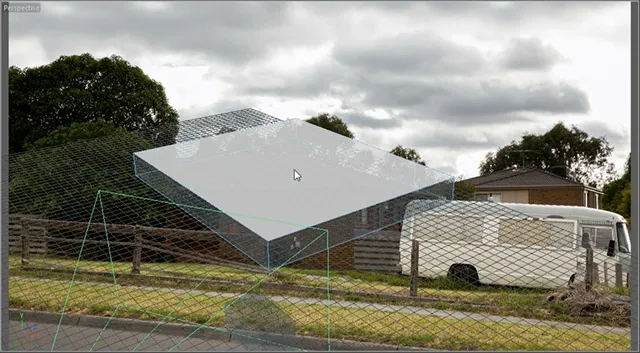
Note that I’ve changed my viewport angle, but I did remember to disable the active camera first. You can see the green cone defining the field of view for the actual camera at the bottom of the screen.
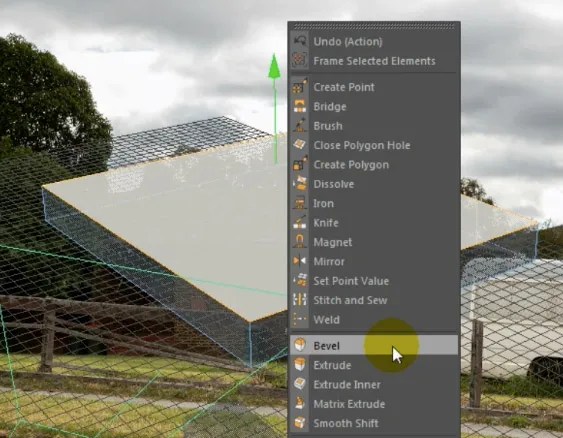
Right click on the top of the house body and select the Bevel option.
Click and drag to add a bevel to the top of the box. Then use the move option to move the new face upwards to create a roof shape.
Switching back to the camera view by re-enabling the crosshair next to the camera, you may discover that the roof geometry does not line up perfectly with your scene.
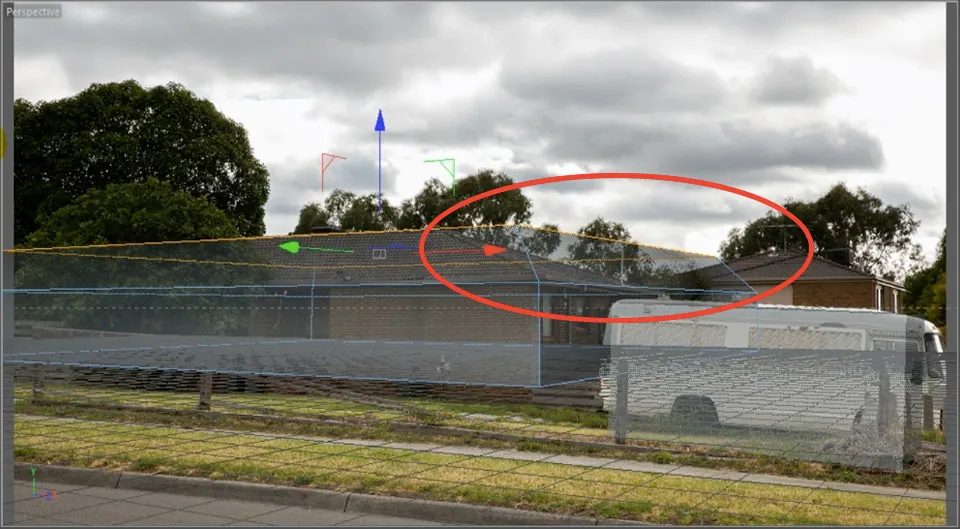
We can fix this by moving the edges along the upper end of the roof inwards. You can do this using the ‘Edge Mode’ in Cinema 4D. It’s right next to the Polygon Mode in the toolbar.
![]()
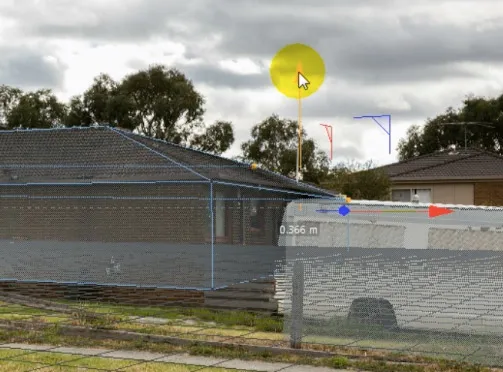
Select the edges of the roof that do not line up and move them around until they fit over the outline of the roof.
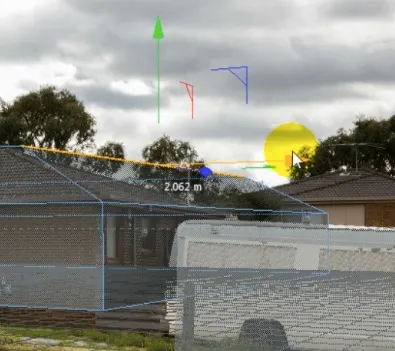
I also pushed down some of the edges to increase the steepness of the roof and match it up with the geometry in my actual scene.
Finally, add a Ground object into your scene. The grid we see from the viewport is simply a helper and will allow any debris elements to fall straight through it.
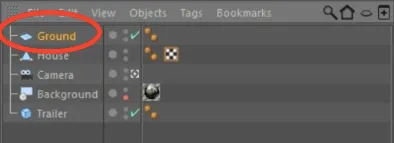
Position this ground plane at the bottom of the boxes for the house and the trailer. Rotate around the scene as needed to ensure that all geometric primitives we have set up match up with their real world equivalent as closely as possible.
Now that the tedious work is out of the way, let’s start creating the destruction debris elements for the roof tiles!
I want to create a grid of roof tile elements that will be flung out of the way as the giant smashes through the roof. For this, we first need to model a single roof tile. I created a simple cube and squashed it down into a flat box. You could model a much more realistic roof tile here, but for this tutorial, let’s go with the simple option.
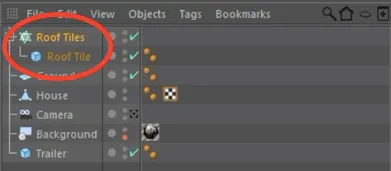
Next, we need to duplicate the roof tile to create a sheet of tiles. You can do this manually or you can use the Cloner object in Cinema 4D. You can find the Cloner object in the MoGraph menu. I called the Cloner ‘Roof Tiles’ and dragged the roof tile object into it. The Cloner will duplicate any child objects that are attached to it.
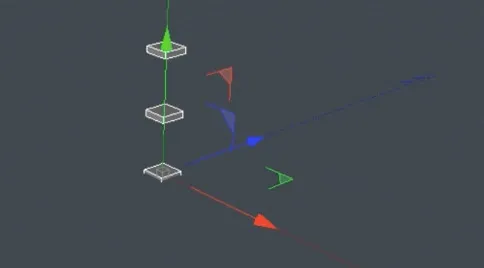
With the default settings, the Cloner will duplicate the child object 3 times vertically.
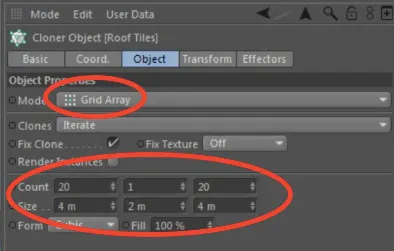
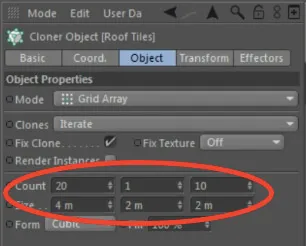
Since this is not what we are after, go into the Object Inspector for the Cloner. Change the Mode to ‘Grid Array’ and then set the x and z repeat counts to around 20. You will also have to adjust the Size property to ensure the roof tiles are lined up precisely next to each other in an even grid.
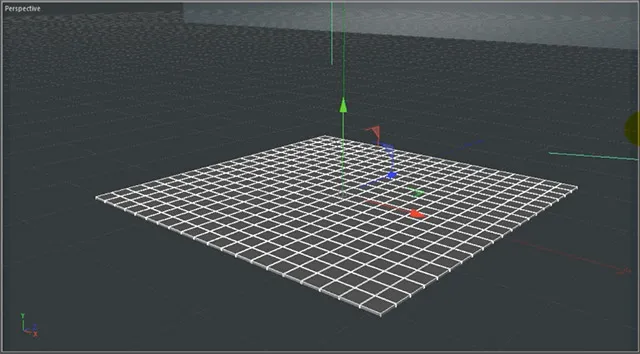
You should now have a sheet of roof tiles, lined up perfectly. Again, you could model this much more realistically, but for this destruction effect it will suffice.
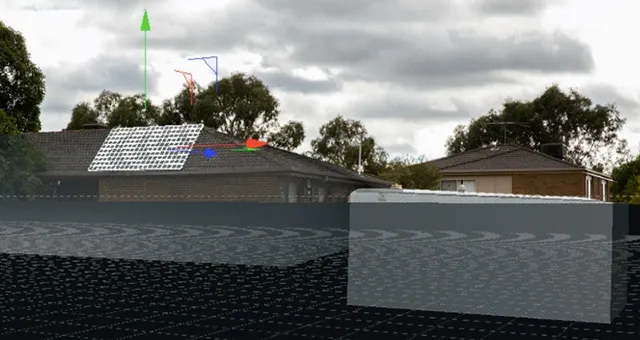
Place this grid of roof tiles on top of the house in your scene, directly above where the giant smashes through the roof.
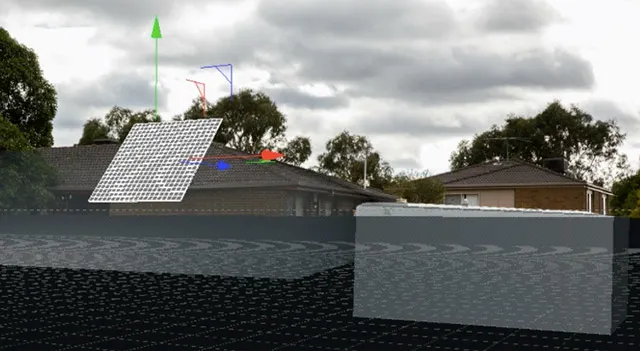
You might have to adjust the Count and the Size properties of the Cloner object to ensure the roof tiles do not extend past the roof.
Then adjust the position of the roof tiles as required to place them exactly over the hole in the roof.
With the roof tiles perfectly in place, it’s time to create the actual destruction effect!
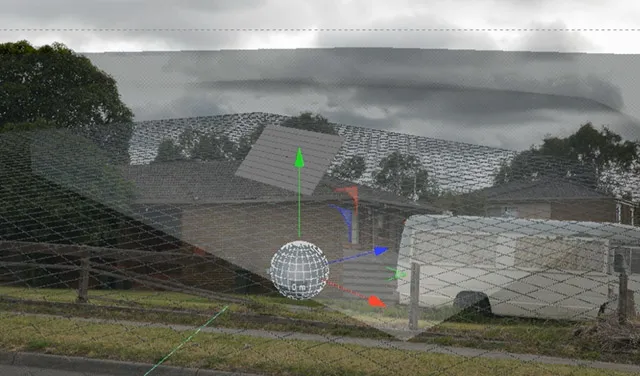
Create a sphere directly below the grid of roof tiles. Scale it to match the approximate size of the giant smashing through the roof.
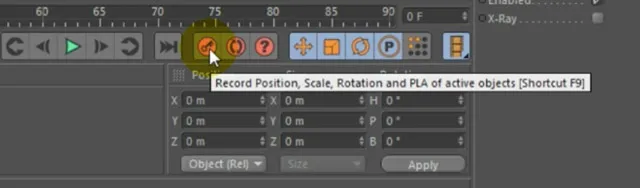
Now animate this sphere to move upwards through the grid of roof tiles. For this, simply create a keyframe at the start of the animation by clicking on the Keyframe button in Cinema 4D. Then move forward a couple of frames and move the sphere upwards through the roof files. Add another keyframe to animate the sphere moving.
If you play back your animation, the sphere shoots upwards through the roof tiles, but right now it just passes through rather than collide with them. We still have to set up the physics simulation in Cinema 4D for that to happen. Fortunately that is actually very easy!
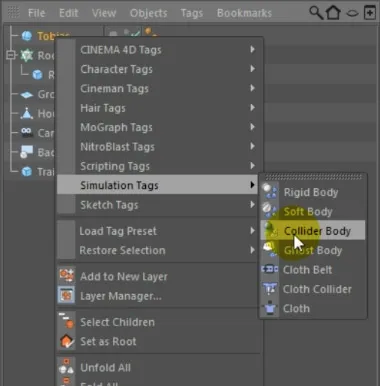
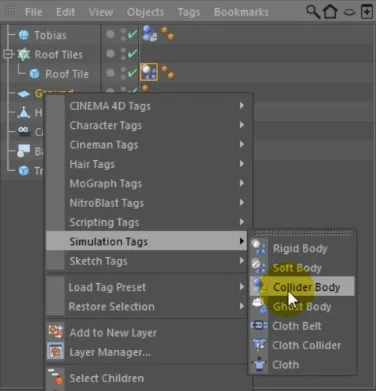
Cinema 4D uses tags to allow you to define and manage all sorts of properties on the objects in your scene. We want to mark the sphere, the roof tiles and the scene geometry as physics objects so they interact realistically. First, right click on the sphere - I called mine ‘Tobias’ - and go to Simulation Tags -> Collider Body.
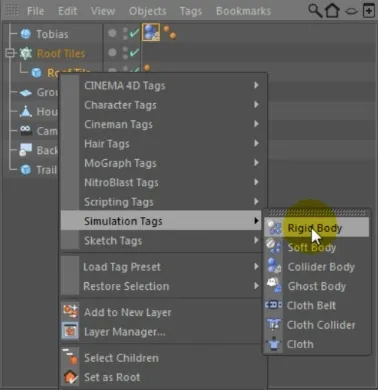
This will add the Collider Body tag to the sphere. Next, select the Roof Tile object - the individual tile, not the Cloner - and add a Rigid Body tag from the Simulation Tags -> Rigid Body context menu.
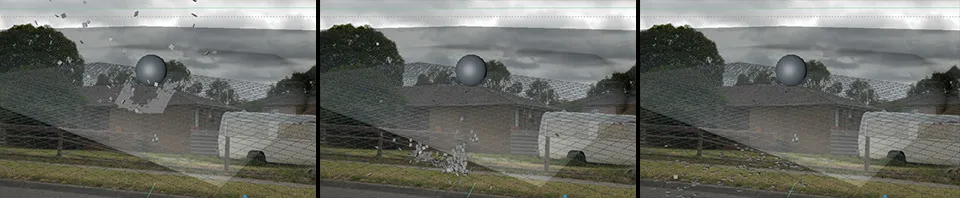
This will use rigid body physics to animate the roof tiles realistically and the sphere will smash through the tiles because we have marked it to be a Collider Body. A collider object interacts with other physics objects in the scene, but does not have gravity applied to itself.
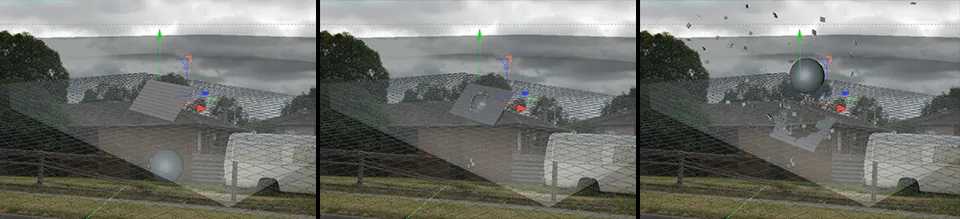
We are starting to get some cool looking destruction happening!
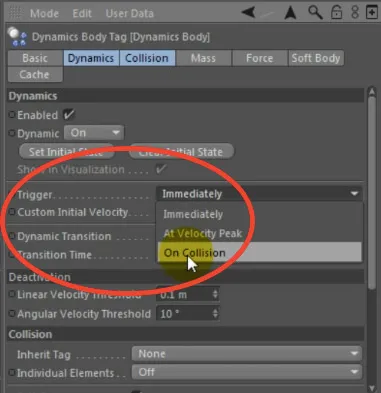
You may notice that the roof tiles are affected by gravity and start to fall even before the sphere smashes through them. We do not want the physics simulation to be applied to the roof tiles until they are hit by the sphere. For this, select the Rigid Body tag on the roof tiles and go to the settings tab. Change the Trigger property to ‘On Collision’.
This will cause the physics simulation to be frozen for the roof tiles until they are being hit by another physics object - in our case the sphere. Finally, add a Collider Body tag to the ground, the house, the trailer and any other geometry you might have set up in the scene. This will ensure that the roof tiles do not pass through these object and therefore appear to be interacting with these elements.
If you play back the animation in Cinema 4D now, you should see the sphere smash through the roof tiles. Some of them will slide off the roof, others will be flung off and bounce across the geometry in your scene. Very cool!
You may notice that the tiles slide a little bit too smoothly along the ground or that they bounce too strongly off the geometry in the scene. You can adjust this behaviour by changing the Bounce and Friction properties found in the Collision settings for the physics tags. I brought down the Bounce and increased the Friction properties for my roof tiles.
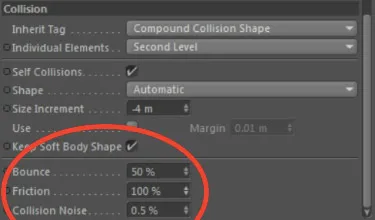
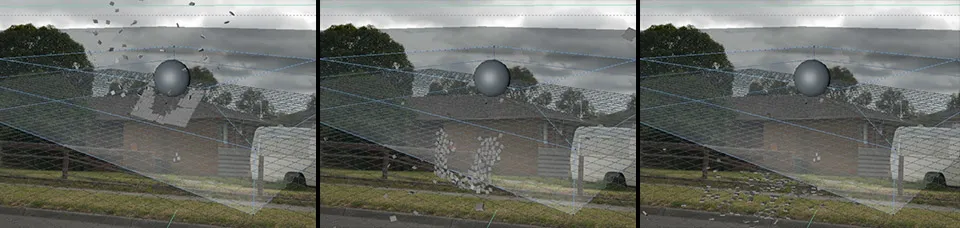
After adjusting these properties, the roof tiles behave a lot more realistically as they are scattered all over the scene.
Now let’s look at setting up some materials and rendering out this roof destruction sequence so we can composite it back into our scene in Adobe After Effects!
First, we want to assign a material to the roof tiles so they don’t look all boring and grey. We want them to be the same colour as the roof in our background image. For this, create a new material and go over to the Color settings. adjust the Color and Brightness properties until the material matches the colour of your roof. You may also want to tweak some of the Specular settings to make the roof tiles appear less shiny.

Assign the material to the roof tiles by dragging it onto the Roof Tile object that we added below the Cloner object in our scene. If you preview the scene now (CTRL+R), the roof tiles should match the colour of your roof. For me, I gave them a brown colour to match up with my background image.
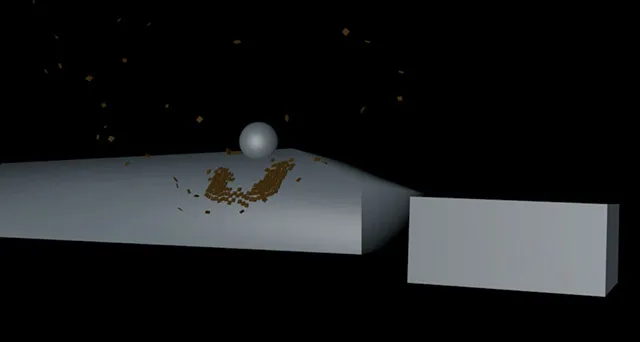
Now we’re faced with a problem. Yes, we can see the roof tiles which we want to composite into the destruction effect, but we can also see the helper geometry we have set up: the house, the trailer, the ground and the sphere.
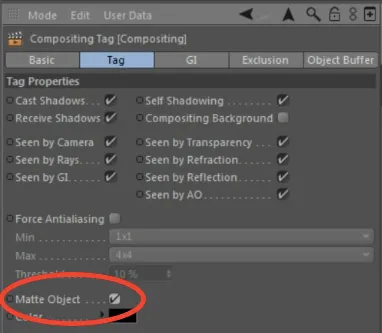
We need to tell Cinema 4D that we do not want to render these elements and you can do that by assigning a Compositing tag to the geometry you want to hide. dd this tag to the house, the trailer, the ground and the sphere.

In the settings for the Compositing tag, enable the Matte Object checkbox. This tells Cinema 4D that this object should still interacts with everything in your scene as normal, but should not be included in the final render.
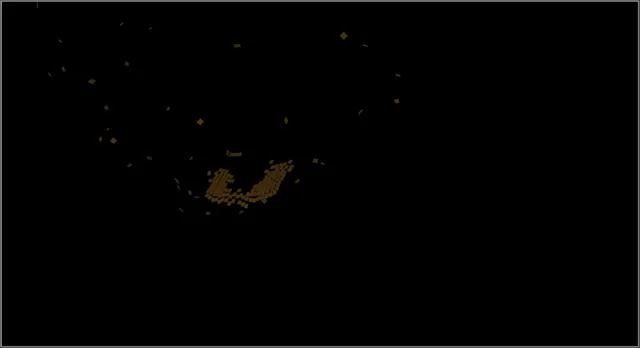
If we preview the scene now, we can only see the roof tiles being destroyed and flung all over the place. Perfect!
Go to your project settings and select the Output tab. Ensure that your resolution is set up correctly and choose to export ‘All Frames’.
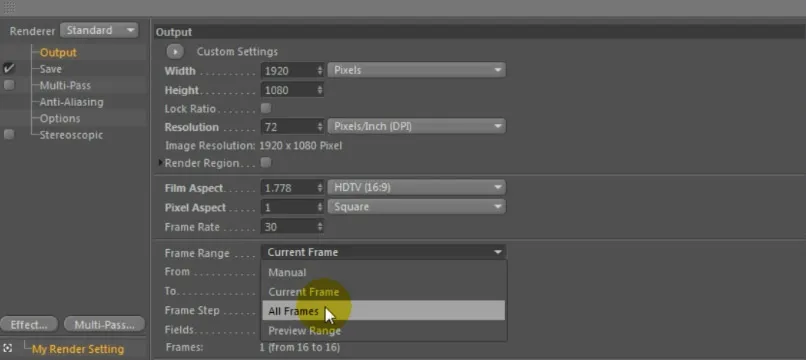
Close the settings dialog box. To render the entire animation, go to Render -> Add to Render Queue. This works very similar to how the render queue works in Adobe After Effects.

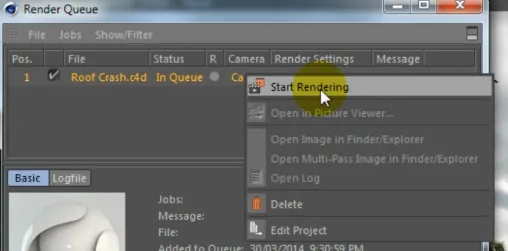
The Render Queue popup will open automatically, with your animation already added. Make sure that you select the correct camera, the one that we matched up with the angle of our real world camera used to film the scene.

Finally, right click onto your animation in the render queue and select ‘Start Rendering’ from the context menu.
The Cinema 4D destruction scene will now be rendered. I chose to export my animation as a PNG image sequence with alpha. Once the render is complete, we can return to After Effects to finish off the roof destruction effect!
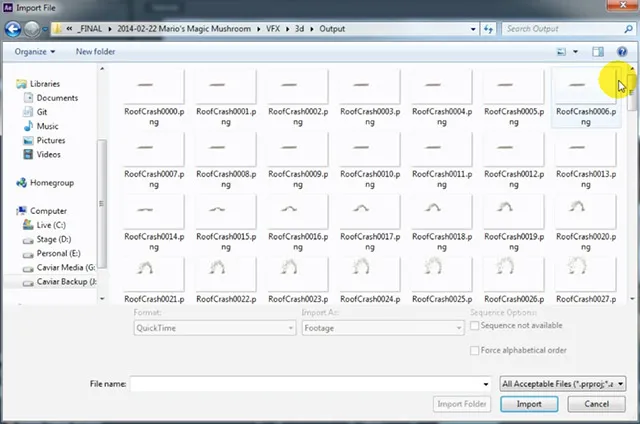
After exporting my destruction scene from Cinema 4D, I ended up with a folder containing the frames for my animation as PNGs with alpha transparency. You can clearly see the roof tiles and how they are being smashed in from below.
Import the exported frames (or the video if you exported your project as a video) into Adobe After Effects.
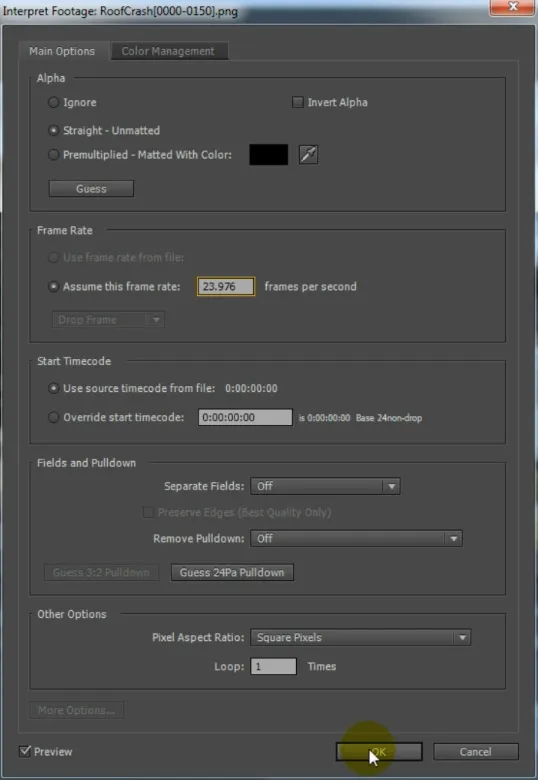
Right click the imported clip and select ‘Interpret Footage’ from the context menu. In the interpret footage popup box, ensure that the frame rate is set to match your footage and set the Alpha option to ‘Straight - Unmatted’. Then click OK.
Finally, drag the rendered elements into your scene and position them to time them with the giant crashing through the roof. I placed my RoofCrash layer above the base elements but below the debris stock footage.

If you play back your scene now you should see the effect we created in part 1 of this tutorial and you should see the roof tiles flying around the scene with realistic physics. Pretty cool!

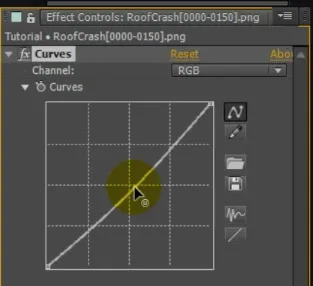
Now of course, the rendered elements might not sit perfectly in your scene and so you will likely have to perform a few simple colour adjustments to the roof tiles. I applied a Curves effect to my RoofCrash layer and brought down the brightness by a little bit.
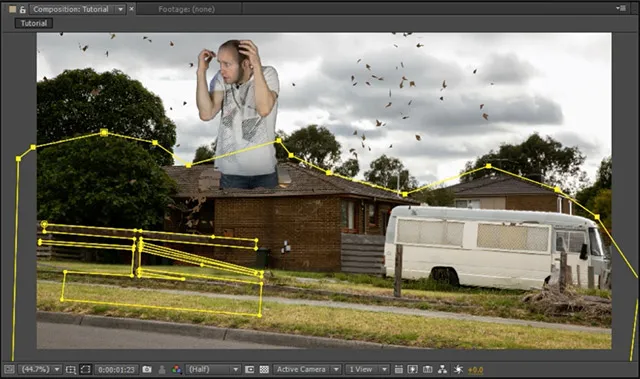
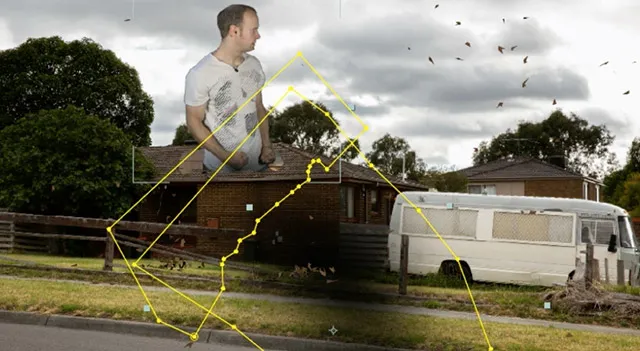
Also, since we have tiles sliding off the roof and falling on the ground, we want to make sure that these tiles fall ‘behind’ any foreground elements in the scene. There is a fence standing in the front of the house and you will need to add masks onto the RoofCrash layer, outlining any foreground elements. I added a number of masks around the shape of the fence and one larger mask onto the ground in front of the fence.
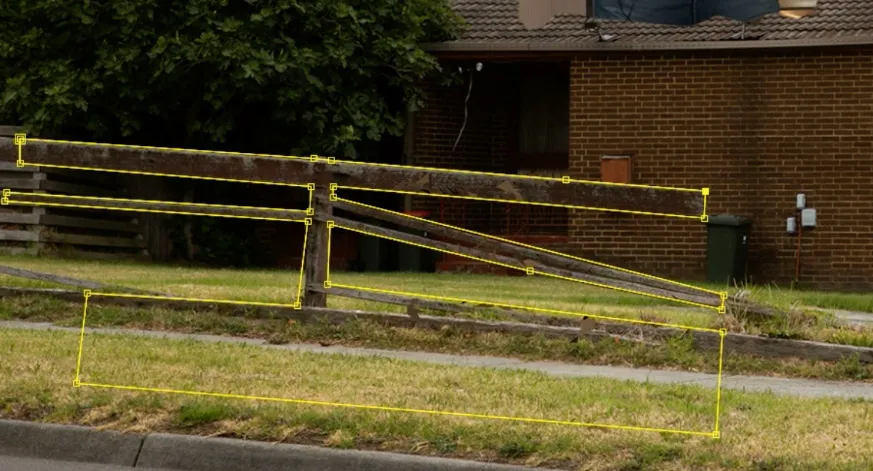
Set the mask mode for these foreground masks to ‘Subtract’ to cut out any tiles that appear in front of the fence. Playing back the composition now, the roof tiles will fall behind the fence.

To finish off the roof destruction effect, let’s add a few simple shadows to blend the roof tiles and the giant a little bit more realistically into the scene!
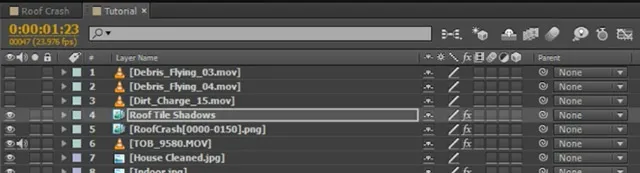
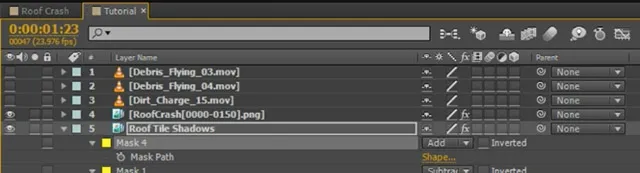
For that, duplicate the roof tiles layer. I called this copy ‘Roof Tile Shadows’. Drag the contents of the layer in your preview window to offset the shadows from the actual roof tiles. Depending on your scene, you might want to also rotate the layer slightly to make it seem like the shadows are mostly falling onto the ground.
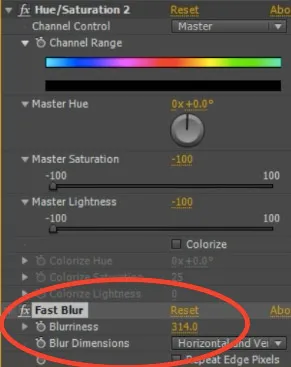
Apply a Hue/Saturation effect to the shadows layer and bring down the Master Saturation and Master Lightness to -100.
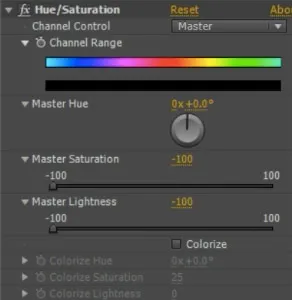
This will make the roof tiles shadow layer appear fully black.

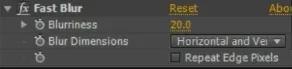
Now apply a Fast Blur effect to the Roof Tile Shadows layer and bring up the Blurriness. This will soften the shape of the black tiles and blur them out into something that looks like shadows.
Finally, add a few masks onto the shadows layer to ensure that no shadows are being cast onto the sky.
I added a large additive mask around the area of my scene where I did want the shadows to show up. I also decreased the Opacity of the shadows layer to around 30 to make the shadows less visible. We just want to add a small illusion of shadows to make the rendered roof tiles blend a bit better into the scene.
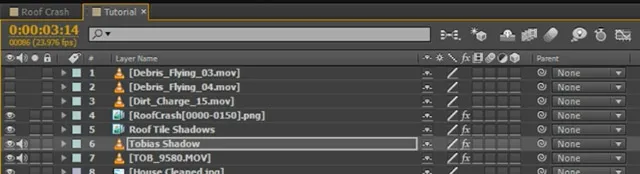
Since we are already adding shadows, we can use the exact same technique to create a shadow for the giant crashing through the roof. Duplicate the Giant layer. I called this copy ‘Tobias Shadow’
Apply a Hue/Saturation and a Fast Blur effect like we did before to create a large dark shadow.
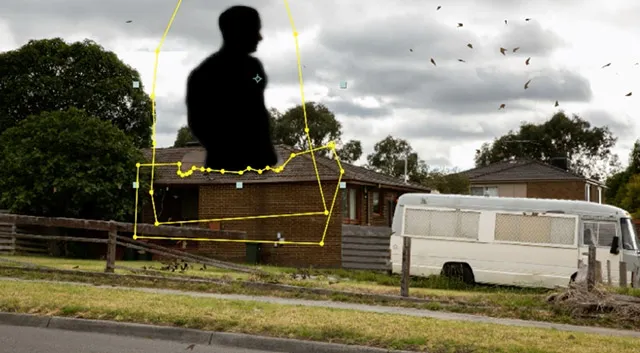
Add a Fast Blur effect to the layer. I jacked up the Bluriness of the Fast Blur effect pretty drastically to eliminate the actual shape of the giant shadow. I don’t want it to be too distinguishable or the viewer might see that it’s just a copy of the Giant layer.
Rotate and offset the shadow to fall onto the scene. There is no direct sun in my scene, but most shadows seem to be falling towards the right and so I aligned my shadow layer to fall towards the right side. I also lowered the opacity a fair bit to make the shadow blend a bit better into the scene.
And with that we are done with our roof crash destruction effect!

I have shown you how to green screen a Giant and make them smash through the roof. We then created some 3D destruction elements with realistic physics in Cinema 4D and integrated them back into our scene using Adobe After Effects.
The very same technique can be used for a lot of different destruction VFX! Shoot your scene, add some basic stock footage elements and then integrate 3D elements to finish off your destruction effect!
I hope you enjoyed this tutorial and will have fun using this technique for all sorts of awesome stuff!