 Surfaced Studio
Roof Destruction VFX with After Effects and Cinema 4D - Part 1
I won’t lie to you, this is going to be a rather long tutorial. But it will be worth it! You will learn how to create a sweet destruction effect of someone crashing through the roof just like the one you can see in our VFX Short Film Mario’s Magic Mushroom! Due to the length of this tutorial, I have decided to split it into two parts.
Part 1 - In this part I will show you how to create the base destruction effect of someone crashing through the roof in Adobe After Effects. We will add some basic destruction stock footage into the scene and you could consider the effect completed at this point.
Part 2 - To enhance the destruction effect, I will show you how you can simulate debris elements using physics in Cinema 4D and then composite them back into your final scene!
Let’s get started with Part 1!
Putting a Hole into The Roof
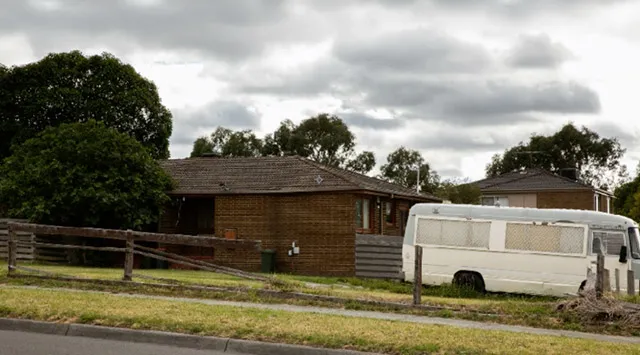
First, you need to get an image of the outside of a house. I have taken a photo in Melbourne’s suburbs of a rather shaggy looking house with a trailer in front of it. I took this photo on a cloudy day and I recommend you do the same. It is tricky to realistically integrate elements into a sunny shot because you have to also create realistic looking fake shadows and that can be very complicated.
Create a new composition in Adobe After Effects and place your photo of the house into it.
I have also taken a simple shot of the inside of my house. We will use this image to show through the hole in the roof so any interior image will do. Import this image into your composition.
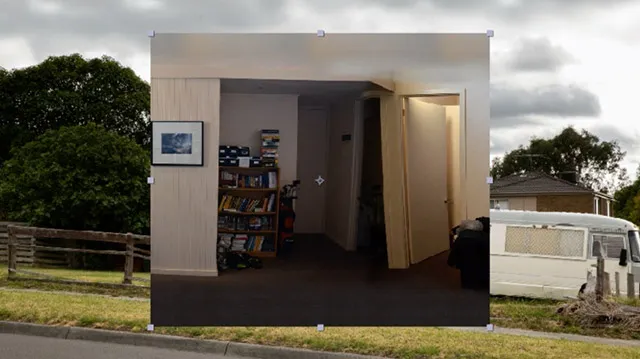
Because we want the interior to show through a hole in the roof of the house, drag the image below the shot of the outside of the house.

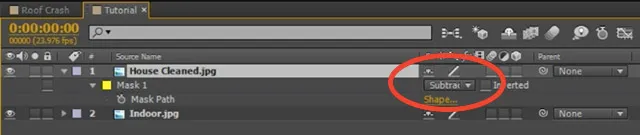
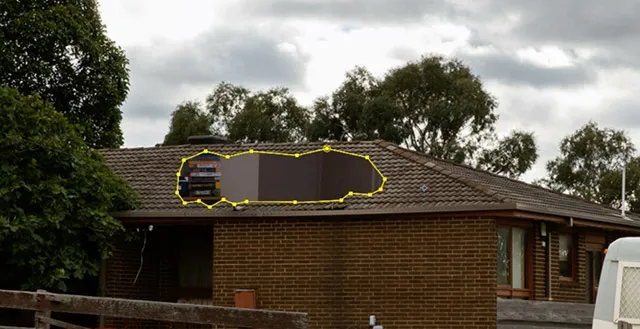
Then apply a mask to the house layer to cut a hole into the roof. Make it nice and ragged so it looks like it was broken through rather than cut out. To create a hole, you need to set the blend mode of your mask to ‘Subtract’.
You should now be able to see the interior of the house showing through the hole in the roof. Scale the interior image as needed to make it sit nicely in the shot.
Next, we will composite a shot of a person growing into a giant and smashing through the roof into the scene!
How To Green Screen a Giant
In order to create the effect of me growing into a giant and smashing through the roof, I recorded a little clip of me standing up in front of a green screen. There are a number of things to watch out for when using a green screen and you can learn more about them in my Common Green Screen Mistakes tutorial.
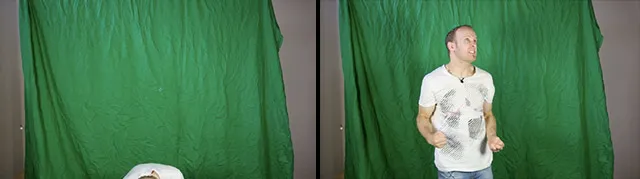
Import the footage into your composition and let’s remove the green screen. We will use the Keylight effect in Adobe After Effects, but because the effect itself is rather computationally expensive, I like to first restrict my footage to only the parts that I actually need. For this you can apply a simple mask around your body and animate it to follow your movement. Leave plenty of space around the edges.
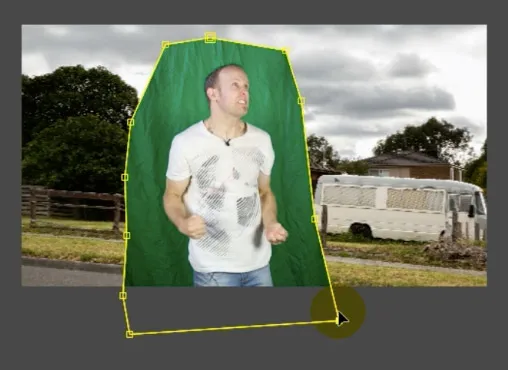
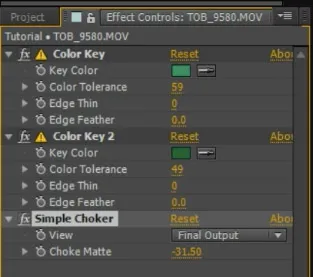
Before applying the Keylight effect, you can use simple (and quick) Color Key effects to remove the majority of the green pixels. Simply apply the effect to your layer, use the Key Color picker to select a green part of the footage and adjust the Color Tolerance.
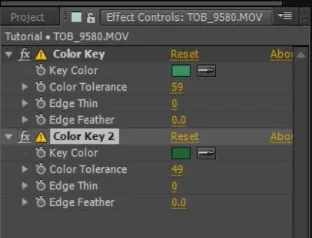
Make sure you don’t accidentally remove parts of the person in the footage, we only want to remove the main parts of the green screen. After applying the mask and the Color Key effects to your video, you should end up with something like this:
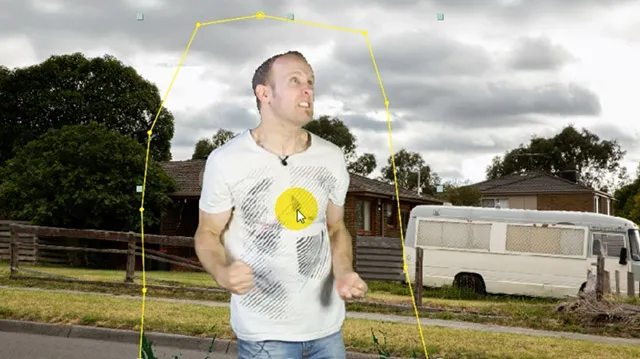
It is still a bit rough around the edges and there are some green bits and pieces left from the green screen.
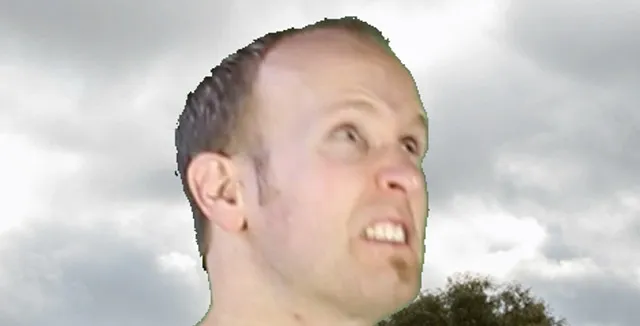
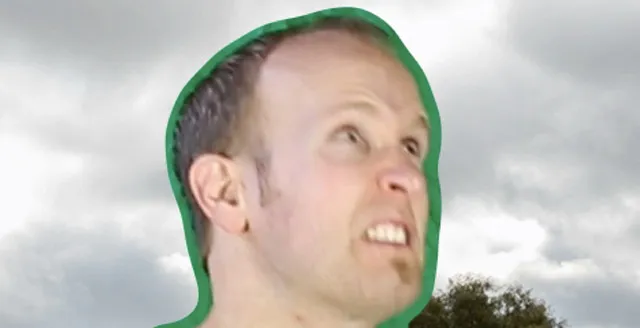
Because the Color Key effects have made the edges of the person look rather ragged, we want to pull back the green screen a little bit. For this you can use the Simple Choker effect. Apply this effect to the layer and decrease the Choke Matte property until you have a smooth green outline around the elements you want to cut out from the footage.
You want the green outline to be thick enough to contain any detail items, for example my hair, in it. This will allow us to cleanly remove the green screen without destroying these details when we apply the Keylight effect.
Finally, apply the Keylight effect to the clip and use the color picker to select the green Screen Colour.
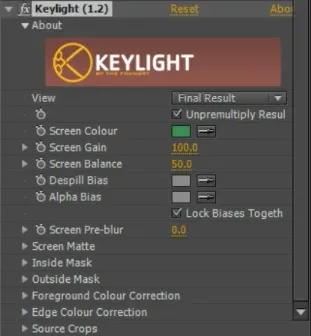
The Keylight effect will intelligently remove the green from your footage and should leave details like hair intact, giving you a much nicer result. However, we do need to do a little bit more tweaking as I can see a dark shadow/outline around my body.
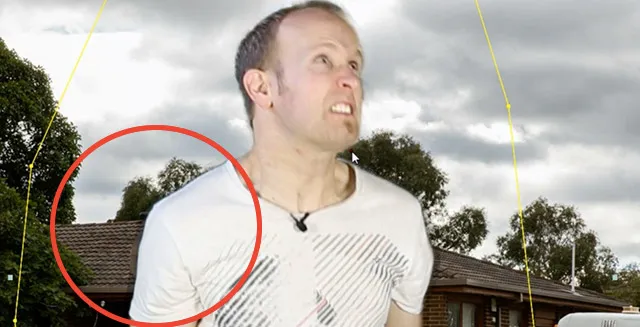
We need to adjust the Keylight effect so it can determine more precisely which areas of the footage represent the green screen and which ones represent the content we want to keep. For that, go back to the effect parameters and change the View property to ‘Screen Matte’.
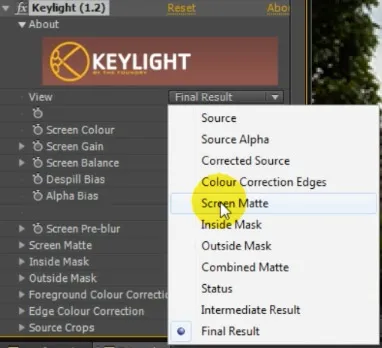
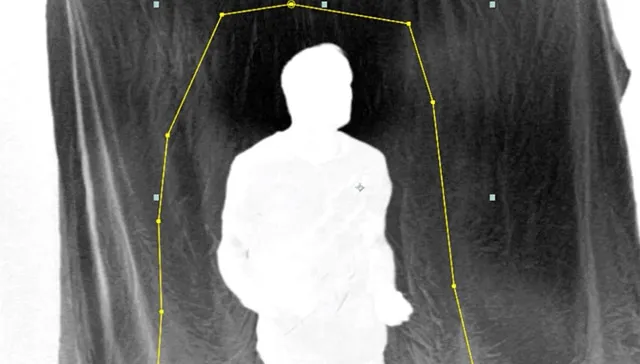
This will give you a greyscale representation of your footage and show you which parts of the footage the Keylight effect is going to remove. Evey part of the image that is black will be removed, every part that is white will remain opaque and the grey pixels represent semi-transparent areas.
To adjust the Keylight effect, you have to adjust two main properties: Clip Black and Clip White. These can be found in the Screen Matte tab in the Keylight effect parameters.
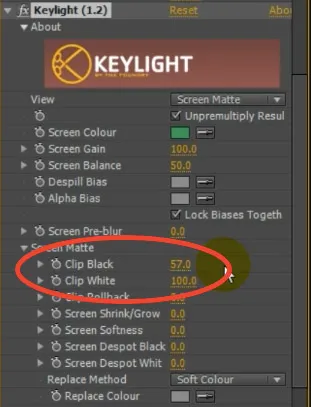
Increase the Clip Black property and decrease the Clip White property to find the best balance that gives you a clean white matte over only the elements you want to extract from the footage. The green screen should be entirely black.
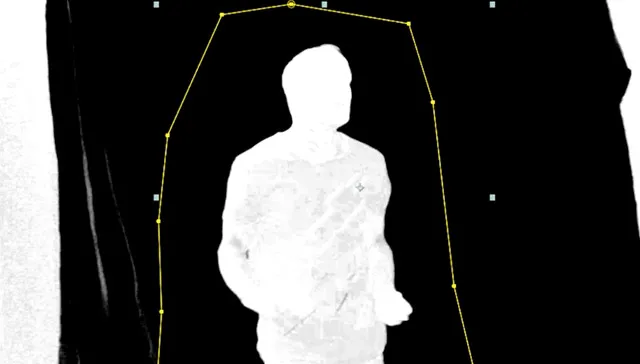
If you switch the View mode back to ‘Final Result’, you should now see the fruits of all your labour: a properly green screened person.
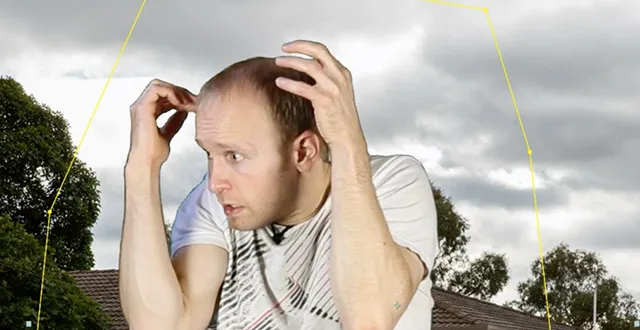
Let’s get this giant integrated into our scene!
Compositing The Giant
Now that we’ve properly green screened our clip, we can position it in the scene just above the hole in the roof.
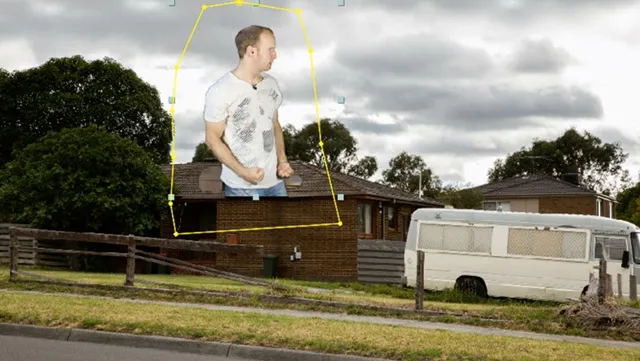
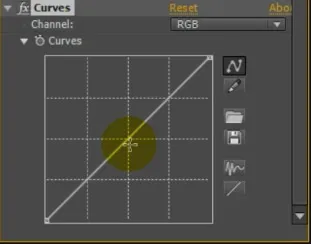
If your clip does not fit into the shot because it is too bright or too dark, you can use some simple Colour Correction Techniques to blend it in a little bit more realistically. Since my Giant clip is a little bit too bright for the background, I applied a simple curves effect and brought down the mid tones by a touch.
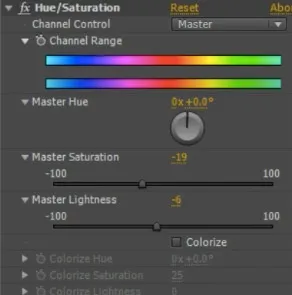
I also applied a Hue/Saturation effect and reduced both the Master Saturation and the Master Lightness to blend the giant a little better into my shot.
This looks much better, the two clips seem to match properly now.
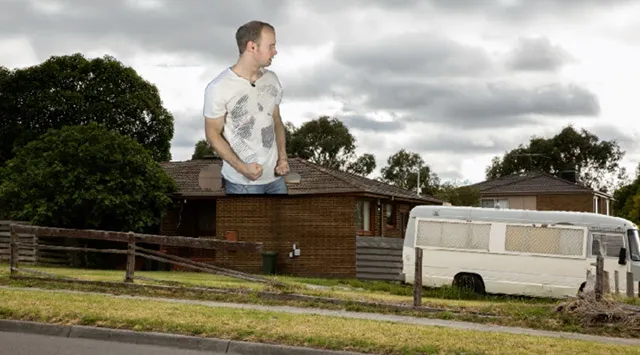
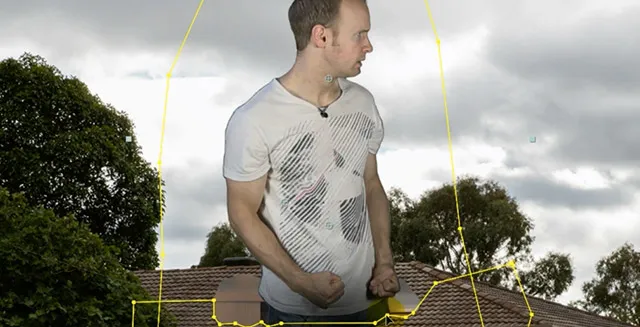
You may have noticed that my legs are still sitting on top of the roof even though they should be coming from ‘inside’ the house. We can fix this by applying a simple subtractive mask to the Giant layer that follows the shape of the lower edge of the hole in the roof.
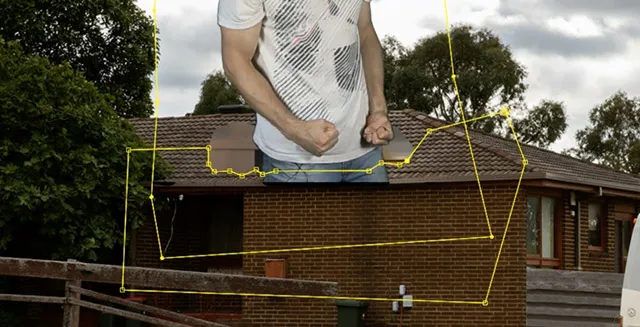
Remember to set your mask mode to Subtract.
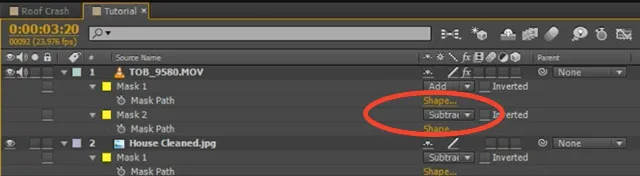
This will make it look like the Giant is emerging from inside the house.
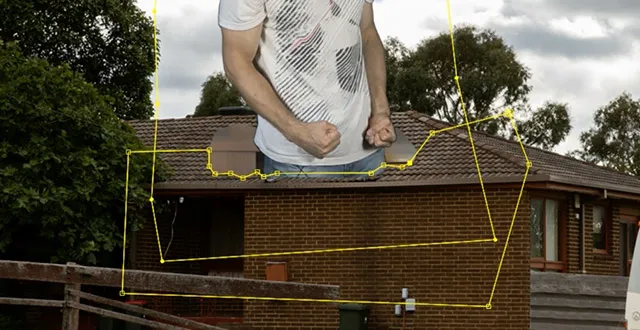
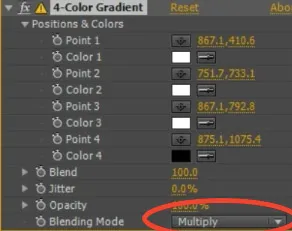
Another little trick that will enhance the effect of the person standing in the house is to add a little shadow around the legs just where they are poking thorough the hole. There are a couple of options, for this tutorial I will use the 4-Color Gradient to achieve this effect. Apply the 4-Color Gradient to the Giant layer.
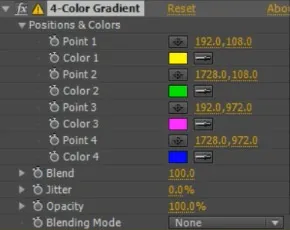
With the default settings, your image will now look like something out of an Apple commercial.
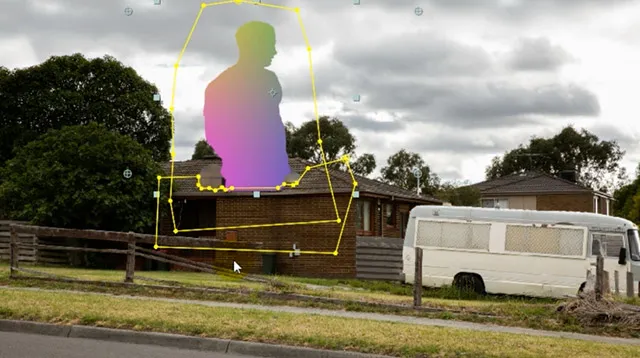
The gradient flows between the 4 points that you can define in the 4-Color Gradient effect. Set the colour for the first 3 points to white and the colour of Point 4 to black. Position the points so that the black area sits just where the Giant is poking through the hole.
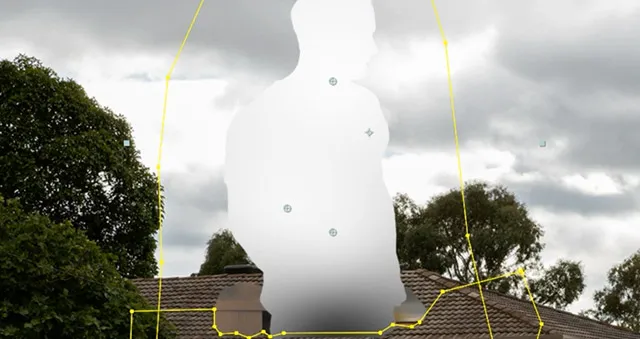
To apply this drop shadow properly onto your Giant layer, set the Blending Mode of the 4-Color Gradient effect to ‘Multiply’.
The drop shadow is fairly subtle, but it helps sell the effect of the person crashing through the roof from the inside of the house.
We’re finally ready to add some destruction elements to the roof destruction effect!
Adding Dust & Debris
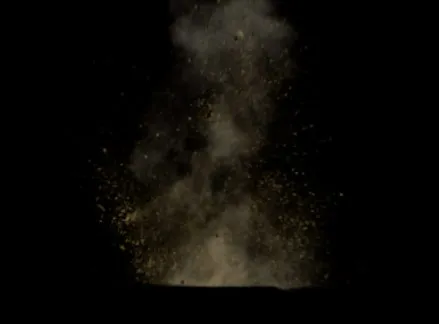
As always, I will use stock footage from Action Essentials 2 by Video Copilot here, but you can get free stock footage elements from detonationfilms to follow along with this tutorial. Here is a dirt burst element from Action Essentials 2:
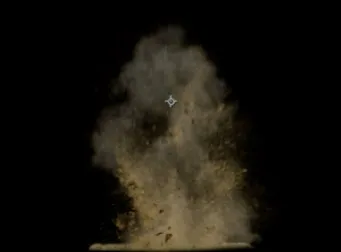
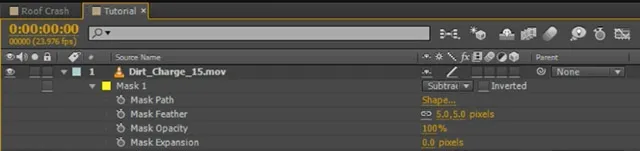
Because I can see a little bit of the ground in the stock footage, I first applied a simple mask to the bottom part of the dirt element.
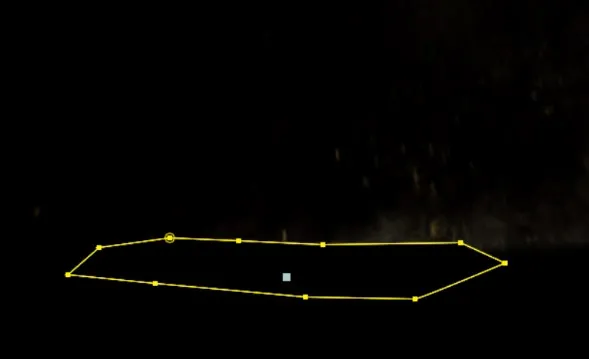
I then set the Mask Mode to ‘Subtract’ and increased the Feather property a little bit so the mask does not have a hard edge.
It pays to spend some time and ensure that the mask at the bottom of the debris element will match the shape of the hole that we cut into the roof. Once we removed the ground from the stock footage element, we are ready to place it in our scene!
Place the stock footage element over the hole in the roof and time the layer so that it matches up with the video of the Giant crashing through the roof.
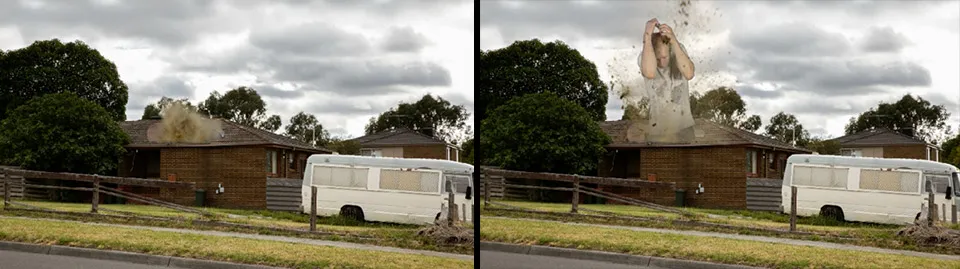
Then rinse and repeat. I added a couple more debris and dirt elements into my scene to make the roof crash effect look a little bit more interesting and destructive. You may have to perform small cleanups here and there as you place your stock footage elements in the scene to make sure they fit together nicely.
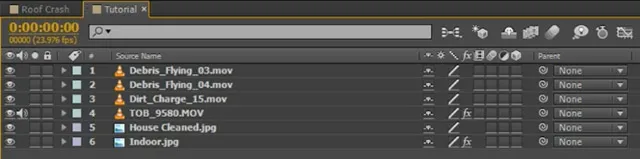
Once you’ve added all the destruction stock footage layers, you should have a pretty cool roof crash destruction effect!

That concludes the first part of this tutorial. In the next part we will look at creating some cool roof debris with realistic physics in Cinema 4D and compositing them back into our scene using After Effects and 3D VFX integration techniques!