 Surfaced Studio
Adobe After Effects Basics - Masking Tutorial
Ever since I started putting up After Effects tutorials, I have gotten an increasing number of questions where people seem to get stuck on some of the more fundamental techniques rather than the actual visual effect. So I decided to start a small tutorial series to cover these After Effects Basics for all the new starters out there.
The first topic is masking and I hope you enjoy it :)
What is masking
All visual effects are created by combining different visual elements together. This allows you to add or remove items to or from your footage and create complex visual illusions for your audience.
In Adobe After Effects, each of these visual elements is represented by a ‘layer’. Layers are placed on top of each other with each one obscuring the layers beneath by default.
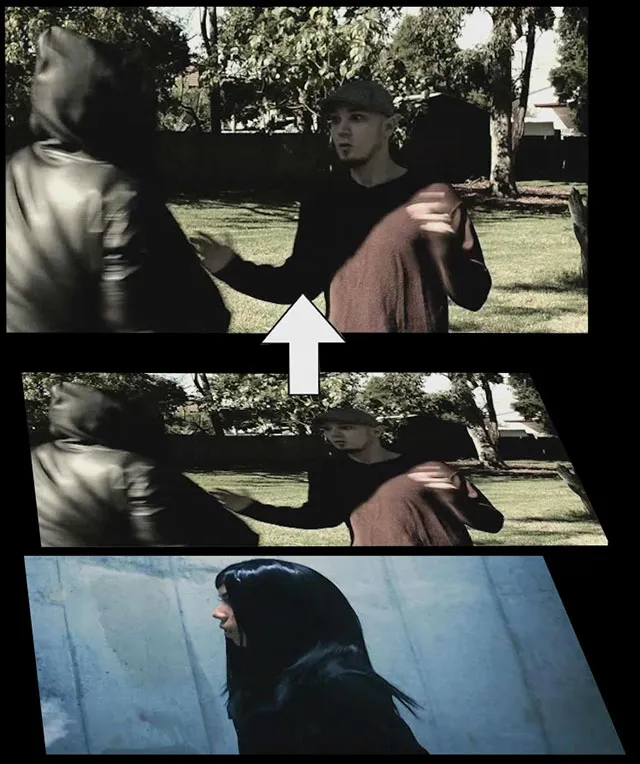
However, you can create masks to cut out certain areas of a layer so the ones below will show through. This is called masking :)
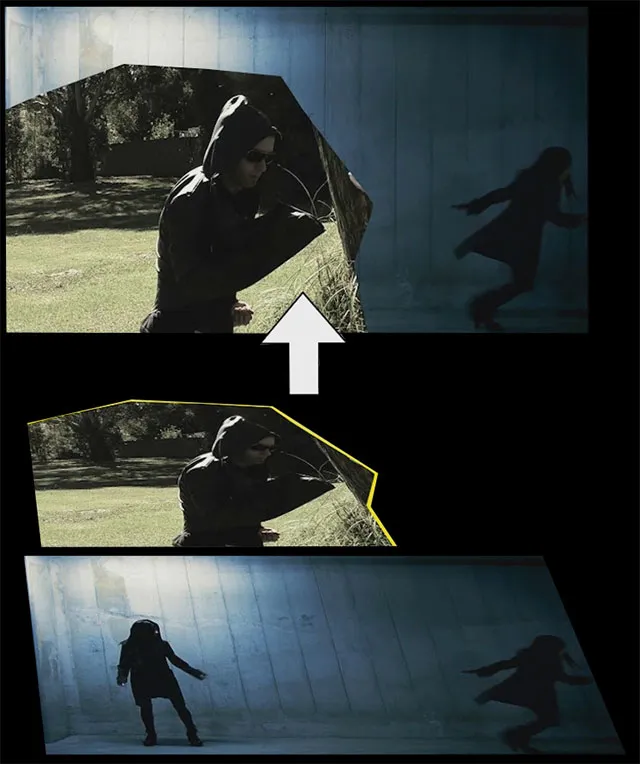
Let’s look at how you can create masks in Adobe After Effects!
Drawing Masks
There are different tools available for masking in Adobe After Effects: shape tools (for rectangles, circles, etc) and a pen tool for creating custom mask shapes. You can find these tools in the toolbar.
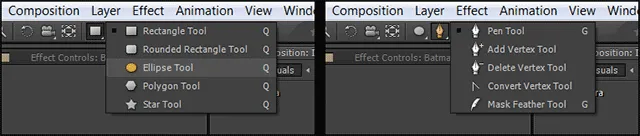
Select a shape or the pen tool, make sure your layer is selected and use the tool to draw and drag a mask onto the layer.
When using shape tools for masking, you can hold down the Control key to center the new mask in the middle of the layer. Hold down the shift key to scale it uniformly in width and height when you drag your mouse.
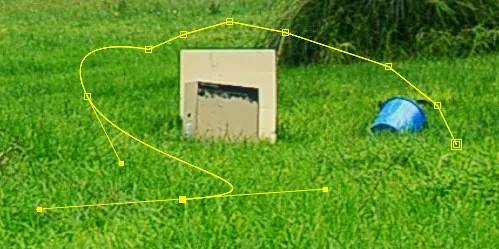
When using the pen tool, make sure to close the mask shape by placing the last point exactly on top of the start point for the shape.
Also, when you click to place a point and then, without releasing the mouse, start dragging, you will reveal the bezier handles that allow you to add smooth curves to your masks :)
If you suddenly see a solid shape being created when you try to draw a mask, hit undo and ensure that the layer you are drawing the mask on is actually selected. Otherwise it will create what is called a shape layer.
Mask properties
Once you’ve added masks to a layer, you can reveal their properties by selecting the layer and pressing the ‘m’ key. Alternatively, you can expand the properties of the layer by clicking on the twisty next to the layer name to get to the masks.
In After Effects CS5, each mask has 5 properties:
Mask mode
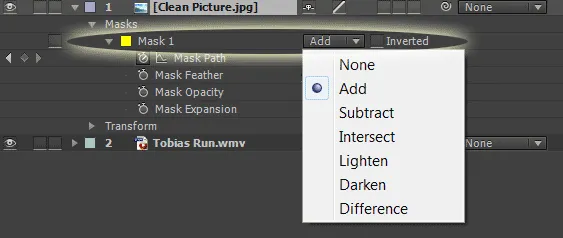
The mask mode determines how a mask is applied.
In Add mode, only the contents of the mask will be visible, the rest of the layer will be discarded.
In Subtract mode, the contents of the mask will be removed from the layer.
There are other modes like Intersect or Difference that only apply if you have multiple overlapping masks on the layer. Play
around a little to learn what they do :) Personally, I don’t really use them much.
Mask path
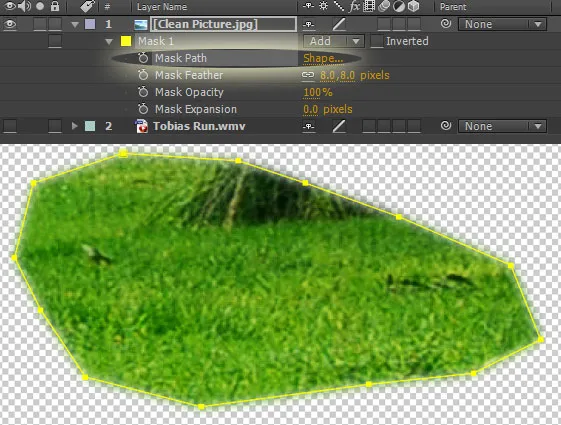
The mask path is the shape of the mask, consisting of the vertices as well as their connecting lines. As you will see in a little bit, this path can be animated which is often used to cut out animated elements with masking to create more complex effects.
Mask feathering
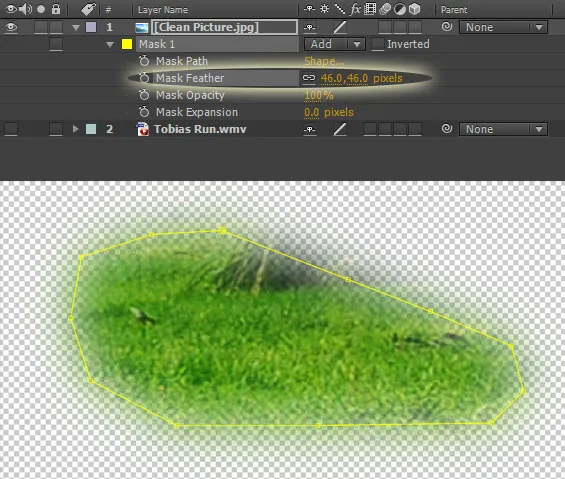
Mask feathering allows you to smoothen out the edges of the mask. This is very useful for blending the masked out elements gently back into the scene :)
Mask opacity
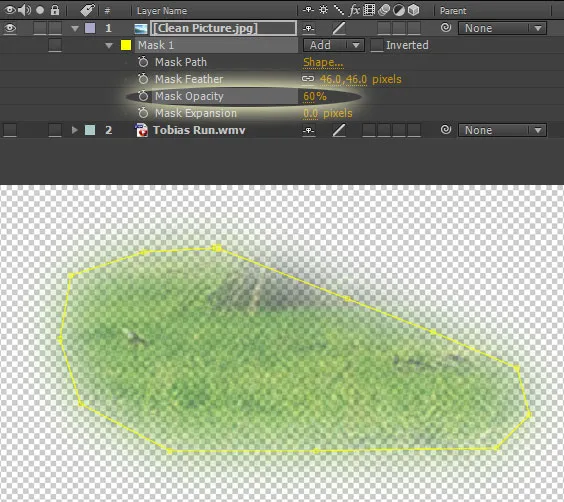
The mask opacity determines how translucent the masked out elements will be. Note that this will affect everything that is NOT in the mask if you’re using the Subtract masking mode. Also, sometimes this may behave differently to what you expect if you only have a single mask on your layer.
Mask expansion
Mask expansion allows you to expand or contract the shape of your mask. You won’t actually see the mask path change, but you will see more or less content being included within the mask as you change this parameter.
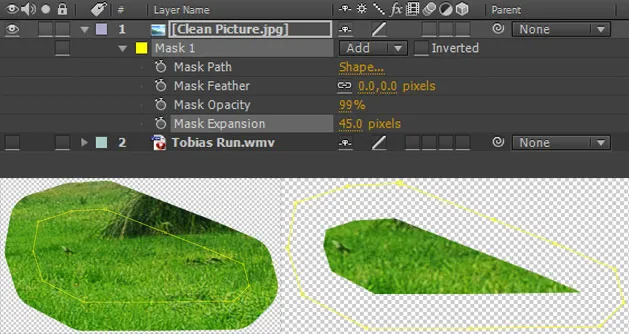
Animating mask in After Effects
One of the powers of masking is that you can animate the masks. This is useful to trace and follow moving elements in your footage and either cut them out or add them into your scene :)
You can enable the stopwatch icon next to the mask path property and then move the mask around or change the vertices around and the mask will be animated and interpolated between the keyframes.
To modify a mask, here are a few things to keep in mind:
When all the vertices are solid squares, dragging will move the entire mask. You can get into this ‘mask drag’ mode by Alt-clicking on the mask.
When all vertices are circles, dragging will either move the individual vertex or the selected edge. You can get into this mode by selecting the mask and then clicking outside of the mask shape.
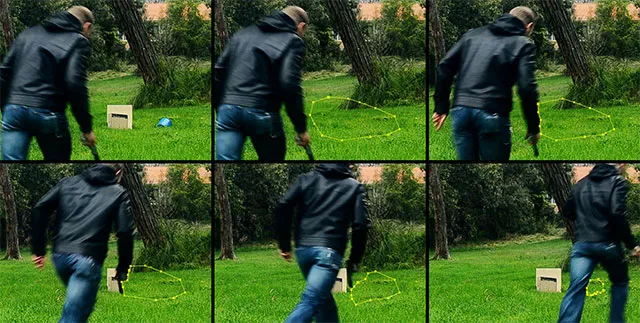
Masks and masking is a fundamental and very powerful tool to create some rather complex effects. I guarantee there will hardly be a visual effect you work on that does not require masking in one form or another :)
14 Comments
thanks.. neat little tips here
thanks very much that helped a lot can u plz give a brief on motion traking for bignners
I already have a motion tracking tutorial on my website. You can find it here: https://www.surfacedstudio.com/tutorials/after-effects-motion-tracking-tutorial
Thank you very much for this wonderful tutorial. Exactly what I was looking for.
thank you very much buddy but i have a problem in moving the mask when i am doing the advance car hit how to mask the car and it's shadow what should i do
I have a tutorial that explains how to create the 'car hit' effect :) [youtube id="f9GGh5oWjbs"]
Mask Path! That's what I was looking for!
Thanks man, you made my day.
Great lesson! Thanks
Hi Tobias
Thank you for your amazing toturials
I've learned a lot from you!
But could you Upload the footages of each toturial so that we can download them and exercise?
Hi Mostafa, thank you for the feedback. This is a pretty old tutorial, all my new ones usually have the footage attached for practice. For this particular one you can really use any clip you want as it's more about the concept than the final effect :)
Yeah, Thank you again ;))
Hello there,
You provide one of the best resources online and finally helped me get over my fear of AE... once and for all :) Problem I am having following your tutorial is that there's no downloadable files to follow along. you can imagine how difficult it is to find matching/similar footage to be able to repeat the steps you are taking... is it possible you include original files for our beginner AE series? and even intermediate?
Thank you!
Hello there,
This is a very old tutorial and for a lot of my old tutorials I do not have sample files for download. All my newer tutorials do have them though.
For this particular one though (as well as a lot of my old tutorials), you can follow along with ANY video you may have. Download a clip of some cows from the internet, take your mobile phone and film a random clip of you in your room, it doesn't really matter - the principles are always the same :)
can i get the video you used for the tutorials to practice