 Surfaced Studio
How to Create Gunfire (Muzzle Flash) Effects in HitFilm 2
Creating Gunfire in HitFilm2
This tutorial will be the first VFX tutorial I have made that does not use After Effects. Instead, we will be using a different software tool all together: HitFilm 2. HitFilm 2 is an all-in-one solution for indie film makers that combines video editing and VFX compositing in a single software package.
HitFilm 2 comes in an Express and an Ultimate version, costing $0 (yes, that’s zero) and $399 respectively. The guys at FXHome were kind enough to give me free access to the Ultimate version to create some great content and I decided to use it to show you how to create one of the most requested visual effects: a muzzle flash!
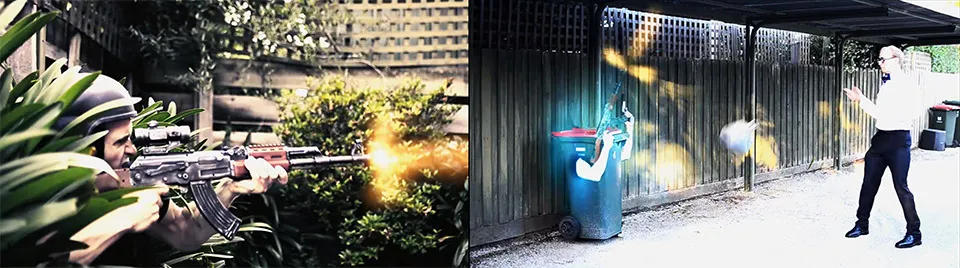
Here are some examples of muzzle flashes created with HitFilm 2:
HitFilm 2 Interface
The interface of HitFilm 2 is separated into different sections and changes depending on which main tab you work in. Each tab roughly represents a step in your film making workflow. I won’t cover all of the functionality of HitFilm 2 in detail since we will be focussing on the Edit & Effects section of the interface, but here is a quick overview:
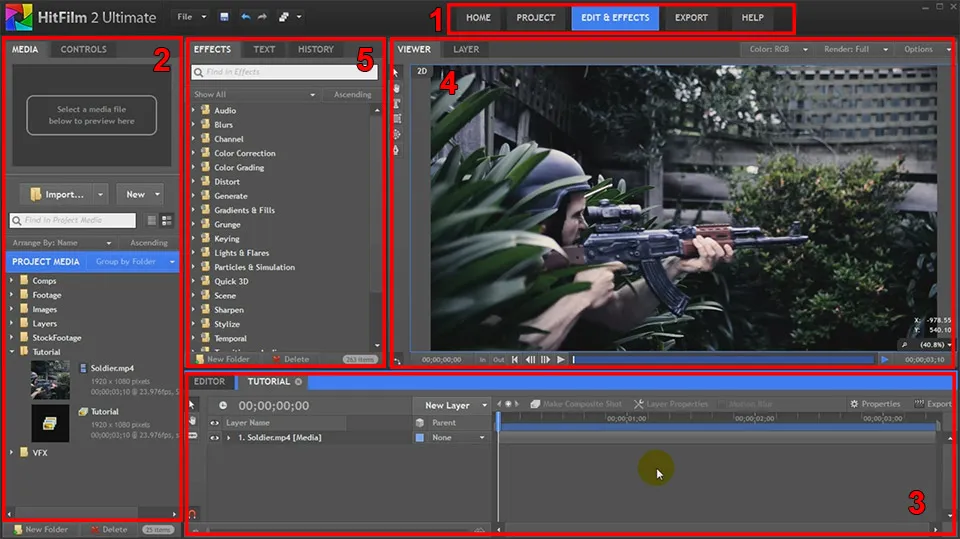
1. Main Tab Control
HitFilm 2 aims to provide a complete workflow from managing your project files, to editing, visual effects and the final export. These tabs allows you to jump between the different stages of your workflow. Currently, we are looking at the Edit & Effects section of the interface where you edit your footage and apply visual effects to any clips you like.
2. Media and Effect Controls
The panel on the left side has 2 tabs. One tab shows all the media you imported into your projects. This includes footage, images, audio files and other resources that will be available to complete your video project. The Control tab displays all the settings and effects on the layer you have currently selected. We will use the Control tab extensively when we get to tweaking our Gunfire effect.
3. Timeline Window
This window shows the layers in your current composite shot. A composite shot is the same as a composition in After Effects. Under the Editor tab in the same window you will find your main project timeline and all the clips you added into it.
4. Preview Window
This window displays a preview rendering of your scene. It will render any effects you place inside your composite shots so you can immediately see what you are working with.
5. Effects, Text and History
HitFilm 2 comes with a large amount of inbuilt effects. They are neatly organised into categories into the Effects panel. HitFilm 2 also contains tools to manage text elements in your composite shot and to undo/redo using a specialised History window.
Now that you know the basics of the HitFilm 2 interface, let’s get started creating our gunfire effect!
Creating a Muzzle Flash
Create a new Composite Shot in HitFilm 2. You can do this by selecting a clip in your editor window and right clicking it or by right clicking in your project window and selecting to create a new composite shot. Initially, you will see nothing but a black background in your preview window. Let’s jazz it up with some effects! In the effects panel, search for ‘Gunfire’. Note that HitFilm 2 does contain a Gunfire particle effect and a variety of presets.
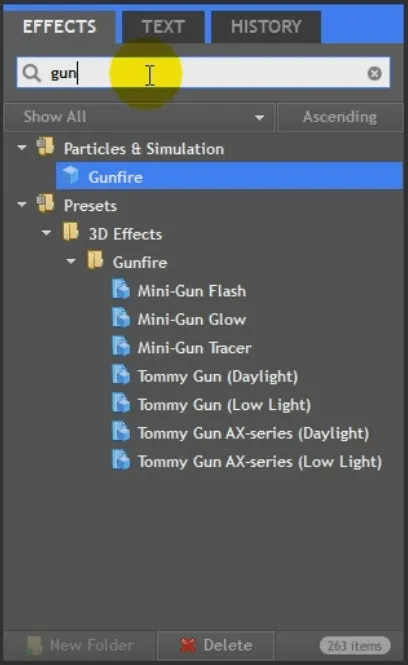
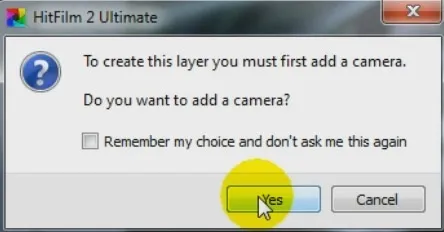
Drag the ‘Gunfire’ effect preset into your composite shot. This will create a brand new layer and HitFilm 2 will ask you if you want to add a camera into your scene. The muzzle flash effect in HitFilm 2 uses a 3D particle system to create a 3D effect and in order to view it properly, you need a camera in your scene. Just click ‘Yes’.
If you rotate your camera around the Gunfire effect, you will see that rather than a flat piece of stock footage, the muzzle flash is fully volumetric. This is great because it allows you to place the gunfire in your scene exactly where you need it, no matter which direction the gun is pointed.
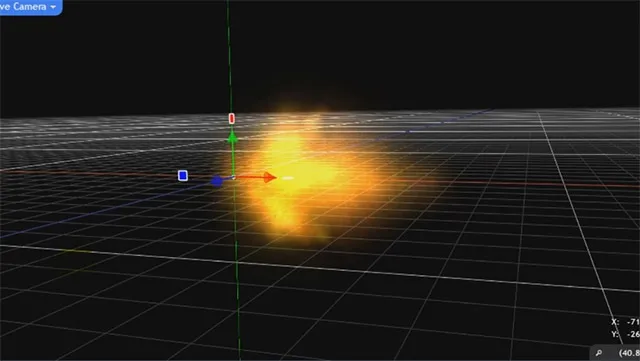
Select the Gunfire layer and go over to the left side to select the ‘Controls’ tab. This tab contains all the settings available for the layer and the Gunfire effect that has been applied to it. This is where the fun begins! Open up the Appearance tab on the layer. This is where you can control the appearance of the entire effect layer.
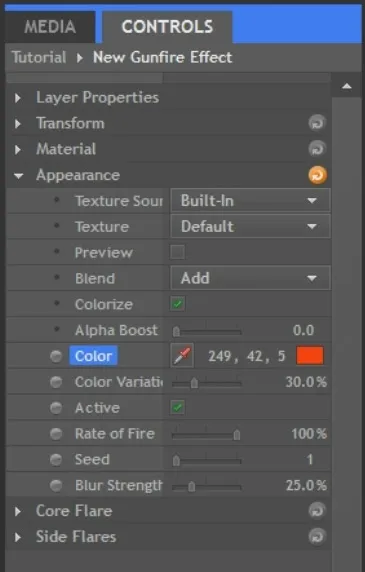
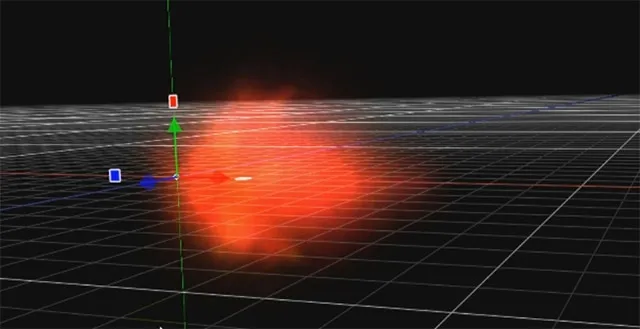
Play around with the properties and tweak some of them. You should immediately see the Gunfire effect reflect your changes. Here is the Gunfire effect after I changed the colour from yellow to a dark red. Try out some other properties to get a feel for what they do.
Besides the Appearance tab, the Gunfire effect layer has two other important tabs: Core Flare and Side Flares and they contain all the effect parameters to control the main burst of fire and the side flames for the gunfire effect. Because HitFilm 2 gives you full control over all of the effect parameters, you can shape and style your gunfire effect however you like to fit your scene.
You can even turn the gunfire particles into something entirely different. Just for fun, let’s quickly create a laser beam by tweaking the Core and the Side Flares settings!
Creating a Laser Beam
Open up the Core Flare tab on the Gunfire effect layer. Jack up the length by quite a bit to turn the main muzzle flash into a long streak. You may have to zoom out a little in the preview window by moving your camera back. Increase the Primary Number of Particles to make the beam nice solid and thick.
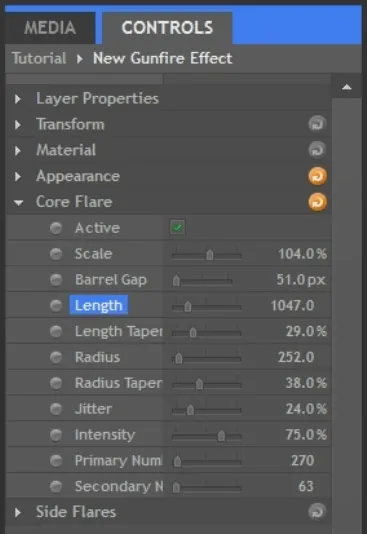
Your gunfire should now look really stretched out.
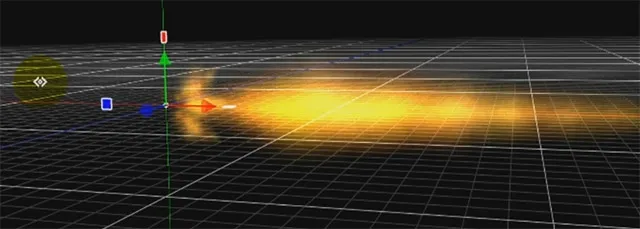
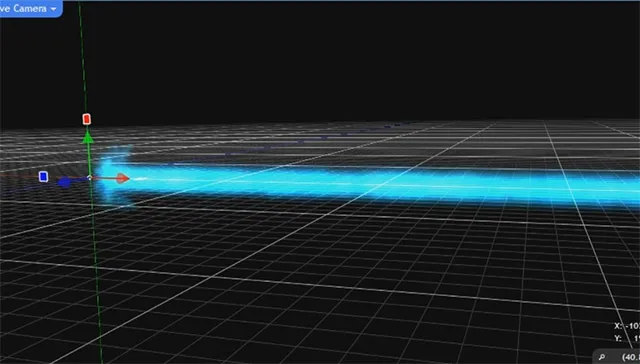
Reduce the Length Taper and the Radius Taper to turn the core flare into a solid beam with consistent girth. Finally, over in the Appearance tab, change the colour to something that suits Sci-Fi effects a bit better, like a nice electric blue. And we now have created a cool looking laser beam effect. I hope this gives you an idea of the things you can do with the Gunfire effect in HitFilm 2.
Revert all the changes we made, by clicking on the ‘Revert’ button, the little orange circle a the top right hand corner of the effect controls.
Let’s also have a quick look at the Side Flares tab of the gunfire effect so you have a full overview of the settings that you can use. Open up the Side Flares tab. Here you will find all the options that control the appearance of the little flares that are shooting out from the side of the gun muzzle.
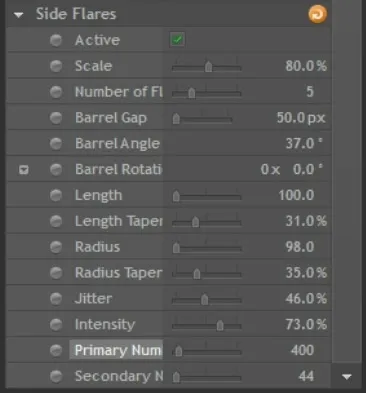
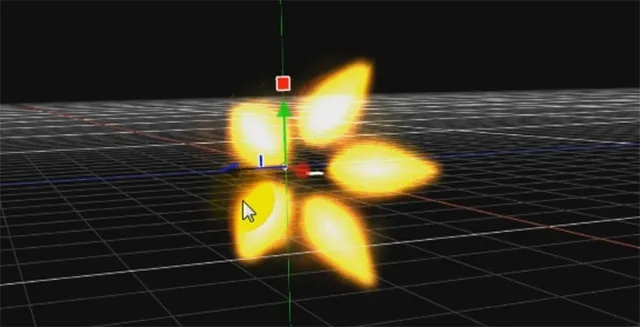
Play around with some of these parameters, especially the Barrel Rotation and Primary Number of Particles properties to see how they affect the look of your gunfire effect. Here is a screenshot of the side flares with the Core Flare disabled. Just like the core flare, you can style the side flares however you want to fit the type of gun and your scene.
Enough playing around, let’s finally get started adding this effect into our scene!
Compositing the Gunfire Effect into your Shot
Now that you understand how to control the look of your gunfire effects, it’s time to add them into our scene. What I have here is a simple clip of me, dressed up as a soldier, ambushing people from my garden hedge.

We want to add a number of quick gunfire effects to the tip of the AK47 just in time with me pretending to fire it. Create a new composite shot and drag the base footage into it. Then, like before, go to the Effects panel and search for ‘Gunfire’. I will actually use the Tommy Gun (Daylight) preset for this scene so go on and drag it into your scene, on top of your footage. Click ‘yes’ to create a new camera when prompted.
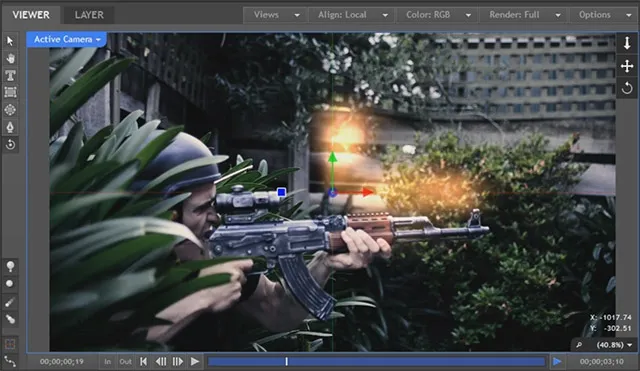
Feel free to use any of the other gunfire effect presets and customise the look of your muzzle flash to your liking. I increased the number of particles on the core flare, made it a little tighter and reduced the side flares to 2 small flares shooting out at 90 degrees from the muzzle of the AK47.
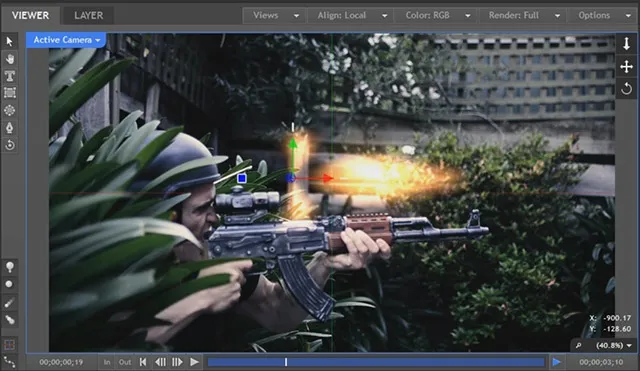
Next, position the gunfire effect on the front of your gun. Again, how you need to position the effect depends on the footage you are using and the aim of the gun. Being a 3D effect, you can reposition and rotate the muzzle flash as needed.
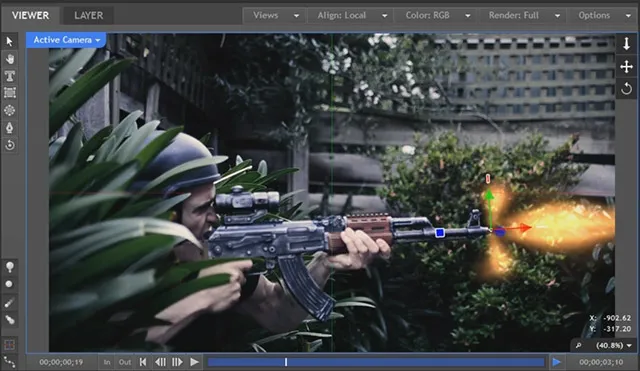
Now it’s time to animate the gunfire effect!
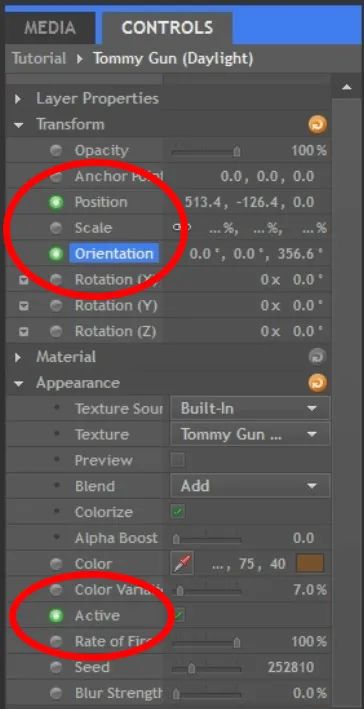
We will need to animate the Active property of the Core Flare for the Gunfire effect to make the muzzle flash appear and disappear in quick succession. Open up the Core Flares tab for the effect and click on the little circle to the left of the Active property.
This will turn the circle green, indicating that keyframing is enabled for this property. Since I move my gun throughout the shot, we also need to animate the position and orientation of the muzzle flash, so enable keyframes for those properties as well. The circles next to all of these properties should now appear green as shown in the following screenshot:
Expand the Gunfire layer in the composite shot to reveal all of its properties in the timeline window. Scroll down until you find the Active property on the left side of the window. Then move through your clip frame by frame and tick or untick the Active checkbox to only show the Gunfire effect for the frames in which you are shooting your gun. We want the muzzle flash to only ever be active for a single frame before vanishing again.
You should see little grey diamonds appear on the timeline as you do this, indicating the new keyframes you are creating. Note that you can select, copy and paste these keyframes on the timeline window to make this a little quicker for you.
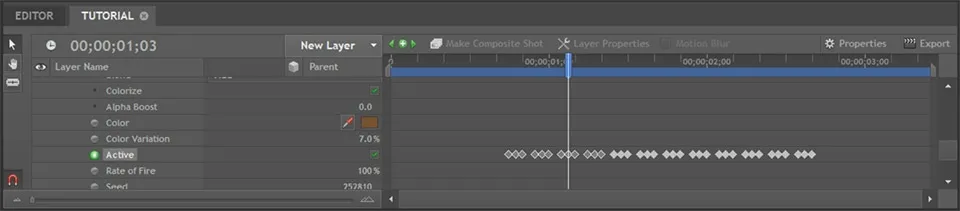
Next, step through the composite shot again and visit only the frames in which the Gunfire effect is visible. For all of those frames, reposition the muzzle flash effect correctly at the tip of the gun, aimed in the right direction. In my clip, I swing my gun around a little bit so I want to make sure the Gunfire follows that movement and is shooting straight out of the gun each time. This is where the 3D properties of the effect in HitFilm 2 comes in very handy - doing this realistically with flat, 2 dimensional stock footage would be very tricky.
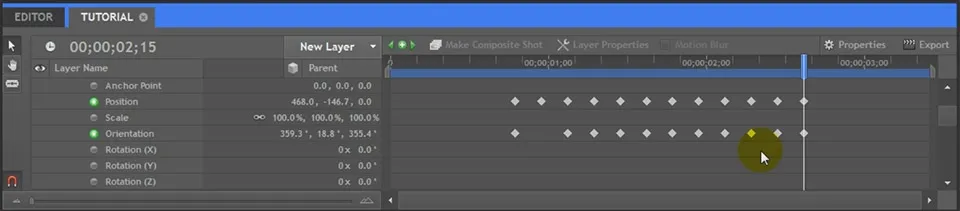
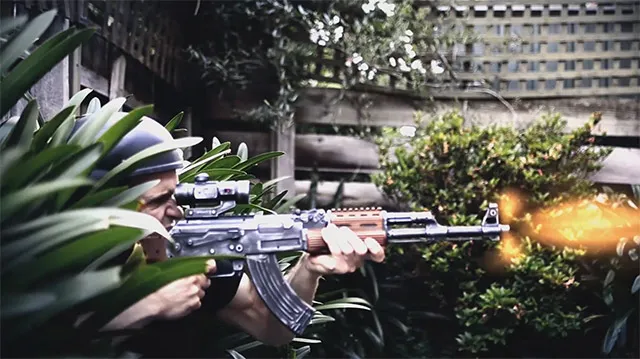
And we’re done with the muzzle flash effect. The gunfire should now shoot realistically out of the gun in quick succession.

Now it’s time to add some fake lighting to the effect so it looks as if the Gunfire actually illuminates the surrounding objects.
Adding the Gunfire Lighting
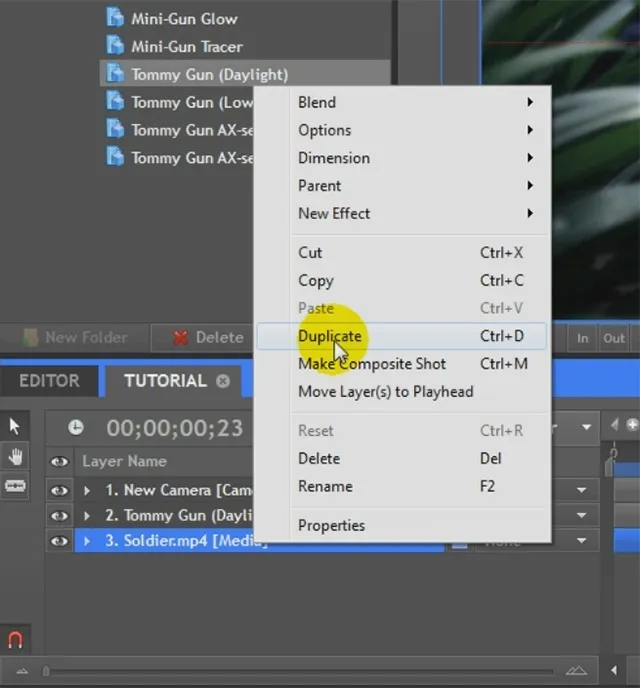
Now that we placed the muzzle flash into our scene it’s time to add some lighting to make it look a bit more realistic. For this, duplicate your base footage layer by right clicking it and selecting ‘Duplicate’ from the context menu.
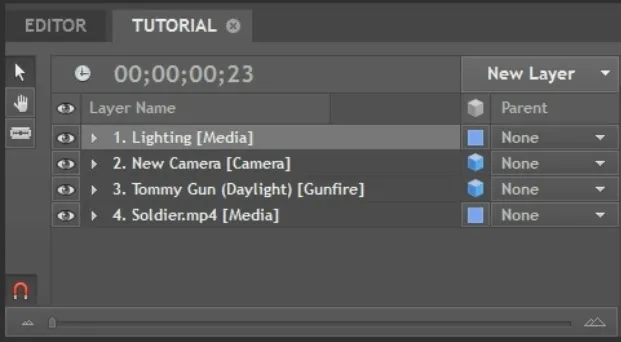
Rename the copy of the layer to ‘Lighting’ and move it to the very top of your composite shot. You will no longer be able to see your gunfire effect, but we will fix that up in a second.
With the Lighting layer selected, go over to the Effect Controls on the left hand side of the interface. Open up the Layer Properties tab and set the Blend property to ‘Add’.
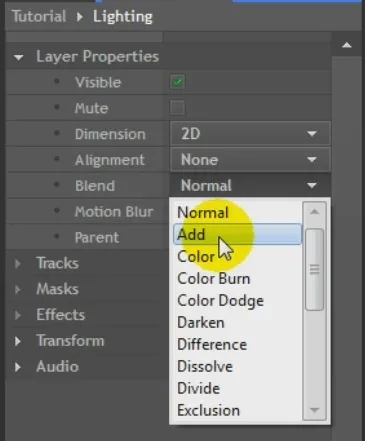
This will composite the Lighting layer in an additive blending mode on top of your gunfire effect. Your scene should suddenly have gotten a whole lot brighter.
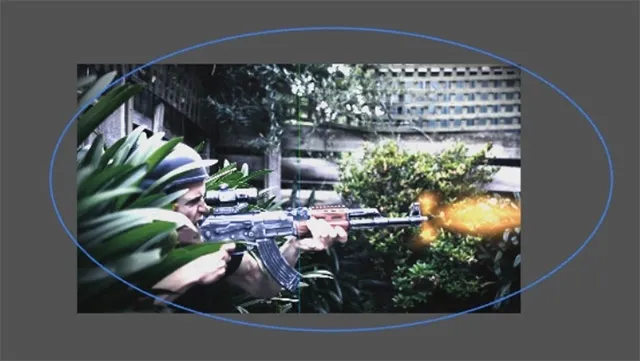
Next, use the masking tools on the left side of the preview window to mask out only the areas of your shot that you want to receive lighting. You can go quite detailed with this for more realism, but for the sake of keeping this quick, I just added a large elliptical mask over my entire scene. Go over to the mask properties in the Effect Controls panel and add some mask feather to soften out the edges.
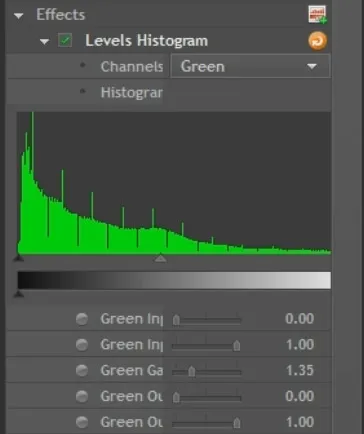
Next, we want to tint the lighting layer to match the colour of the muzzle flash. Go to the Effects panel, search for the ‘Levels Histogram’ effect and apply it to the Lighting layer. Go over to the Red channel and bring its intensity up a little bit. Then go into your Green colour channel and increase the green colour to tint the Lighting layer nice and yellow to match your gunfire.
You should now have a very strong yellowish highlight everywhere where you added a mask on the Lighting layer.
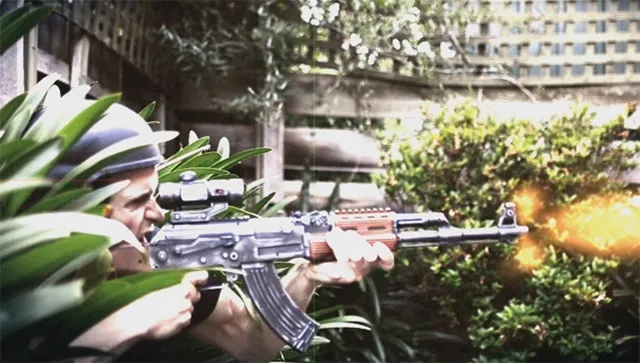
To make the lighting pop a little bit more, I also added a Brightness & Contrast effect to the Lighting layer and jacked up the Contrast property.
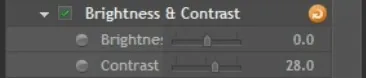
Feel free to tweak this to your liking, I just felt this gave the scene a bit more of a dramatic look.
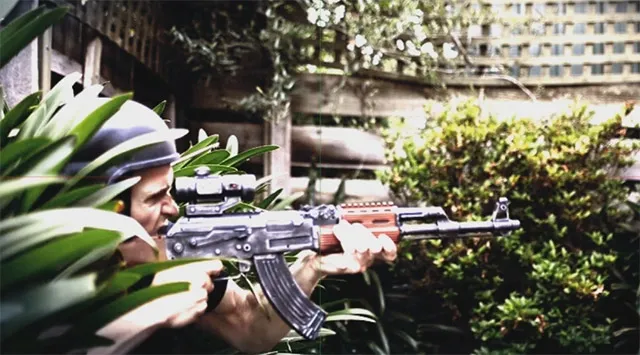
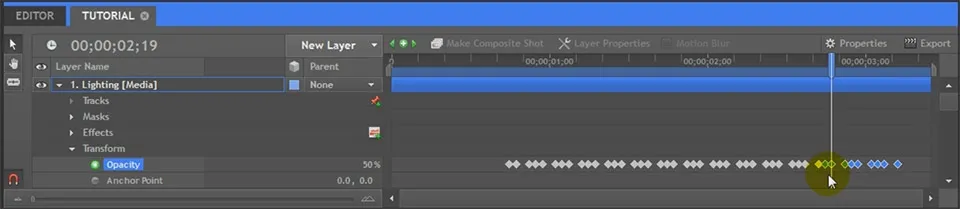
There is however one last issue with the gunfire lighting: it is visible all the time. We want the lighting to only be visible for a frame or two right when the gun is fired. For this, go over to the Controls on the left side and enable keyframes for the Opacity property on the Lighting layer by clicking on the grey circle to the left of the property. Then, using the timeline window like we did before, step through your composite shot and animate the Opacity to come in and out to match with the timing of your gunfire.
Whenever the gunfire was visible I set the opacity to around 50%, then moved forward 2 frames and set it back down to 0%. I wanted to give the Lighting layer a fraction of a second to fade away rather than vanish instantaneously.
And with that we’re done with the final effect!
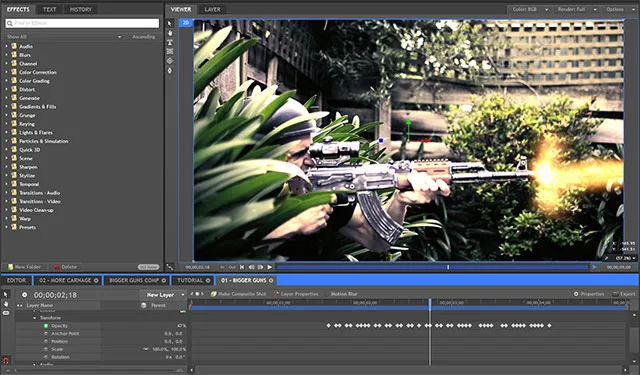
Let me quickly show you how to export your finished project from HitFilm 2 so you can share it with the world!
In the main tab control at the top of the HitFilm 2 interface you will find the ‘Export’ tab. The export tab contains all the settings you need to configure your final video export. Make sure you select the correct timeline - for me I will select ‘Tutorial’, which is the timeline for my composite shot. Select the format you would like for your final exported video and enable video and audio export.
I left most other settings pretty untouched as they matched the footage I used already.
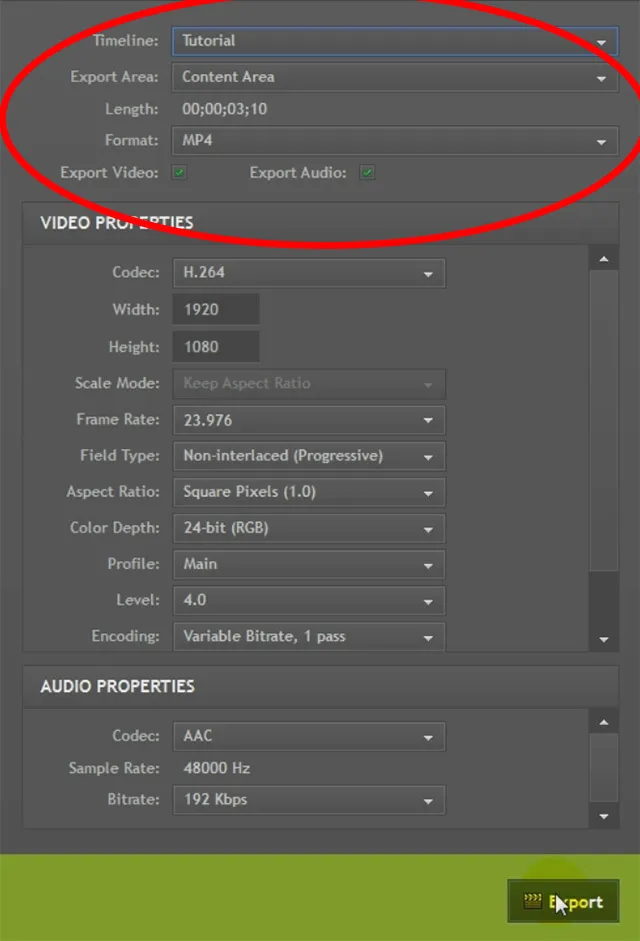
Finally, hit the Export button and let HitFilm 2 do its thing and export your final project for you.
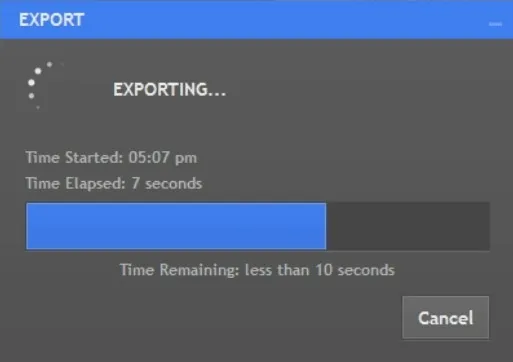
Once HitFilm 2 is done exporting your video you can play back the completed Gunfire effect to your heart’s content!
I hope you enjoyed this tutorial. Feel free to leave any comments, questions or suggestions down below and let me know if you would like to see more tutorials on some of the cool things you can do with HitFilm 2!