 Surfaced Studio
How To Give Your Video A Cinematic Look – Colour Grading
Everyone wants their video to look like something straight out of the cinemas. There are many aspects to making your footage look ‘cinematic’ and one important step in the process are colour correction and colour grading. I discussed colour correction at length in my last tutorial. Today we will look at Colour Grading.
It is important to first correct any colour issues with your footage before you move on to colour grading. Otherwise it’s like putting fresh paint on your walls without a proper undercoat.
Also note that colour grading can technically ‘break’ your colour correction again, but that’s ok; properly correcting any colour issues beforehand ensures that we have the best possible starting point when it comes to grading our footage.
What is Colour Grading?
Colour Grading is the process of creatively altering the appearance of your footage to give it the desired emotional impact. You might want a scary movie to look dark and gritty whereas a comedy should probably look more colourful and happy. How you colorise and style your footage has a huge impact on how the audience will experience it. For example, here is the same scene, once made to look warm and friendly and once made to look all scary and dark.
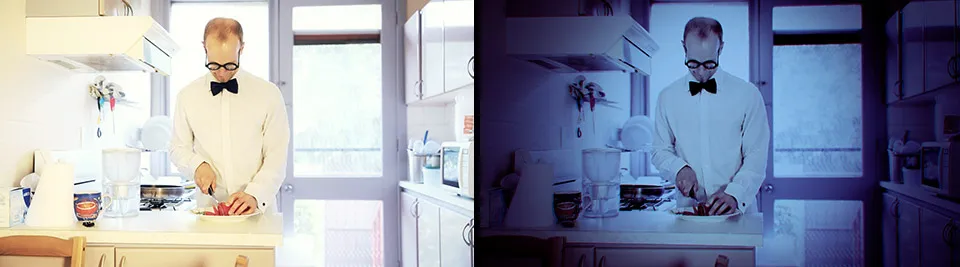
It is important to note that there are no hard and fast rules or set steps that you can follow to get the look you want, because the look you want depends on your personal taste and the style you are going for. Therefore in this tutorial I will take you through how I colour graded our Zombie Hunter VFX short film as well as our recently released short film Mario’s Magic Mushroom.
While I will use Adobe After Effects for this tutorial, you should be able to follow along with any other video editing or visual effects compositing software as long as it offers you effects to control the colour of your footage and apply some creative effects.
Let’s get started!
Zombie Hunter VFX Short Film Colour Grading
The first clip we will work with is the short sequence from our Zombie Hunter VFX short film that we colour corrected in the last part of this tutorial. Here is the corrected scene we ended up with: 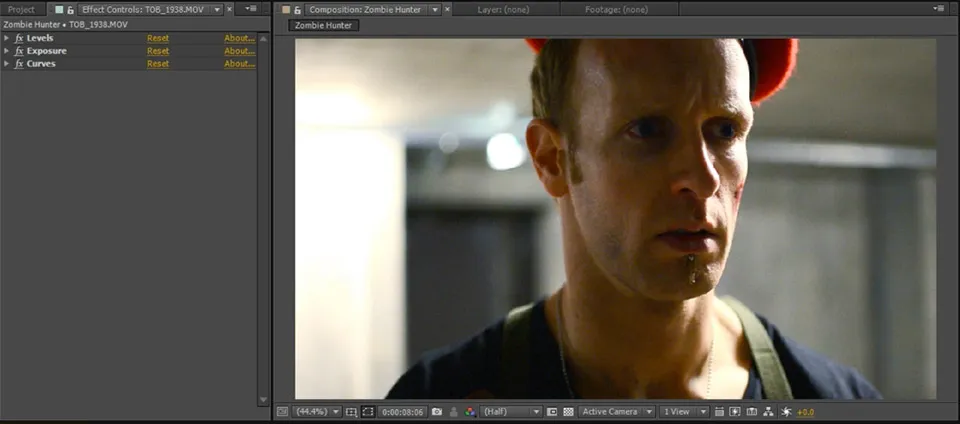
When performing colour grading in Adobe After Effects or Premiere Pro, I like to use Adjustment Layers. Adjustment Layers allow you to gather all the colour grading effects in one place, apply them to all clips below the layer and easily control the strength of the effect by altering the opacity of the adjustment layer.
If your software does not support adjustment layers, simply apply the colour grading effects to the individual clips. Since I am working in After Effects, I created a new adjustment layer, called it ‘Colour Grading’ and extended it to cover all clips in my composition.

First, I wanted to add some more contrast to the footage to give it a more edgy look. For this, search for and apply a Curves effect. As we did in the colour correction tutorial, add some contrast into your footage by raising the upper end and lowering the bottom end of the curve.
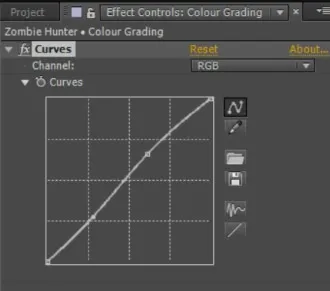
This will give our footage a harsher, grittier look.
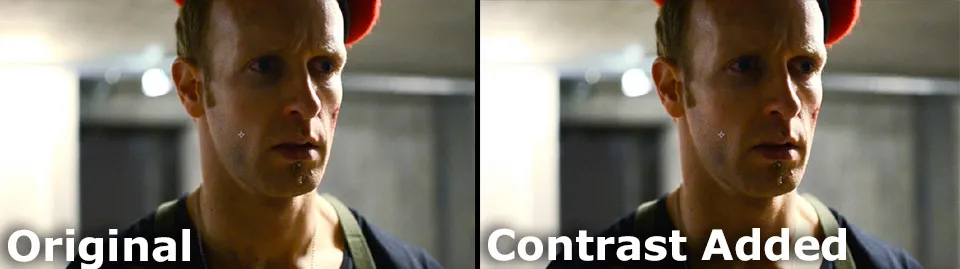
Next, to make the footage look colder and prepare it to receive a nice colour tint, I decided to apply a Hue & Saturation effect and drain about 20% of saturation out of it.
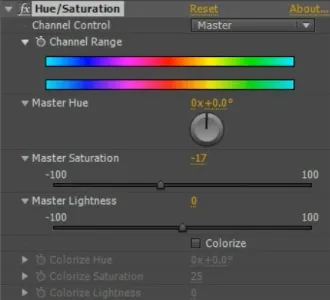
This makes the zombie hunter clips look much colder.
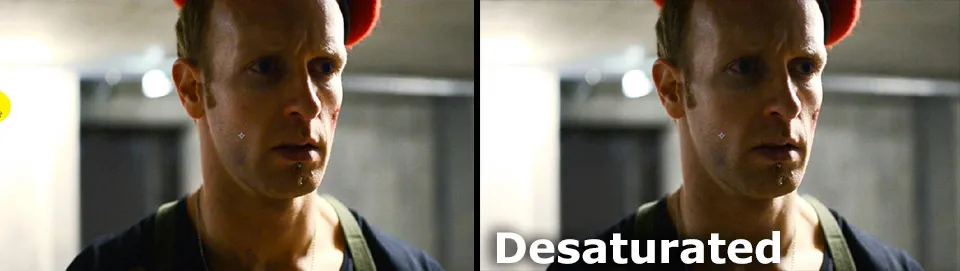
You can push this effect much further, but for me, it’s time to start tinting the footage!
For this, apply another Curves effect. While you could go back and change the Curves effect we already applied, I prefer to layer small changes on top of each other since it makes it easier for me to go back and disable specific elements of my grading pipeline.
In the Curves effect, go over to the Red channel and drain the red colour from the lower end of the video.
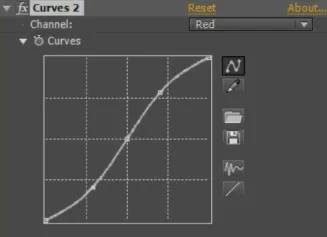
Because we are modifying a single colour channel, removing the red colour from the shadows of our video will tint the dark areas cyan.
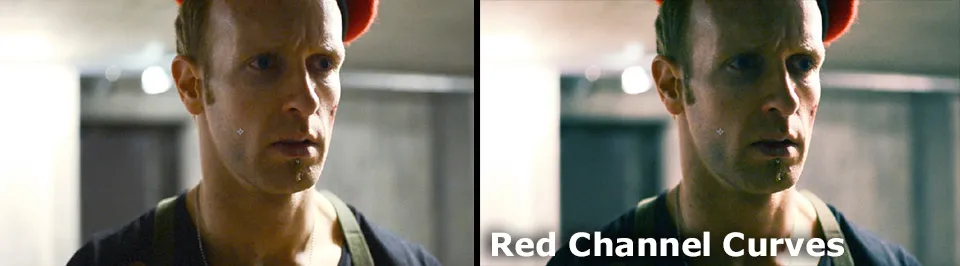
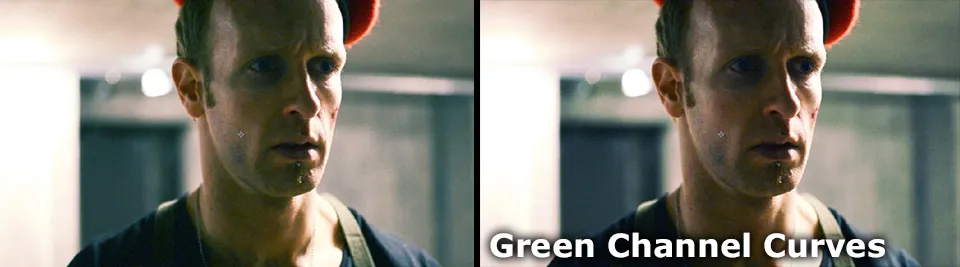
Now go over to the green channel and bump up only the middle of the curve. I added two additional points on either side to keep the rest of the curve unchanged.
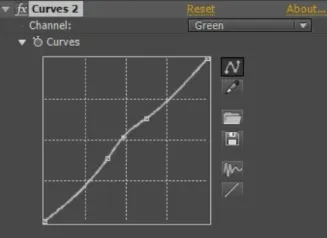
Our Zombie Hunter clip now has an interesting green look in the mid tones.
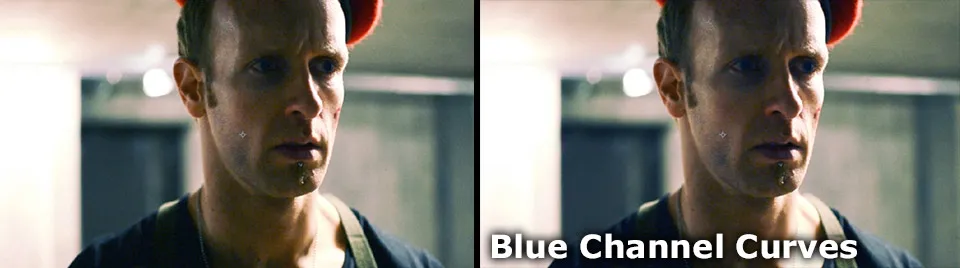
Now go over to the blue channel and push up the lower end of the curve to introduce some more blue into the shadows of the footage.
Blue channel curves
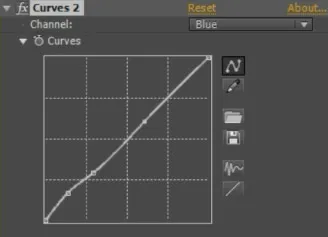
It’s a fairly subtle effect, but the blue curves drain some more of the warm colours out of the shadows and round off the colour tint nicely.
If we compare the original footage to the version with added contrast and colour tint, we can slowly start to see the final look taking shape.
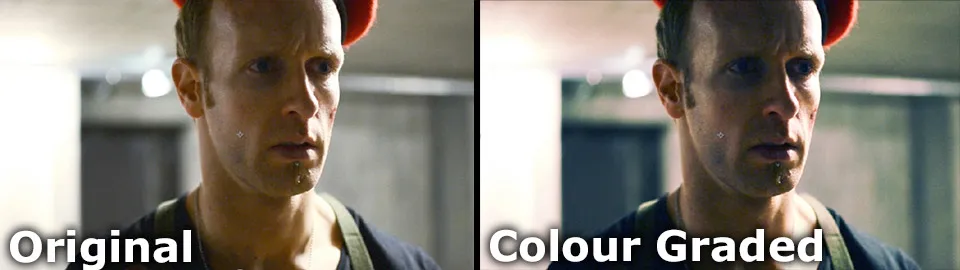
While scrubbing through my footage I did notice however that the highlights of the image appeared rather red. Have a look at how the bright areas behind me in the screenshot have a strong reddish tint.
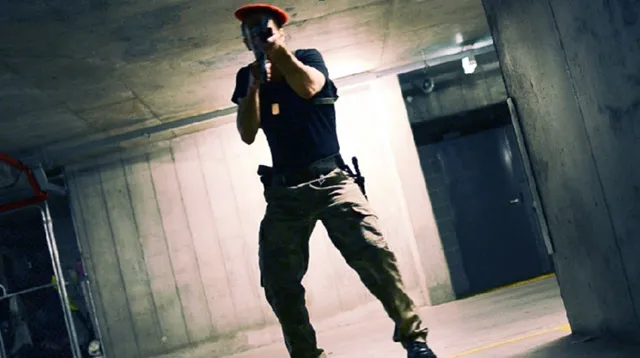
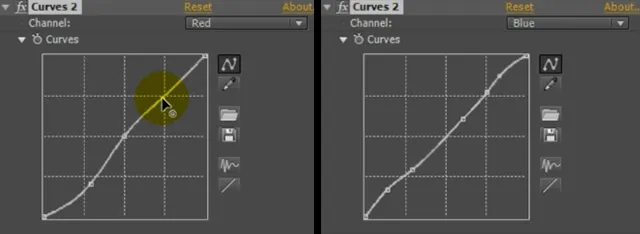
This took away from the dark and gritty look I was going for so I decided to fix that up. For that, go back to the curves effect and bring down the highlights of the Red channel. Then go over to the blue channel and increase the highlights. This will replace the red tinted highlights with a subtle blue colour tone.
This looks much better! Our footage now has a much more consistent and darker look.
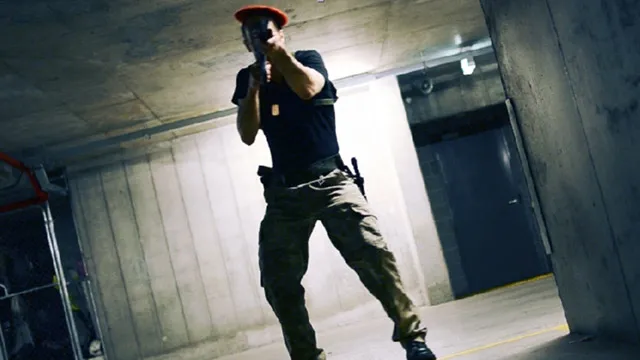
The footage now no longer looks plain and boring, but is starting to look a lot more moody and cinematic. Finally, because I think it really suits the style of the Zombie Hunter video, I am going to add a vignette.
Adding a Vignette
To add a vignette, add a simple black solid on top of your footage and then create a large elliptical mask covering the entire centre of the solid. Set the mask mode to ‘Subtract’ to cut it out of the black solid. This will create an elliptical black frame around the video.
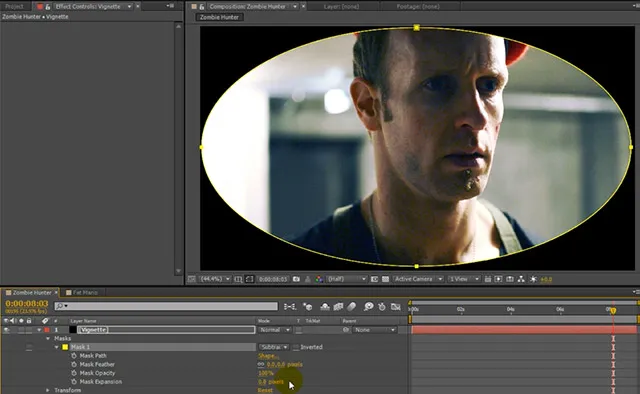
Soften up the edges of the mask by increasing the Mask Feather amount and also raise the Mask Expansion if required to push the mask boundaries further outside. We only want the very edges of the footage to be covered lightly by the vignette.
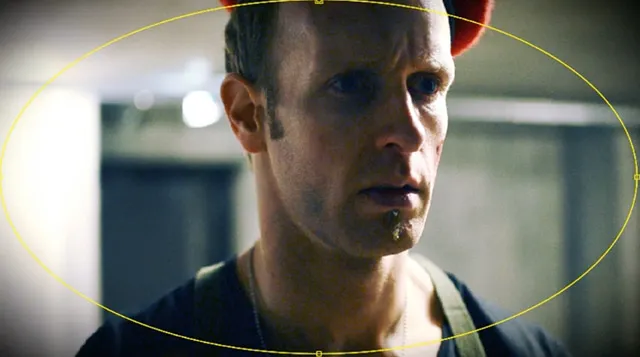
You may be perfectly happy with this effect, but I decided to set the Blend Mode of the vignette layer to ‘Classic Colour Burn’. I just find that it blends the vignette a bit more interestingly with the Zombie Hunter footage.
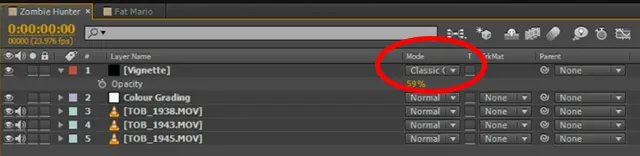
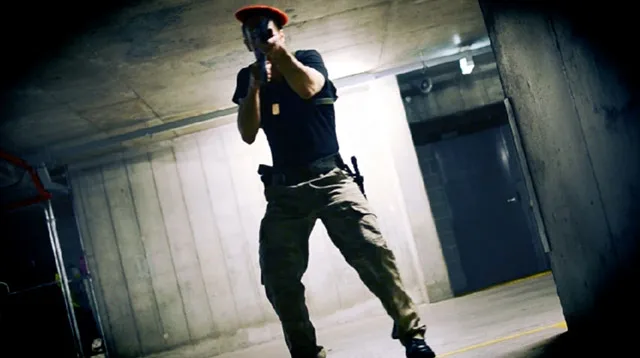
If the vignette appears too dark, simply tweak the Opacity of the Vignette layer to your liking. I don’t actually mind the rather dramatic vignette effect for the Zombie Hunter footage.
Before we wrap up this tutorial, let me quickly show you how creative you can get when it comes to colour grading!
Mario’s Magic Mushroom VFX Short Film Colour Grading
Here is a clip from the VFX short film Mario’s Magic Mushroom. It’s the scene of fat Mario getting off the couch to reach for the mushroom.
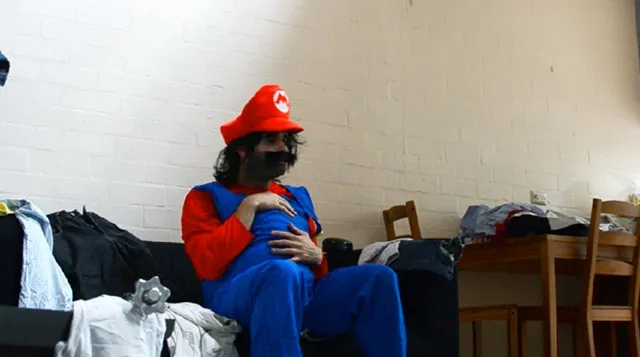
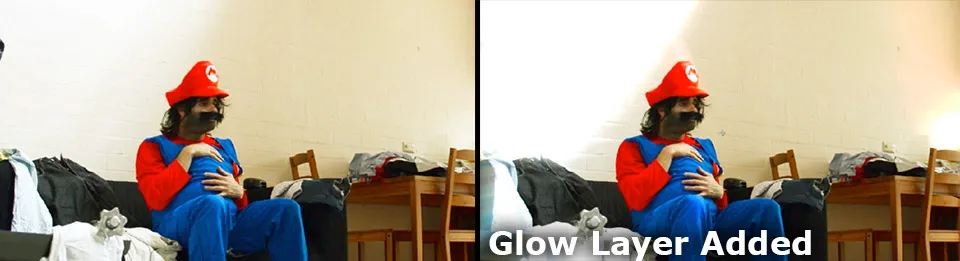
I wanted to give the footage a thick, warm yellow tint and I decided to add some glow to the highlights of the footage to enhance the feeling of Mario being a little bit spaced out.
For that, first apply a Curves effect to your later (or, ideally to an Adjustment layer). I brightened up the mid tones of my footage and then pushed up the red and the green channel considerably.
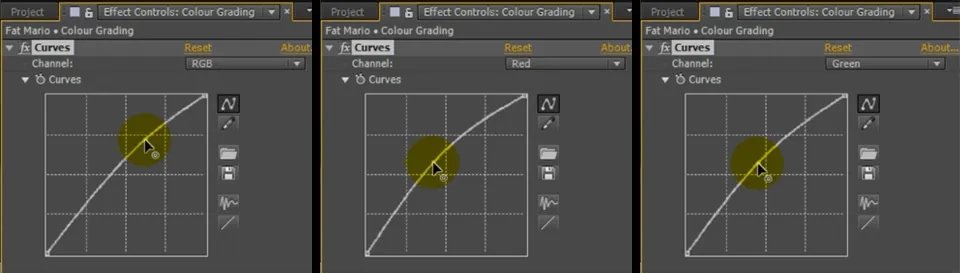
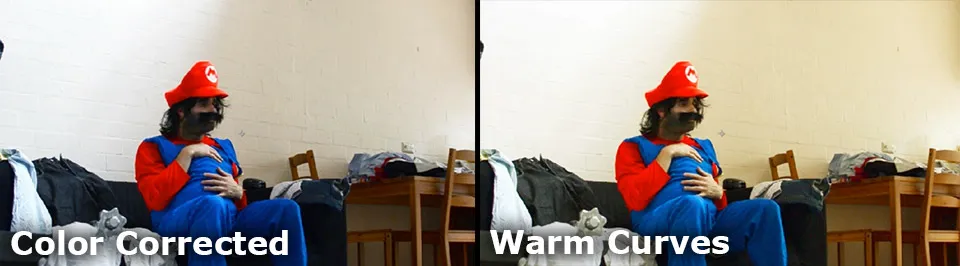
This gives the footage the strong, yellow tint that I am after and make the footage feel a lot warmer and more friendly.
I have to admit the main reason for wanting to add a Glow effect is to show you that colour grading does not have to be limited to simple colour adjustment effects. You can be as creative as you want in achieving the desired look. So let’s be creative and duplicate the base footage layer. Rename the top layer to ‘Mario Glow’.

Since I only want the highlights of the footage to glow, let’s first remove everything except but the bright areas in the Mario Glow layer. For this, apply a brightness and contrast effect and increase the Contrast to almost 100%. Then lower the Brightness by an equally large amount.
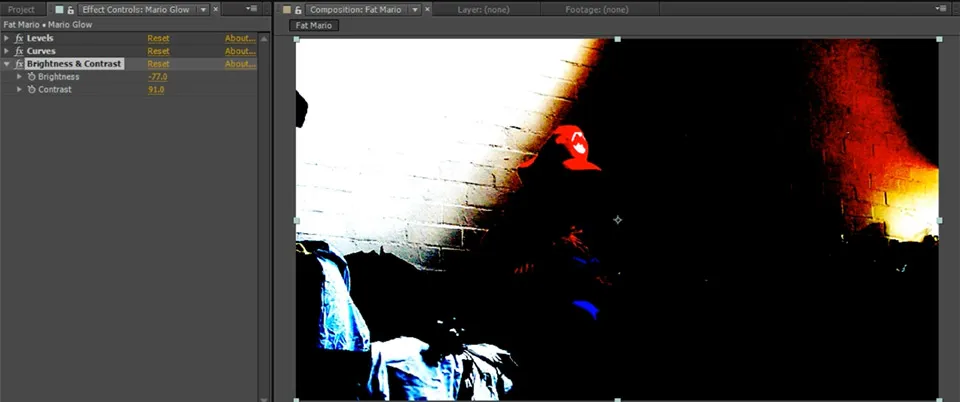
This should remove all but the very bright areas of your footage.
To create a spacey looking glow, search for and apply a ‘CC Fast Radial Blur’ to the layer. Increase the Amount property to your liking to create rays of light shooting out from the centre of the footage. I set mine to around 90 to create fairly strong directional blur.
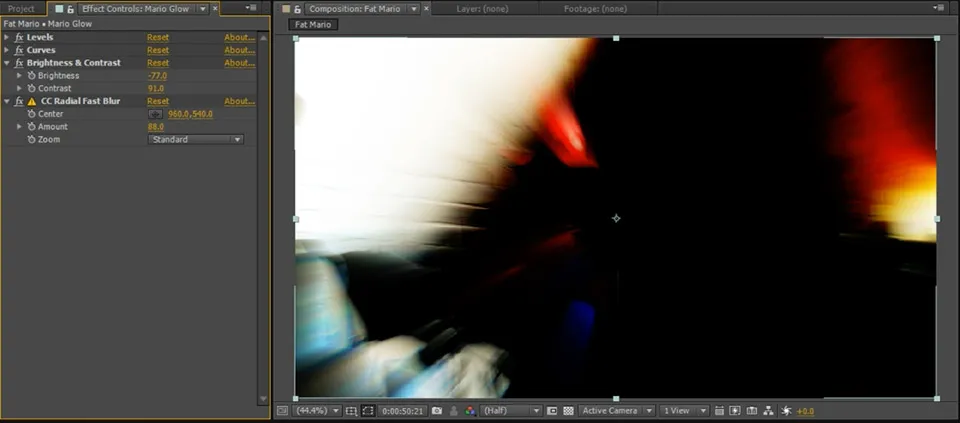
To blend this blurry streaks with our base footage, simply set the blend mode of the Mario Glow layer to ‘Add’.

This will apply the Glow effect on top of our scene, creating a very unusual, warm and almost psychedelic effect.
Be as Creative as You Want!
Remember, there are no hard rules when it comes to colour grading. You can use any type of effect to alter the look and feel of your footage to enhance the emotional impact you want it to have. From simple colour adjustments to duplicated layers and all sorts of other crazy effects - be creative, have fun and start taking your videos from the plain out-of-camera look to fully cinematic.
1 Comment
Thanks for helping me learn more about color grading. I actually had no idea that it could help achieve an emotional impact you want from the footage. Perhaps it could also be important to understand the basics of color theory to understand when certain colors should be used.