 Surfaced Studio
Adobe After Effects Puppet Tool Tutorial
In this tutorial I will show you how you can create cool (or creepy) character animation with the Puppet Tool in Adobe After Effects. The Puppet Tool is very useful for adding animations to a static image and is primarily useful if you want to breathe life into a character without doing it frame by frame.

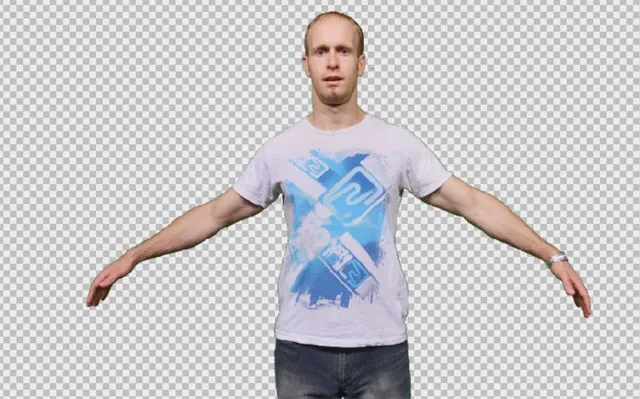
If you want to follow along with this tutorial, feel free to follow the PNG I created of me, cut out from the background. Simply click this link to download a clean cutout image you can use.

When animating your image, make sure you don’t have a solid background. The Puppet tool will use the outline of your image (as defined by its alpha channel) to detect the shape of the ‘puppet’ and figure out how to animate it. If the cutout of me had a solid background, moving my arms would also warp/deform the background since After Effects could not determine where I end and the background starts.
The Puppet Tool consists of 3 separate controls: the puppet pin tool for placing joints, the puppet starch tool for defining how (in)flexible certain parts of your image are and the puppet overlap tool to control how After Effects will handle parts of the puppet overlapping with itself. You have access to all of these tools via the Puppet Tool button in the toolbar.

Let’s look at these controls one at a a time and use them to animate the cutout image of me.
The Puppet Pin Tool

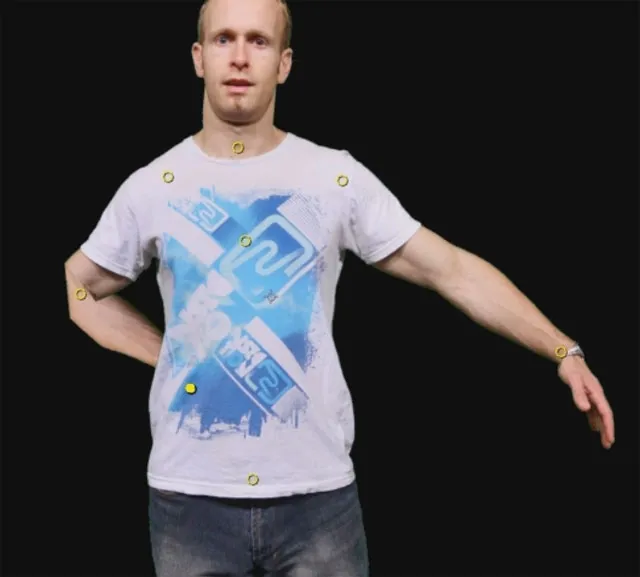
The first thing you need to do to add animation to your image is place a number of pins on it. These pins define the joints that After Effects will apply to your picture. To place a pin simply select the Puppet Pin Tool, ensure your layer is selected and click directly onto the image. A small yellow circle will be be visible to indicate the location of a pin.
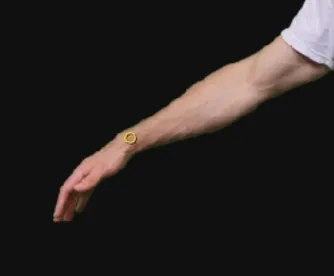
To animate the cutout image, I have placed pins on my wrists, shoulders, collar bone, lower stomach, sternum, throat and head. Each of these pins allows me to control how the image moves at those joints.
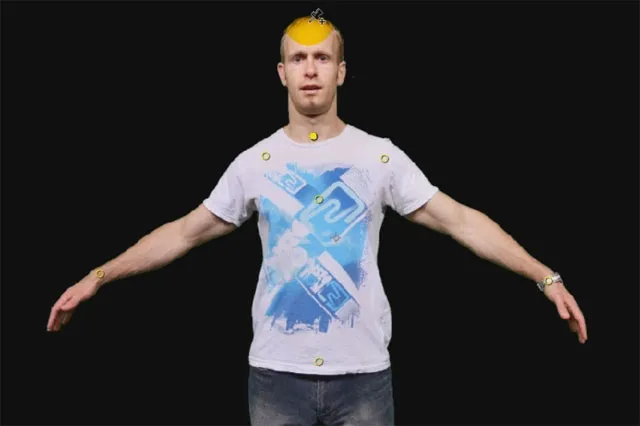
Once you placed all of your pins, you can grab the pins and drag them around to change the pose of your puppet. After Effects will automatically deform the image as best as it can based on where the joints are located.
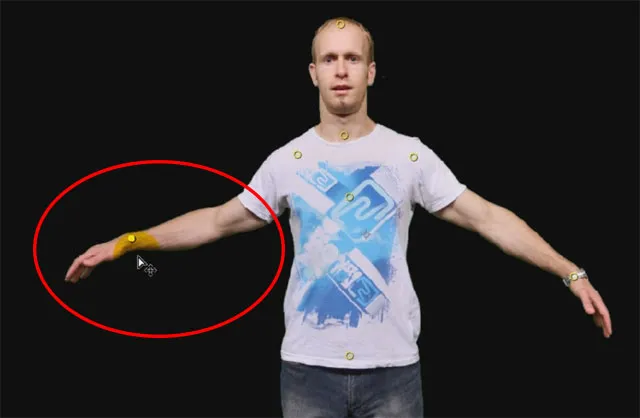
To determine how to deform your puppet, After Effects uses a Deformation Mesh. You can show this deformation mesh by checking the ‘Show Mesh’ checkbox in the Puppet Pin toolbar.
The deformation mesh for the puppet pin tool will be overlayed onto your image in the preview window.
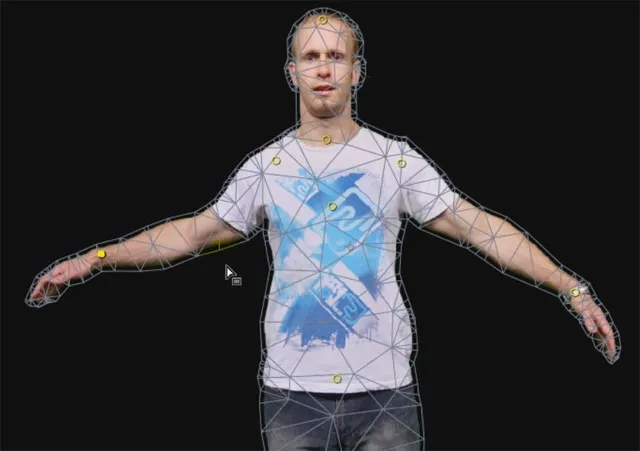
When you move a pin around, After Effects uses this mesh to deform your image based on all the joints you added to your puppet. You can adjust the expansion and control how many triangles the mesh contains to make sure it covers your image adequately. Note that in this screenshot, the expansion property is set to 15 so the mesh has a 15 pixel border around the outline of the puppet.
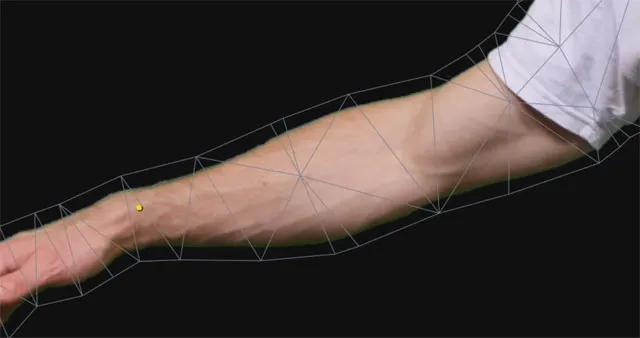
This is why it is important to have an alpha channel defined for your image and have your puppet properly cut out. If the image had no alpha channel, the deformation mesh would simply cover the entire contents and any movement of the joints would simply deform the entire image - background included.
To ensure you use the right Expansion value, you want the deformation mesh to fit tightly around the shape of your puppet, but not cut into it. If you lower the Expansion property by so much that it does not cover all of our puppet, moving the pins will leave a strange outline behind as shown in the following screenshot.
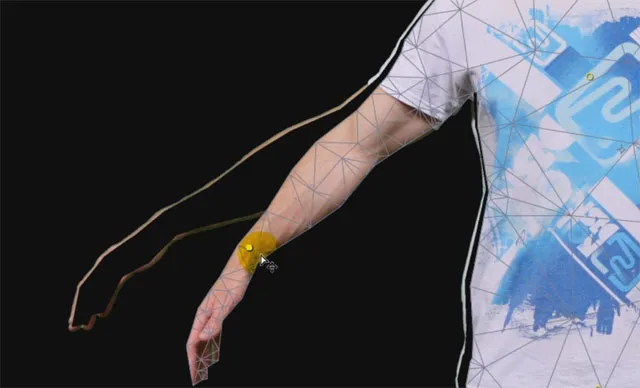
So make sure you configure our deformation mesh correctly. If something unexpected happens, reveal it and deal with any problems as appropriate. Now let me show you the most amazing way to animate your puppet once you have placed your pins!
Animating the Puppet Tool
The biggest power of the Puppet Pin tool lies in the way After Effects deals with animations. To animate a pin moving, go to the time position where you want the animation to start. Hold down the CTRL key (or Command on a Mac) and then click and drag the pin you want to animate.
You will notice that After Effects immediately begins playing back your composition and you will see a yellow outline of your deformation mesh overlayed onto your image. CTRL-drag one of the pins around your puppet for a couple of seconds.
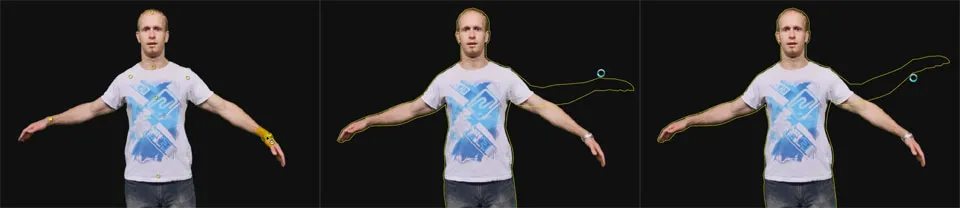
Once you let go of the CTRL key, the timeline indicator will jump back to its starting position. If you now play back your composition you will see that After Effects just recorded the pin movement frame by frame for as long as you dragged it around.
You can jump to any time position and animate any pin you added to your image freely to ensure the puppet moves the way you want it to. However, one thing you will likely notice is that all the parts of your puppet tend to bend like rubber, even if - logically - they should not, like my arm.
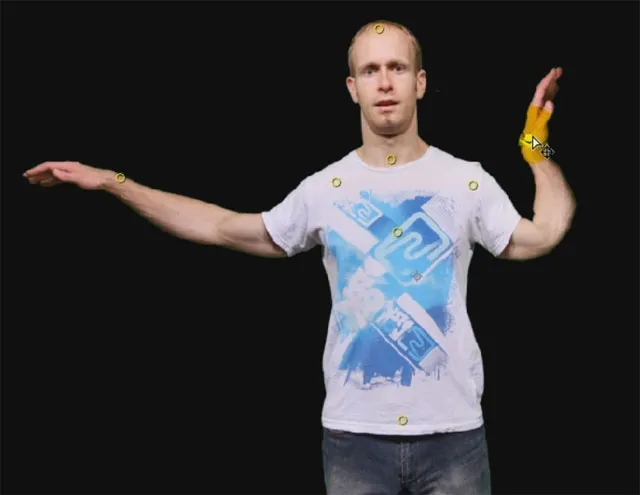
Since After Effects does not know what the contents of your image represent it cannot infer which parts of the puppet should be stiffer than others and so it bend/warps the mesh in a very flexible manner. For cartoon characters that usually looks ok, but applying the puppet tool to a photo of a human tends to look a little creepy. To tell After Effects which parts of the image should not bend, we can use the Puppet Starch Tool.
The Puppet Starch Tool
The puppet starch tool allows you to place ‘starch points’ on the areas of your puppet that you want to remain stiff and you can define the strength and the reach of the starch effect. The puppet starch tool has its own little toolbar.

When you select the puppet starch tool, a grey outline of your original image will appear in your preview window. This outline will have the shape before any deformations have been applied. In the screenshot below, I animated my right arm, but the grey outline for the starch tool shows the original position of my arm.
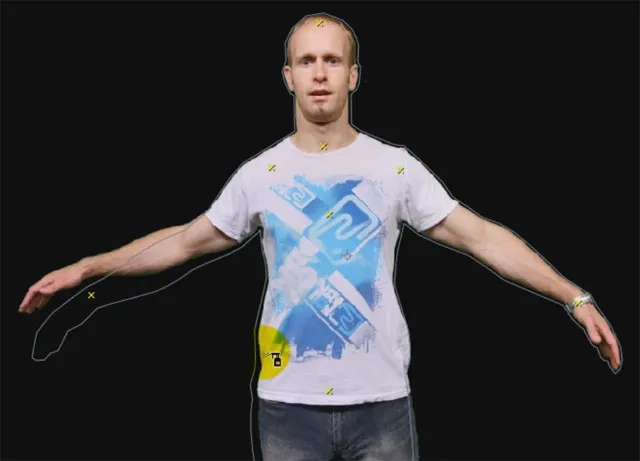
Just like the puppet pin tool, the puppet starch tool uses a mesh to apply additional information to selected areas of the image. This mesh is separate from the one used by the puppet pin tool and you can show it using the ‘Mesh: Show’ checkbox in the toolbar. Note that again, the mesh will be shown for the original position of your puppet.
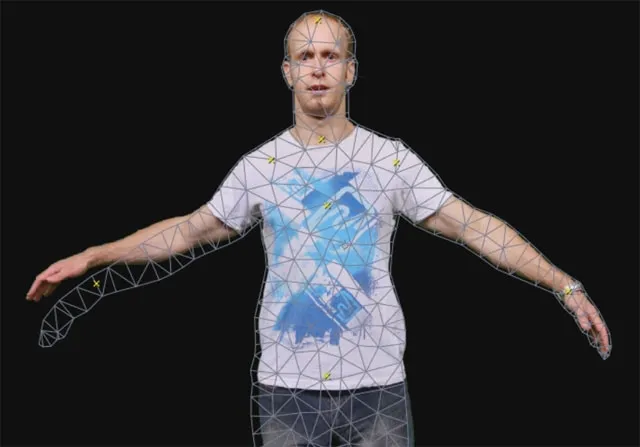
To place a starch point, select the Starch Tool, make sure your layer is selected and click on the part of your puppet that you want to stiffen up. I placed the first starch point on my forearm. Starch points show as red dots on your puppet.
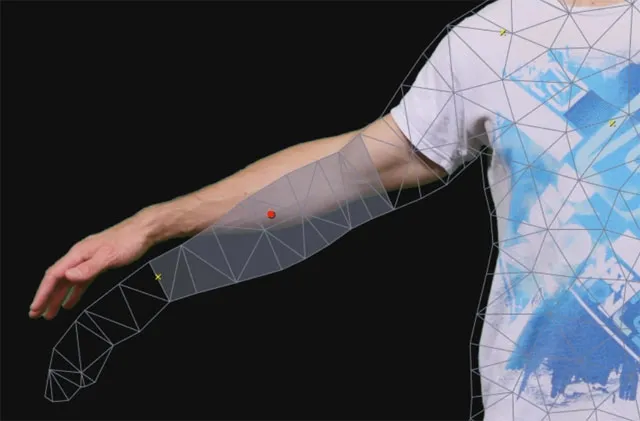
The grey area around the starch point defines the triangles in the deformation mesh that will be affected by the starch. You can alter the strength and the reach of the starch using the Amount and Extent properties in the starch tool menu.
You can also drag starch points around your puppet as you please and After Effects will update the triangles affected by the starch. Here I have placed 3 starch points: one on my hand, one on my forearm and one on my upper arm. Note that I left a little gab on my wrist and on my elbow because those are the areas on my puppet I want to be able to bend.
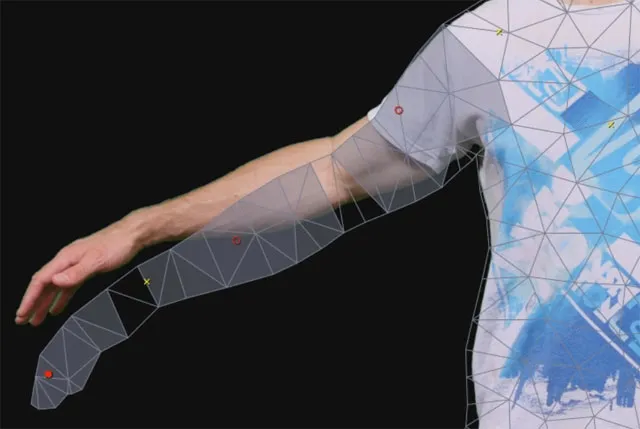
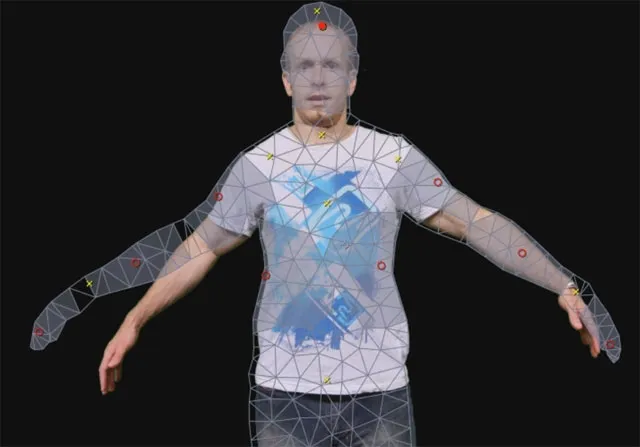
I usually leave the starch amount at 15% and I will set the extent of the starch to cover most of the area but leaving the space around the joints free. If you place too much starch on your puppet, After Effects will no longer be able to bend those parts and it can make your puppet look too stiff. Continue to place starch points and define the areas of your puppet you want to be stiff. For me, I placed them on my arms, my sides and my head.
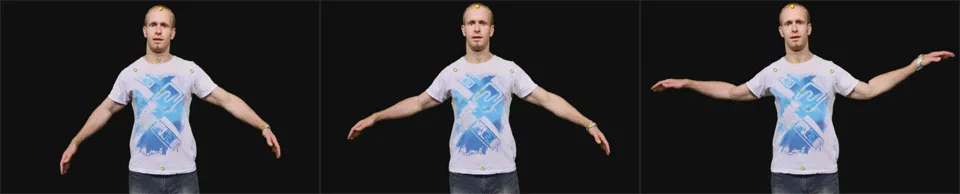
Moving the join on my wrist now no longer bends my arm like rubber, but moves the entire arm as expected.
Finally, let me show you how to deal with situations in which your puppet overlaps itself.
The Puppet Overlap Tool
Assume we wanted to animate my hand going in front of my body. Currently when I drag the puppet pin on my wrist over my body, my hand ends up behind me. Whether an element appears in front or behind your puppet is totally random unless you tell After Effects specifically which parts should be in front and which parts should be behind. For this, you use the Puppet Overlap Tool
Just like the other puppet tools, the puppet overlap tool comes with its own little toolbar. It looks (and works) almost identical to the puppet starch tool.

Once you have the overlap tool selected, you can click on your puppet to add a new Overlap Point. Each overlap point has an Extent and an In Front value. The extent works exactly like it does for the starch tool and defines the reach of the overlap area. The In Front value defines the depth for the area. The higher this value, the more in front the area will be, the lower this value, the more behind the area will be. Any part of the puppet that does not have this depth information defined has an In Front value of 0.
Add an overlap tool on my right hand, set the In Front value to 50% and increase the Extent if required. You will immediately see my hand come in front of my body (since the In Front value for my body is 0%).
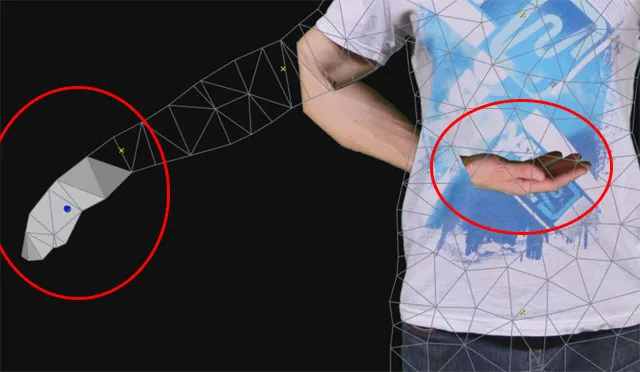
Keep increasing the extent until the overlap are reached all the way up to my elbow. My entire right arm will now be rendered in front of my body
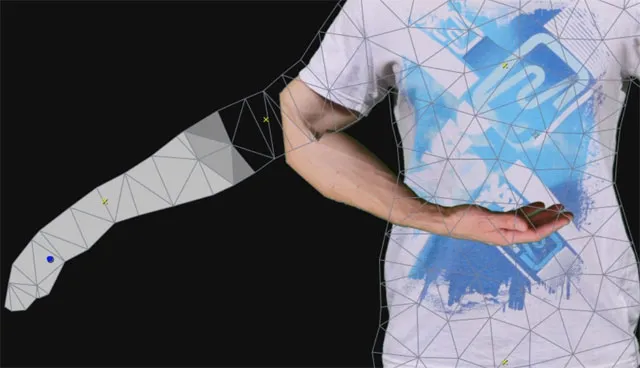
The overlap tool is very easy to use, but gives you great control over how your puppet is rendered.
Why Use The Puppet Tool?
The puppet tool makes it very easy to add cool looking animations to a static image. Its main use is for character animations, but you can do all sorts of crazy and creepy stuff with it so play around, experiment and just have some fun with it!
5 Comments
bon
Could you please let me know how you did the strings?
They are 2 simple Strokes along a line (mask) and then tracked to the movement of my hands :)
Dear Tobias,
Thank you for the tutorial. How to animate the eyelids and the mouth?
Hi Samuel,
I animated the eyes and mouth using motion sketch and converting audio to keyframes. I have tutorials for How to use Motion Sketch in Adobe After Effects and How to Convert Audio to Keyframes in Adobe After Effects that you can check out :)