 Surfaced Studio
Adobe After Effects Basics – Expressions
In today’s tutorial we are going to look at a feature of Adobe After Effects that I’ve used in most of my tutorials without ever going into too much detail: expressions.
Instead of keyframing a property in After Effects you can write a little piece of code, an expression, that controls the value of the property for you. This expression can be very simple or very complex and you can introduce some intelligent logic into your composition and create some amazing visual effects.
Diving into Expressions
I am going to approach this tutorial a little bit differently. I will throw you into the deep end first and then pull you back out so we can look at all of the details that we missed the first time around. Ready?
To get started with this tutorial, create a new composition. Add a new text layer anywhere into your scene and change the text to ‘Slider Value: ’. Then create a new Null Object and call it ‘CONTROL’. Search for and apply the ‘Slider’ effect to the null object. Finally, add keyframes to the Slider effect to animate the value of the slider to increase from 0 to 100 over the course of your composition. Your composition should now look something like this: 
Expand the text layer until you can see the Source Text property and ALT-click onto the little stopwatch icon. Yes, this will add an expression, but I will cover that in more detail soon. For now just follow along and in the little text editor that appears in your timeline window on the right side type
“My slider value: ” +
and then, with the active cursor still in the text editor, drag the pick whip icon on the left side onto the Slider value on the CONTROL null object and let go.
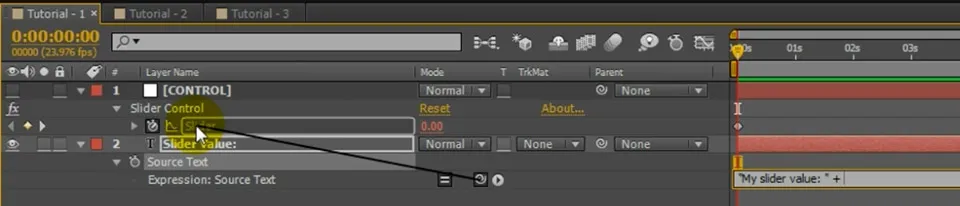
This will insert even more code into your little expression, but we will look at that later. Add ‘.value.toString()’ to the end of your expression to convert the slider value to a string and then click outside of the text editor. The text in your composition should now be animated and display the value of the slider when you scrub through your composition.
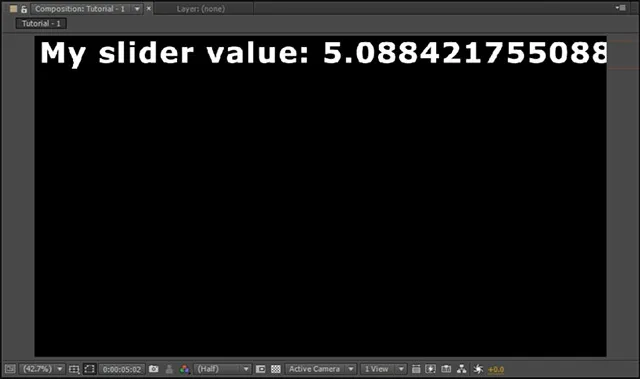
This setup will make it a lot easier for you to see how expressions affect the slider value. So now let’s come back from the deep end and look at the very basics of expressions in Adobe After Effects!
The Basics of After Effects Expressions
You can add an expression to any property that can be keyframed by ALT-clicking on the little stopwatch icon instead of just clicking on it. Let’s try it out: ALT-click onto the stopwatch icon of the Slider effect that we have applied to the CONTROL null object.
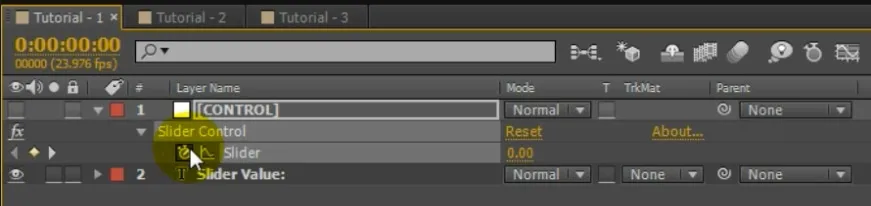
Over on the right side in your timeline window, a little text editor will appear. This is the Expression Editor of Adobe After Effects. In here you can type your expression.
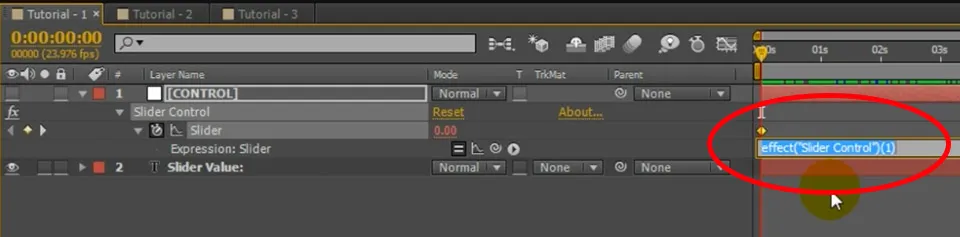
Since your expression can be a single line or pages of complex code, you can expand the Expression editor by dragging the bottom border of the text box downwards.
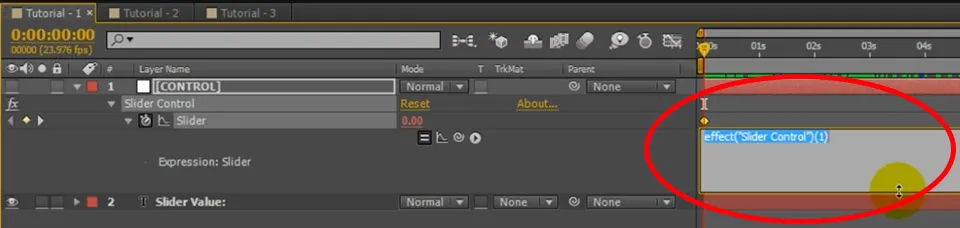
Let’s add the simplest possible expression. In the expression editor type
value;
and then click outside of the editor to apply it. Note that the semicolon is optional for single line expressions. However, if you enter multiple lines in your expression editor, each line needs to be terminated with a semicolon.
If you scrub through your composition, nothing will have changed. The slider text value still animate from 0 to 100 over the course of the composition like it did before. Why? Because the ‘value’ expression simply tells After Effects to set the final value of the property to the current value that is applied (including keyframes). So when the Slider value is 20, value will return 20 and when the Slider value is 60, value will return 60. ‘Value’ simply represents the current value of the property at the time.
Change the expression to
value * 2;
Your slider will now animate from 0 to 200 because the expression will return the Slider value at the current time multiplied by 2. You can use any type of arithmetic in your expressions to calculate the final value. Let’s move on to some more useful examples!
Change the expression to
time;
The ‘time’ expression will evaluate to the current time value in seconds, expressed as a decimal number. So 1 second into your composition, time will be 1, after 2 seconds it will be 2 and so on. Note that this expression actually ignores the current Slider value so it won’t make any difference whether you have keyframes on it or not. The slider value will simply be set to the number of seconds elapsed.
I usually use the time expression to automatically animate Offset or Evolution properties so they continuously animate without requiring any keyframes. Time to get a little bit more fancy!
Go ahead and change your expression to
Math.sin(time) * 100;
This expression will set the value of the Slider to the sine of the current time (in seconds) multiplied by 100. This will make the Slider value oscillate between 100 and -100 when you play back your composition. You can control the speed of the oscillation by applying a multiplier to the ‘time’ part of the expression.
Another exciting expression I use a lot is ‘wiggle’. The wiggle expression is a function that takes 2 parameters:
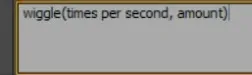
You can use this expression whenever you want to introduce a bit of chaos or randomness to your effects. Wiggle will randomly alter the current value of the property by a certain amount a number of times each second. Note that this expression does actually take the current (keyframed) value of the property into account and alters it rather than overwrite it entirely.
To test this out, change the expression for the Slider value to
wiggle(1, 50);
If you now scrub through your composition and have a look at the slider value, you will notice that it no longer changes smoothly from 0 to 100. Instead, it seems to sway on its way. Wiggle will take the current Slider value and apply a random offset to it at the specified frequency. In this example it will change the value by up to 50, once a second. This means that when your Slider value is keyframed to be 0, the actual value could end up anywhere between -50 and 50. At the end of your composition, when the Slider value is keyframed to 100, the final value after the wiggle expression will be anywhere between 50 and 150.
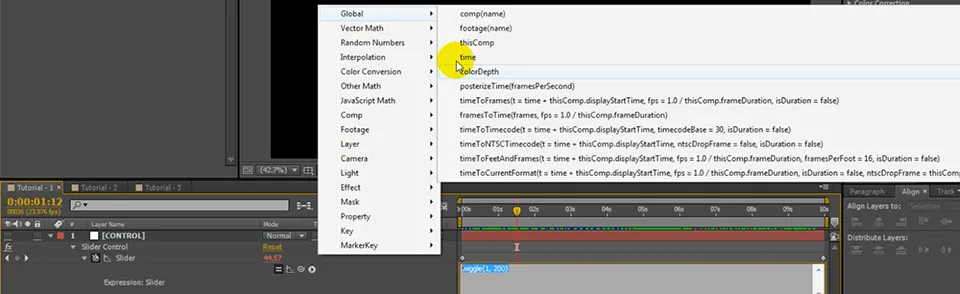
There are tons of useful expressions available to you in Adobe After Effects. With the expression editor enabled, you can actually click on the little context menu item on the layer to dig through all of the functions that are available to you.
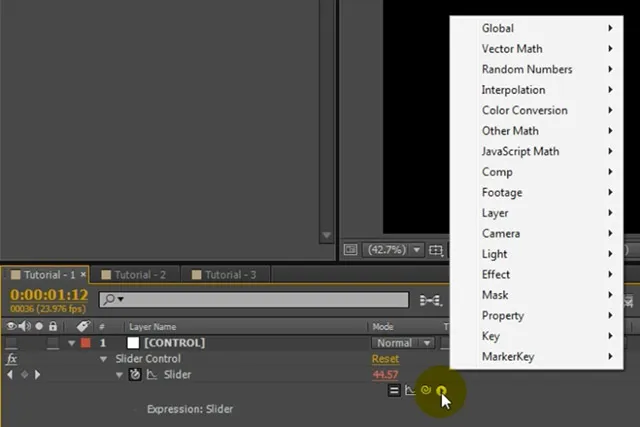
In this menu you will find all sorts of useful expressions and I encourage you to try out as many of them as you can and get familiar with them.
Now that we’ve covered the basics, let’s look at some more advanced expressions!
Multidimensional Expressions
All of the expressions we’ve looked at so far are one-dimensional; they only return a single value. However, a lot of effect properties in After Effects have more than one dimension. A 2D position has 2 dimensions: x and y. A 3D position has an x, y and z value. Of course you can use expressions to control these properties as well, but the syntax is a little different.
I have created a simple composition with a circle in it. The circle is keyframed to move from left to right though the scene.

The circle is a simple masked out solid layer and I’ve keyframed the Position property of the layer to animate the circle across the screen.

Add an expression to the Position of the circle layer by ALT-clicking on the stopwatch icon next to the property. Just like with one dimensional expressions, you can use
value;
to have the circle behave exactly like it did before. ‘Value’ will simply evaluate to the current position of the layer. Now this is actually a shorthand. The full syntax for the same expression is
, value[1]]
Since the position property has 2 dimensions, we have to set both the x and the y dimension by enclosing the expression in square brackets. The general syntax to access multidimensional properties is
Since ‘value’ is also multidimensional when used in a multidimensional property, you can access each of the dimensions by indexing the value with value[0] for the x, value[1] for the y and value[2] for the z dimension.
Change the expression on the Position property on the circle layer to
, 100]

The x position of the circle will still be updated from the keyframed animation and the circle will move across the screen as before left to right. The y coordinate however has now been fixed at 100 pixels from the top of the composition.

To get a little bit more fancy, change the expression on the Position property for the layer to
, value[1] + Math.sin(time) * 100]

Can you guess what this will do?
It retains the current x coordinate but the y position of the layer will be set to the current y coordinate plus the sine of the current time (in seconds) multiplied by 100. This will cause the circle to bob up and down by 100 pixels as it moves across the screen.

And, finally, of course you can also use the wiggle expression with multidimensional properties. The expression will simply randomise all dimensions of the property by the specified amount.
To check that out, enter
wiggle(2, 400)
into the expression editor.
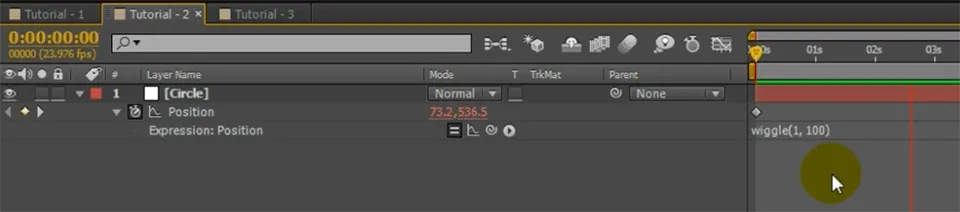
The circle will still move from left to right across the screen since we animated the position property, but the position will be randomly altered twice per second by a value of up to 400 pixels. It looks as if the circle is drunk and stumbling across the screen.

Now that we’ve covered expressions for multidimensional properties, let’s jump back into the deep end and have a look at some of the advanced things you can do with expressions!
Advanced Expressions
I have another composition here that contains 6 white circles in a vertical line.

I’ve animated all the circles to move from left to right across the screen by keyframing their Position property.

Next I am going to use wiggle to randomise their movement. Add a new expression to the Position property of all of the circles and type
wiggle(1, 400);
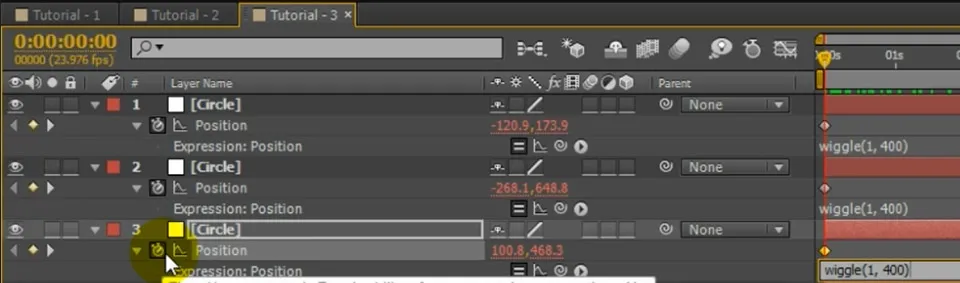
The circles will still move from left to right across the screen, but their movement will be randomised by up to 400 pixels every second. Their movement is now more akin to a swarm.

What we are going to do now is use an expression to control the colour of each of these circles in an intelligent way. Imagine the circles are a swarm and they hate getting too close to each other. Whenever two circles get near each other they become angry and turn red and whenever they are some distance away from all other circles they relax and turn green.
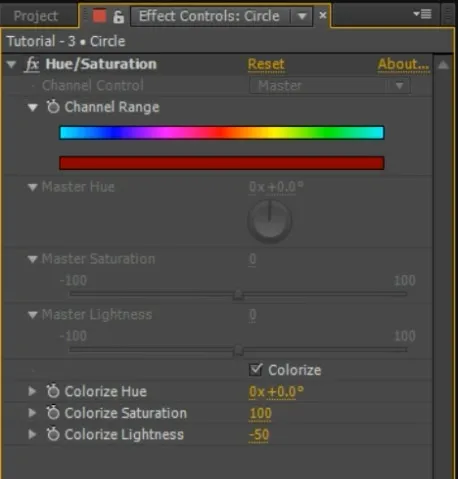
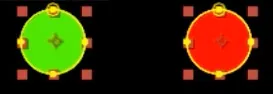
To set this up, first apply a Hue and Saturation effect to one of the circles. Check the Colorize checkbox and increase the Colorize Saturation amount to 100. With the Colorize Hue property at 0, the circle should appear solid red.
If you change the Colorize Hue property to 100, the circle will turn solid green.
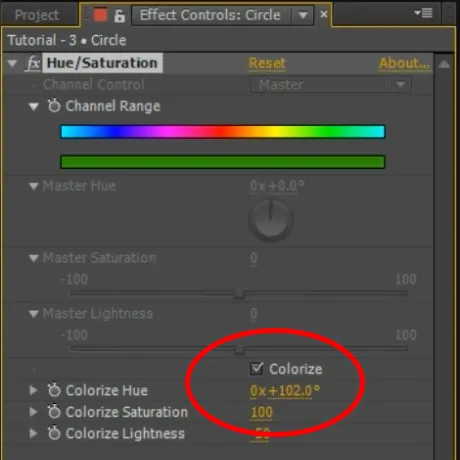
We want to add an expression to the Colorize Hue property to control it for us automatically. For this we will us a rather advanced expression.
Add an expression to the Colorize Hue property of the Hue and Saturation effect and then copy and paste the following expression into the editor:
// Number.MAX_VALUE is the largest number you can use closest = Number.MAX_VALUE;
/* Loop over all layers in the composition */ for (i = 1; i <= thisComp.numLayers; i++) { // Don’t check against yourself if (index == i) continue;
distance = length(position, thisComp.layer(i).position); if (distance < closest) closest = distance; }
value = Math.min(100, closest / 5);
This expression iterates over all layers in the composition and calculates the minimum distance to the nearest circle (excluding the current layer). It then scales the distance to a value between 0 (red) and 100 (green) and applies it to the Colorize Hue property.
Note that any lines starting with ’//’ are comments and will be ignored by the expression. Alternatively, you could enclose a block of lines in ’/*’ and ’*/’ to comment them all out together.
Finally, copy and paste the Hue and Saturation effect from this circle layer onto all other circles in your composition. This will also copy the expression we just applied across. If you now play back your composition, you should have a swarm of circles moving across the screen, automatically changing colour based on their distance to the nearest neighbouring circle.

I’d say that is some pretty intelligent behaviour! Can you imagine how insanely difficult this would be to animate manually using keyframes?
After Effects Expressions are a very powerful tool and I recommend checking out some other online resources to get up to speed and start using them to create some amazing visual effects!
7 Comments
Please Ineed This Program :))))))
Hi there!!! i have a question,
i followed the steps on your webpage, but the expression on the source text isnt working for me so i cant really start with the tutorial :/
after i pick whip the source text with the slider effect i got this error
invalid numeric result (divide by zero )
this is how my expression looks:
"slider value: " +
thisComp.layer("CONTROL").effect("Slider Control")("Slider")
what could it be my mistake?
THanks a lot!! you really do a great job!!!
Show less
You need to append '.value.toString()' to the end of the expression. I was actually missing it from the description of the tutorial (fixed). It's in the video at around 10:30
Hi. I think there is is some mistake into hue expression. There is "for (i = 1; i < thisComp.numLayers; i++)" but shuold be "for (i = 1; i <= thisComp.numLayers; i++)"
"<=" instead "<"
Hi Michal, thank you for the correction. I've fixed up the code in the post accordingly :)
Hi. Thanks! Any idea how I could adapt this to the 'scale' or 'opacity' property?
You can apply expressions in the same way to any property. Scale is a vector with [x, y] values and opacity is just a single number from 0 to 100 :)