 Surfaced Studio
Adobe After Effects - Building Destruction Effect (Part 2)
In the last part of my After Effects building destruction tutorial I showed you how to track your footage, create a fake building and add some explosions into your scene to blow it up. In the second part I will show you how to add more destruction effects like debris, smoke and lighting to finish off this cool visual effect!
Adding Debris to the Building Explosions
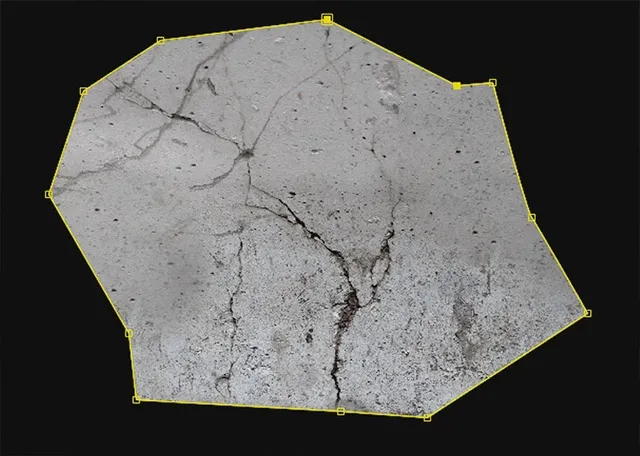
To add falling debris to our building destruction, we will be using the CC Particle World effect available in Adobe After effects. However, before we can add this effect, we need to prepare a texture that we want to use for our particles. You want to get an image of a material that matches the building you added into the scene in the first part of this tutorial. Since my building is fairly grey and seems to be made out of concrete I am using a simple concrete texture.
Add this texture into a new composition in After Effects and mask out a rough shape of a fragment that might break off the building. I called this composition ‘Concrete Particle Comp’.
Next, go back into the Building Comp we set up in the first part of this tutorial. We want to add any new destruction elements into this composition rather than into the parent Building Destruction comp. This way the Skyline Matte layer we set up in the first part is applied to all destruction elements to ensure that these elements sit behind the buildings in the foreground.
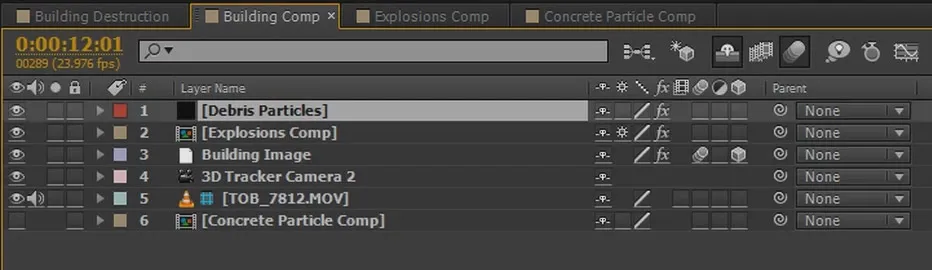
In the Building Comp create a new solid and call it ‘Debris Particles’.
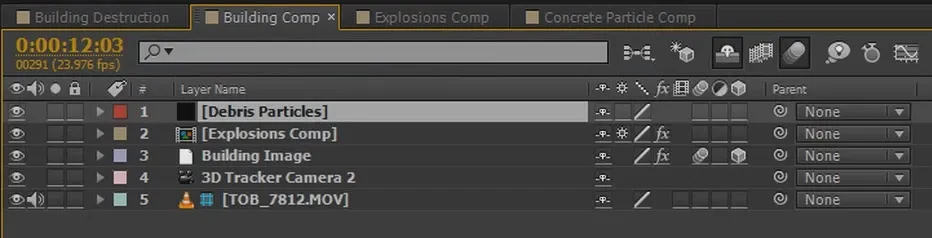
Then apply the CC Particle World effect to the solid. Expand the Producer settings and position it in 3D space directly at the position where the first explosion strikes the building. Scrub through your footage a few times to ensure the particle generator is correctly placed in the 3D scene. I had to push mine quite far into the scene (Position Z) to place it properly.
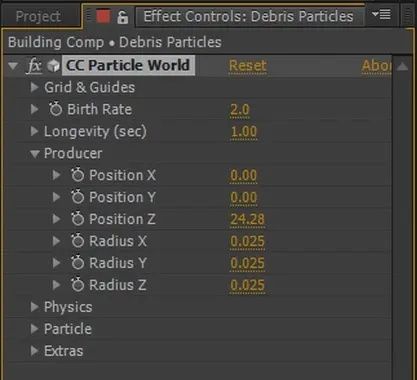
Increase the Radius X property as needed to have the producer cover the area where you want the debris particles to be spawned. For me, that is along the entire length of the building as that is the area where my explosions strike.
If you scrub through your composition you should see simple particles being continuously spawned at the correct position on your fake building.
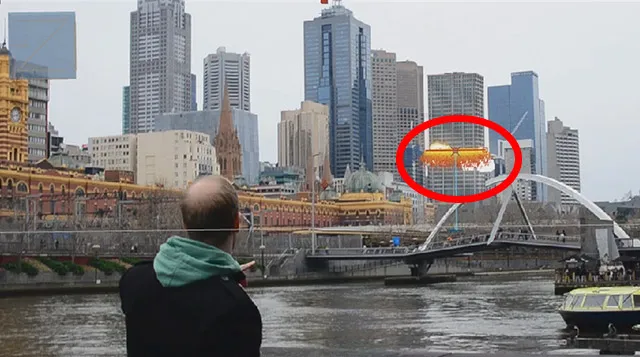
Let’s change the particles to use our concrete texture we set up. Drag the composition that contains your particle texture - for me that is my Concrete Particle Comp - into the Building Comp. Place it at the bottom of the layers and disable its visibility.
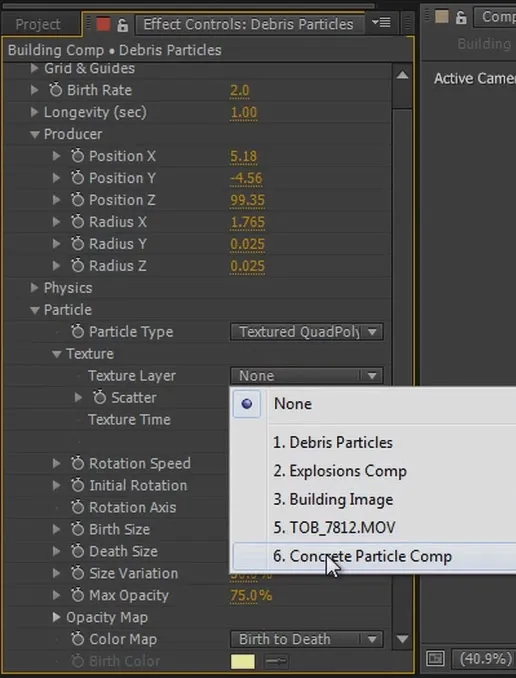
To set the particles in the CC Particle World effect to use our concrete texture, open up the Particle settings tab. Change the Particle type to ‘Textured QuadPolygon’. This will enable the Texture tab right below this property. Expand the Texture tab and you should see a ‘Texture’ option. From the dropdown menu select your Concrete Particle Comp to assign it as the texture to the particles.
If it appears as if your particles have just vanished it might be simply that your particles are now too small. You can fix this by increasing the Birth Size and the Death Size of the particle. This will depend on your scene and the particle texture you used, but for me, a size of around 10 was enough to reveal them.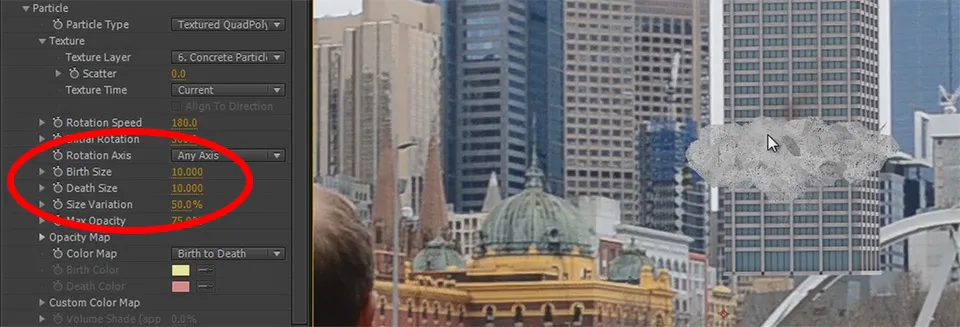
Playing back the effect you should now see random debris particles being spawned on the building throughout the entire scene. Adjust the speed and the gravity of the particles so they look like heavy chunks of debris falling.
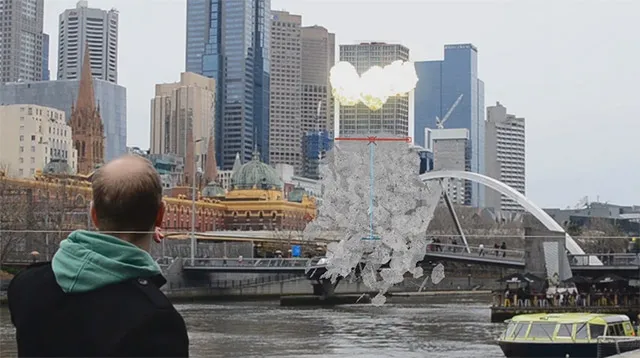
Two things I ended up tweaking on the particles were the size and the opacity. I reduced the size a little bit since the building fragments are very far away and shouldn’t be too big. I also increased the Max Opacity to 100% since concrete is usually not very translucent.
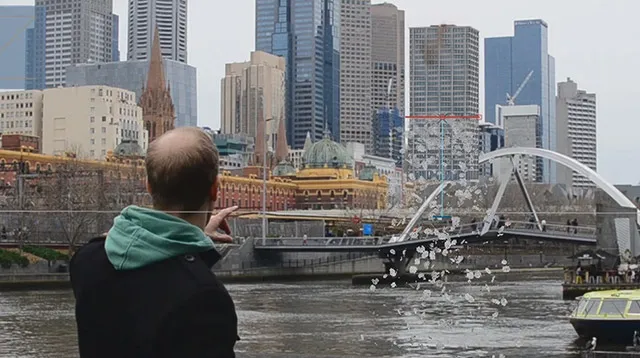
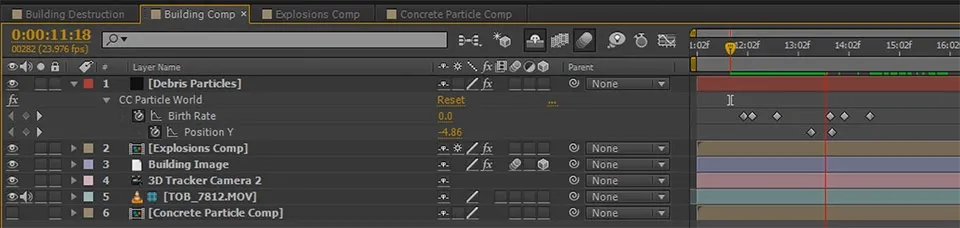
Now animate both the Birth Rate and the Position property of the CC Particle World effect to emit short bursts of debris particles right at the moment of the explosions. If your explosions strike the building in different locations like they did in my setup, reposition the producer correctly after each detonation.
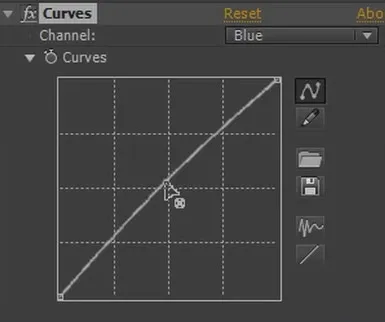
Finally, like with most visual elements that you composite into a scene, apply a Curves effect and tweak the colour if needed to make the debris particles sit a bit more naturally in the scene. I decided to push up the blue channel a little bit to match the debris up with the buildings in the distance.
Playing back the destruction effect, the explosions should now propel pieces of debris off the building.

Let’s add some smoke to the collapsing building!
Adding Smoke to the Collapsing Building
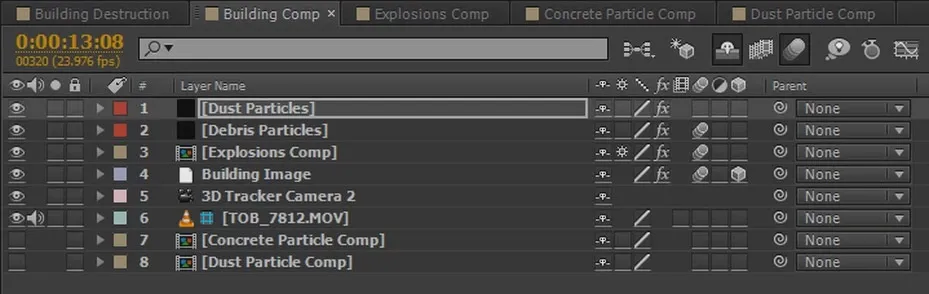
Similar to how we created the debris particles for the destruction effect, you will need to take some stock footage of smoke, place it in its own composition and mask it out. Note I added quite a lot of feathering to this mask to make the smoke blend out smoothly around the edges. I called this composition ‘Dust Particle Comp’.
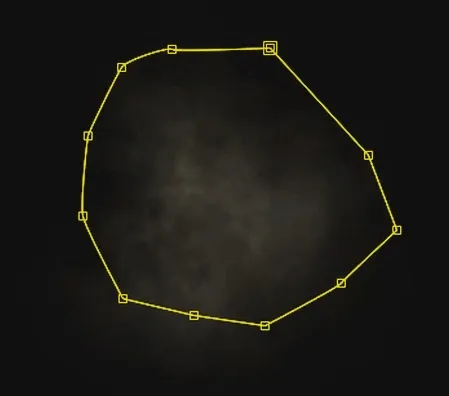
Create another solid in the Building Comp and call it ‘Dust Particles’. Add the Dust Particle Comp with our smoke texture into the composition and disable its visibility just like we did for the concrete debris.
Apply the CC Particle World effect to the Dust Particles solid. Position the Producer correctly in your 3D scene at the base of the fake building. Animate the birth rate and the size of the producer to spawn a large number of particles horizontally along the base of the building just as it starts to collapse. Imagine the building throwing up a large cloud of smoke as it falls in on itself.
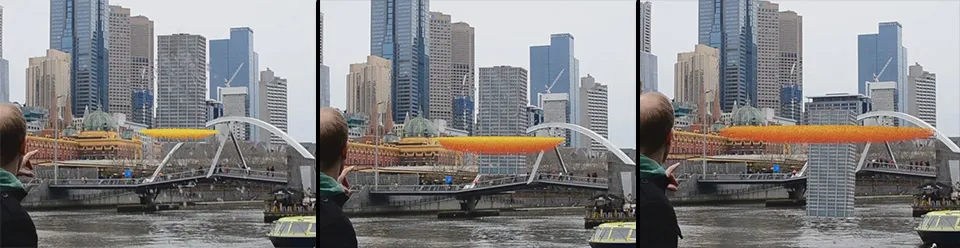
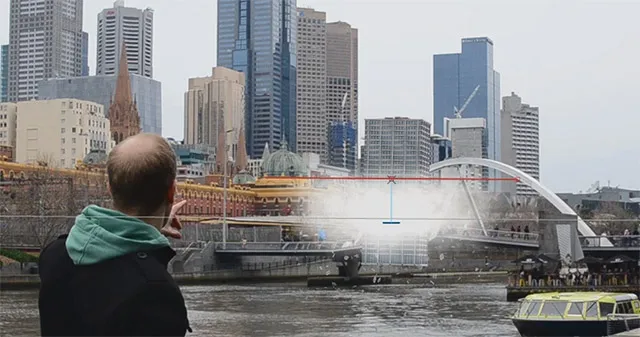
Next, assign the Smoke Particle Comp as the texture for the particles. Increase the particle size until you have a nice and solid smoke cloud appearing over the collapsing building. This starts to look quite cool, but gravity still pulls the smoke particles downwards which looks rather unrealistic.
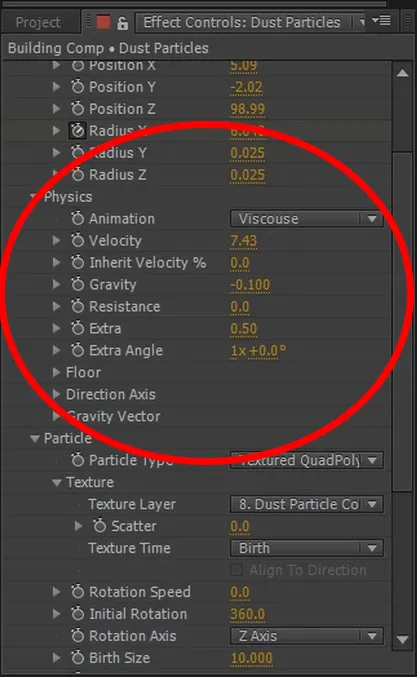
In the physics tab of the CC Particle World effect, set the Animation to ‘Viscouse’. Then tweak the velocity and gravity settings until your smoke slowly drifts off from where it is being spawned. I set the gravity to negative to make the smoke slowly drift upwards.
You should now see a nice fat smoke cloud sit right over the building during the destruction effect. Feel free to tweak this to your liking or darken the smoke with some colour adjustments if you prefer. I went with a very grey look to match the concrete look of the fake building I was destroying.
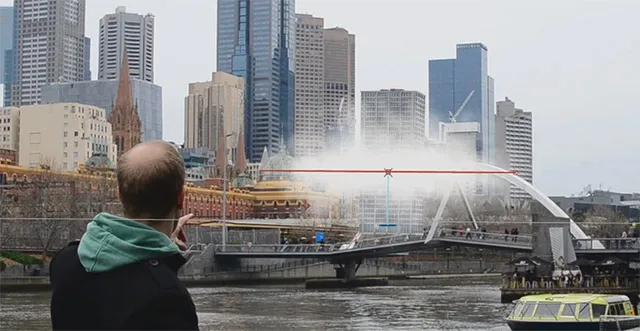
If you go back to the parent composition you should now see the building collapse into a cloud of smoke and the cloud should sit realistically behind the foreground buildings we defined.
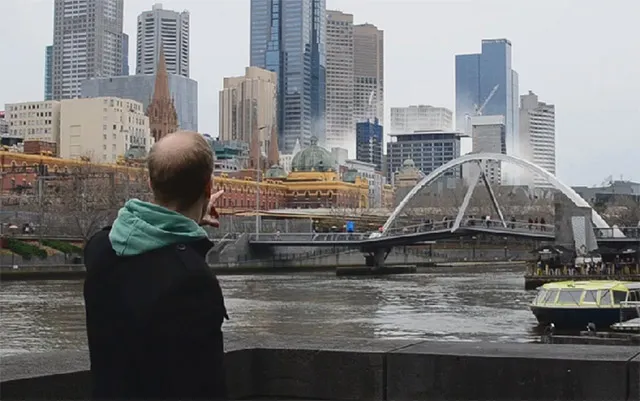
The very last thing to do is to add some lighting being cast by the explosions onto nearby buildings to blend the destruction effect nicely into our skyline.
Adding Lighting to the Explosions
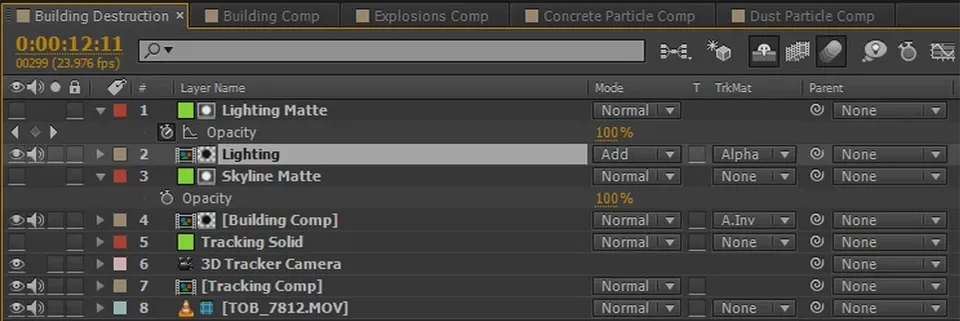
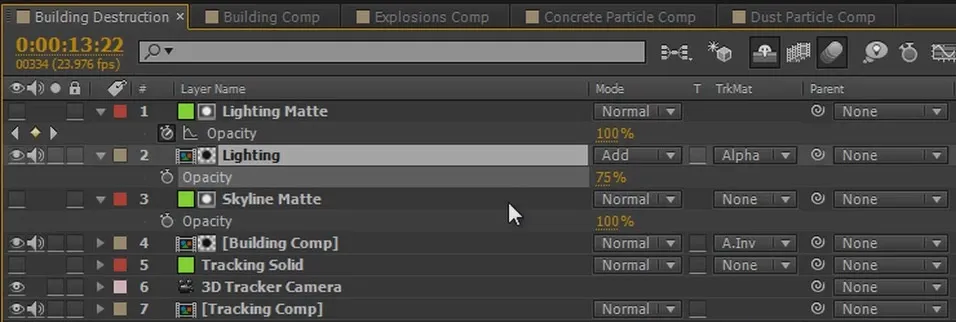
We want the lighting for the explosions to sit correctly over neighbouring buildings. To define which areas of the scene will receive the lighting, we will again use a track matte. Simply duplicate the Skyline Matte layer and rename the copy to ‘Lighting Matte’.
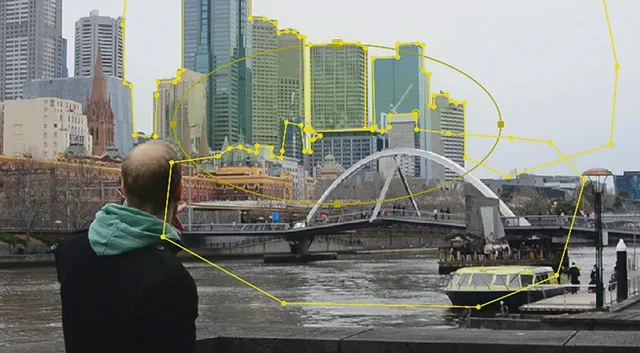
Now use masks to define the areas where you want the lighting to be applied. I chose a number of subtractive and additive masks on my layer to create a rough area around the centre of the neighbouring buildings that will be lit up by the explosions. I inverted the skyline matte mask so that the buildings in the foreground to not receive any lighting.
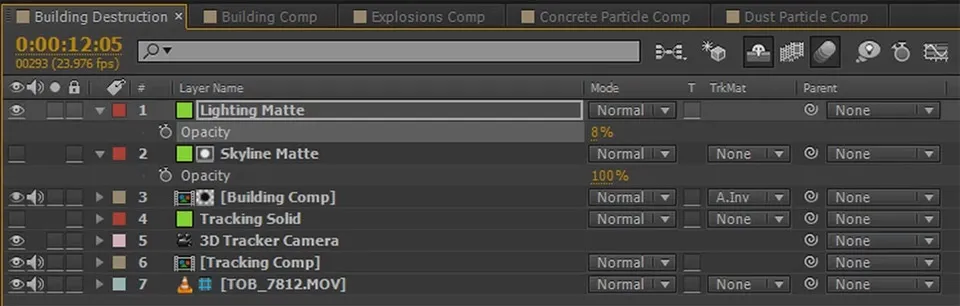
Animate the opacity of the Lighting Matte in time with the explosions to fade in and out. You want the layer to be most visible during the brightest moment of the explosions.

Next, duplicate the Building Comp layer and call this layer ‘Lighting’. Set the blend mode to Add and then set the track matte option to ‘Alpha’ to apply our Lighting Matte to it.
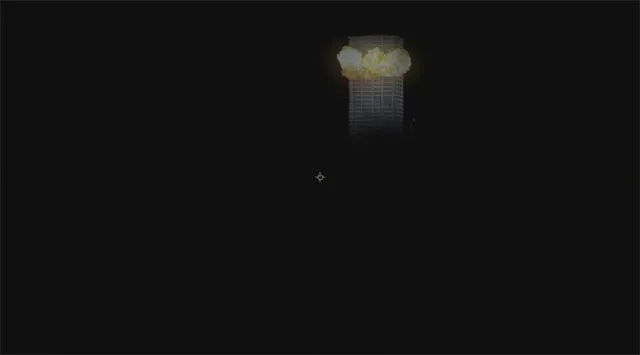
If you solo out the Lighting Layer you you will likely only see the building itself get brighter during the explosions, but none of the surrounding skyline. Why?
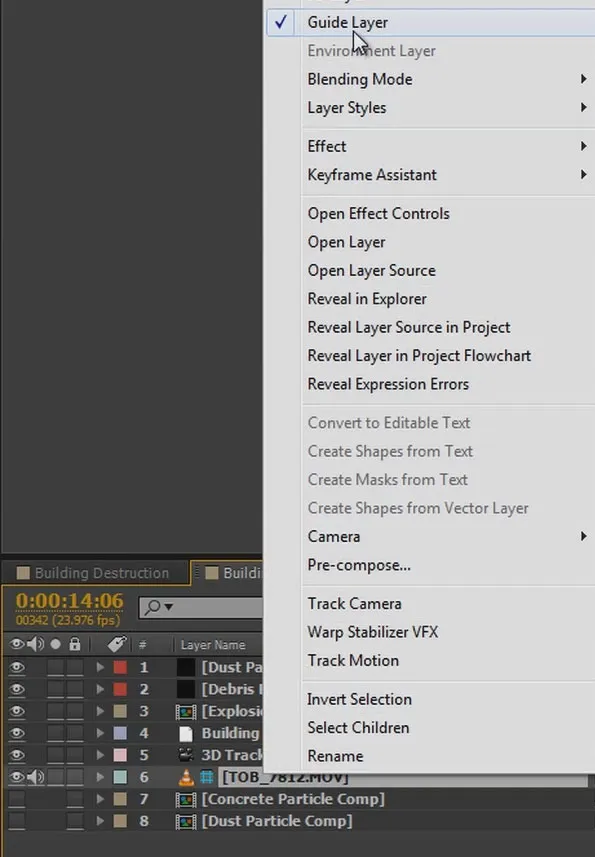
Because the Lighting Comp only contains our actual footage as a ‘Guide Layer’, which isn’t being rendered. To fix this, mark the base footage in this parent composition as a Guide Layer instead. Go into the Lighting composition and disable the Guide Layer flag on the base footage in there.
If you now go back to the parent composition, the Lighting layer should show not only the fake building but the entire skyline as defined by the Lighting Matte.
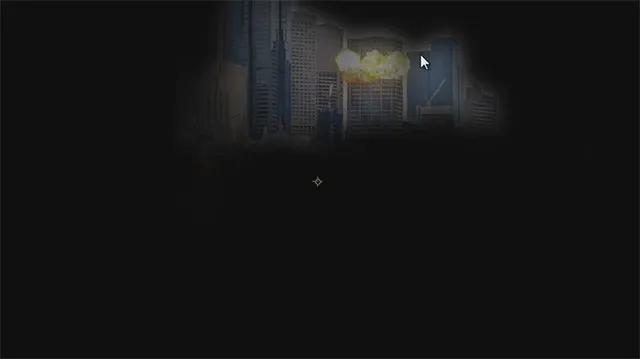
Tweak the opacity on the Lighting layer to suit your scene. I lowered it to around 75% which seemed to fit in nicely.
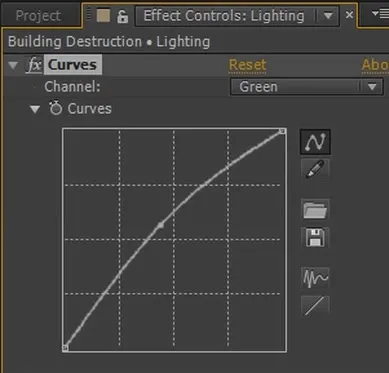
Apply a curves effect to the Lighting layer and increase the red and green channels to add some yellow into the lighting. You want the colour of the lighting to match up with the colour of the explosions so all elements for the destruction effect fit together.
And with that we are done and you should have a cool looking building destruction effect with a moving shot!

I hope you enjoyed this tutorial. Feel free to leave any comments, questions or suggestions in the section below.