 Surfaced Studio
Adobe After Effects - Building Destruction Effect (Part 1)
In this advanced After Effects tutorial I will show you, in detail, how to destroy a building within a moving shot. Don’t worry, we will be creating a fake building in After Effects so we can blow it up without harming a soul. Here is the final destruction effect that we will be creating:

Preparing Your Footage For The Building Destruction Effect
Whenever you are working with a moving shot (a shot where your camera is not fixed on a tripod) you need to track your footage. If you filmed your scene with your camera on a tripod you can skip this section.
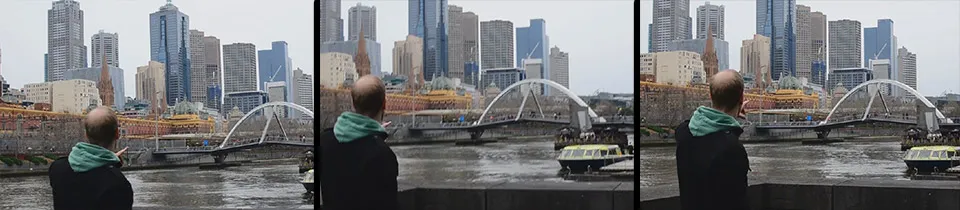
The footage I filmed shows me talking in front of the Melbourne skyline. We pretend like a massive explosions strikes a building in the distance and me and the camera man dive for cover. The camera then returns to show me, stunned, in front of the city as another explosion hits the building and it collapses in a wave of debris and smoke. Here is the footage we filmed - without the destruction effect.

Tracking this footage was going to be tricky due to the hectic movement of the camera in the middle of the clip. So I decided to track the beginning and the end of the footage separately. Since you can only see the building for a frame or two during the hectic movement, I decided to fix those two frames up manually afterwards.
Let’s get cracking with the 3D Camera Tracker.
Using The 3D Camera Tracker in After Effects
I have a detailed tutorial on how to use the 3D camera tracker in Adobe After Effects and I will assume that you watched it before attempting this building destruction effect.
As always, you want to cut out any foreground elements that could confuse the 3D Camera Tracker. Duplicate the base footage layer and add a mask over only the city part of the footage. I don’t want to include me in the mask so the tracker has a better chance of tracking the static geometry of the scene.
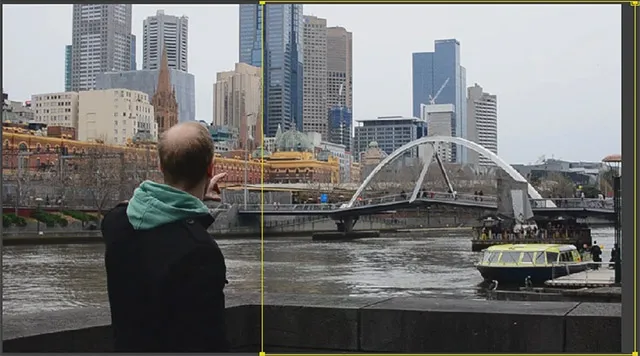
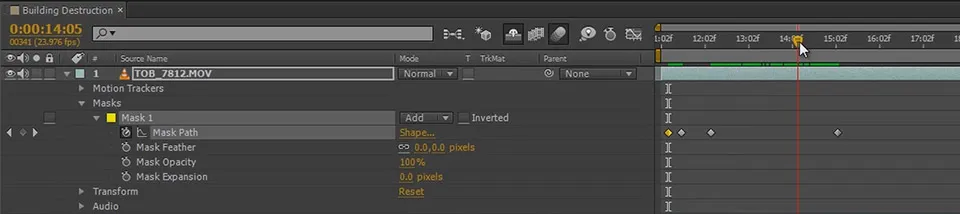
If the aim of the camera changes throughout the shot like it does in the clip I’m using here, animate the mask path so that it follows the city and avoids any moving foreground elements (like me) getting into the area of the mask. You want to do this fairly precisely to ensure your moving foreground elements stay out of the way of the camera tracker.
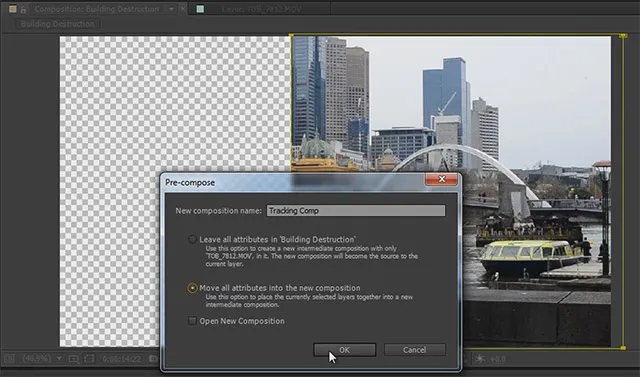
Before throwing the 3D Camera Tracker at the clip, remember to pre-compose your layer to nest all masks and effects inside it. Select the ‘Move all attributes into the new composition’ checkbox. Otherwise due to the render order in Adobe After Effects, the 3D Camera Tracker will not take the mask into account. I called this new composition ‘Tracking Comp’.
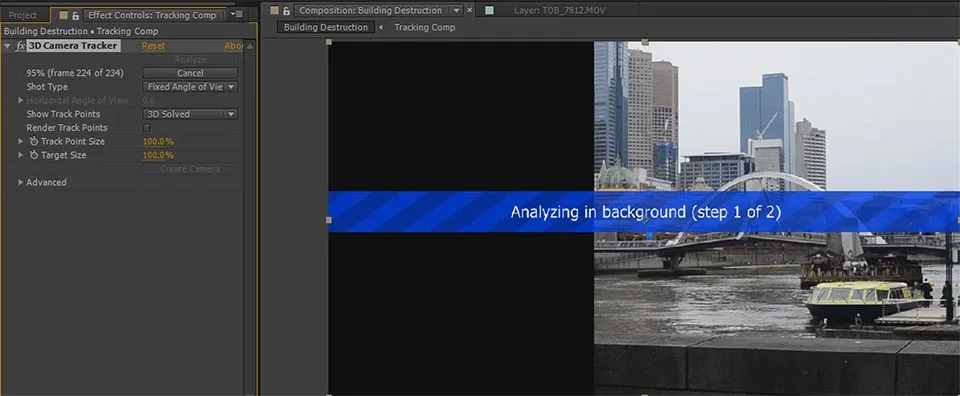
Now apply the 3D Camera Tracker effect to the new composition. If your shot is rather complex, try to check the ‘Detailed Analysis’ option under the Advanced settings. Go get some coffee and wait until the tracker has completed its work.
Once you tracked your footage you should see a large number of track points overlayed onto your footage. If that is not the case, something might have gone wrong and you may have to adjust your 3D Camera Tracker settings and try again. Depending on your footage, you may also see the message in the screenshot below:
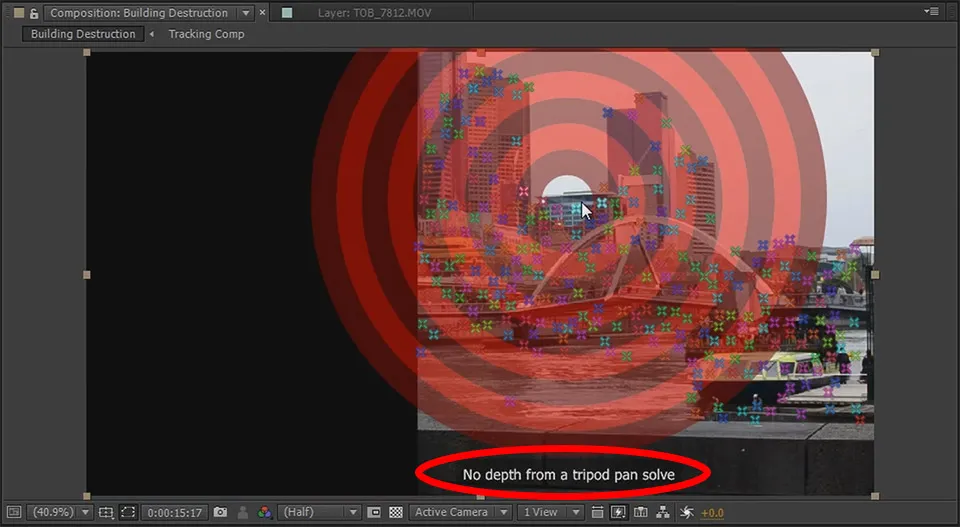
‘No depth from a tripod pan solve’ indicates that because your camera did not move in/out of the scene very much, the 3D Camera Tracker was not able to figure out how far the objects in your scene are from one another. If all you did was pan the camera around as if it was fixed on a tripod, this is the expected outcome.
Most of the time, as with the shot above, you will find that it’s actually not a problem because the shot itself only has horizontal or panning camera movement and it therefore doesn’t matter whether your tracking data contains depth or not. For the building destruction effect we will be placing the fake building and the explosions in the back of the scene and the camera only pans so it does not matter.
We are now ready to place the fake building into our scene!
Creating A Fake Building
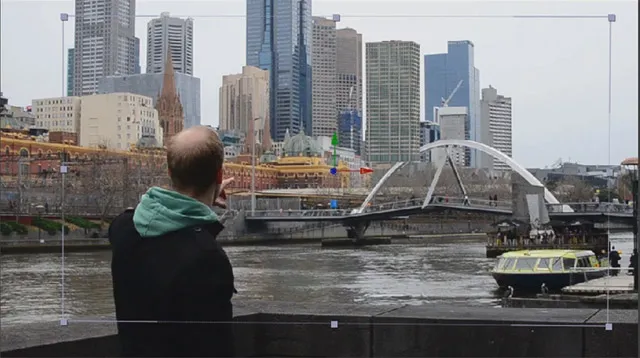
Select the 3D Camera Tracker effect and Shift-click 3 points on the flat surface of a building in the background. Choose 3 points at the position where you want to add the fake building. Then right click and select ‘Create Solid and Camera’.
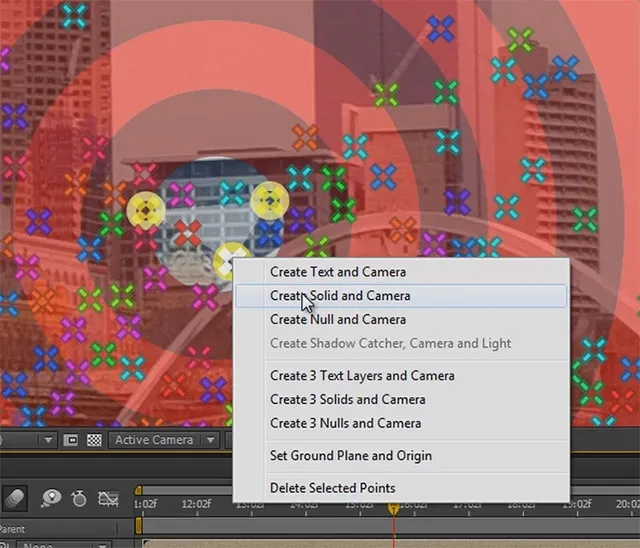
This will place a new solid on the surface of the building and create a 3D camera in your composition. I will name this new solid ‘Tracking Solid’. Scrubbing through your footage, you should see the solid follow the building correctly throughout the shot.

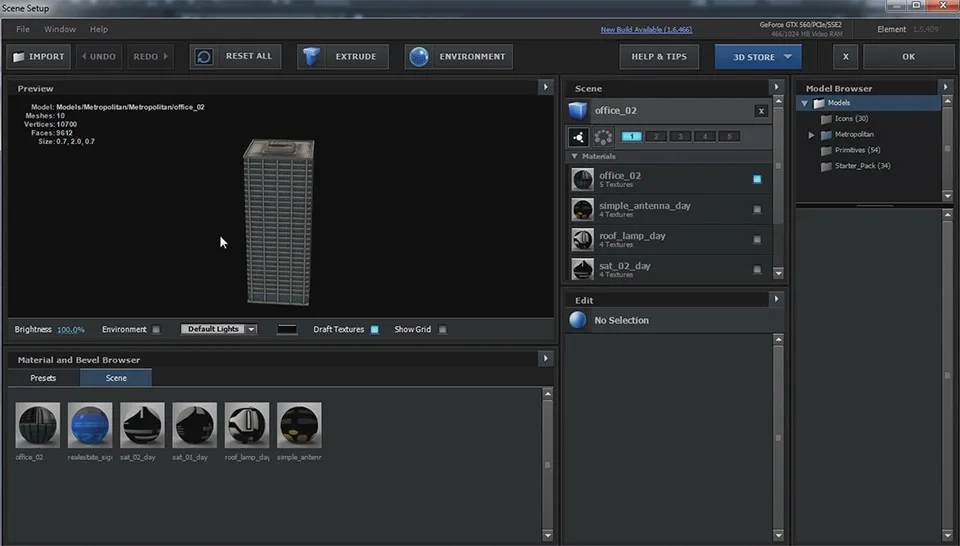
In order to add a fake building, you will need an image of a building. You can find free ones online (beware of copyright!) or, if you own Element 3D and the Metropolitan model pack from videocopilot.net, you can create your own. Here is a screenshot of Element 3D with a building model loaded. I exported the building as a simple image because it allowed me to get a building image with the correct viewing angle to fit into my shot.
Also want to make sure that the lighting on the building matches your city skyline as best as possible, otherwise the effect will not look very convincing.
In order to place the building image correctly in your scene, duplicate the Tracking Solid layer we created earlier. Make sure the copy is selected and then alt-drag the building image from your project window onto the layer. This will replace the contents of the layer without affecting it’s position in the scene, placing the building image at the same location as your tracking solid. Rename the layer to ‘Building Image’.
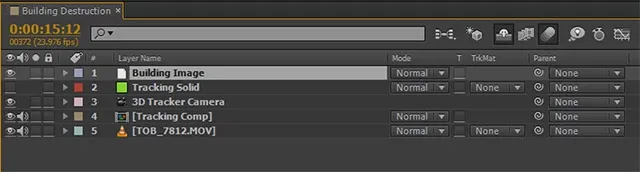
Reposition the 3D Building Image layer as required to place it exactly where you want the fake building to stand in your skyline. Note that at this point, the building will overlap all others, but we will fix that up in a moment.
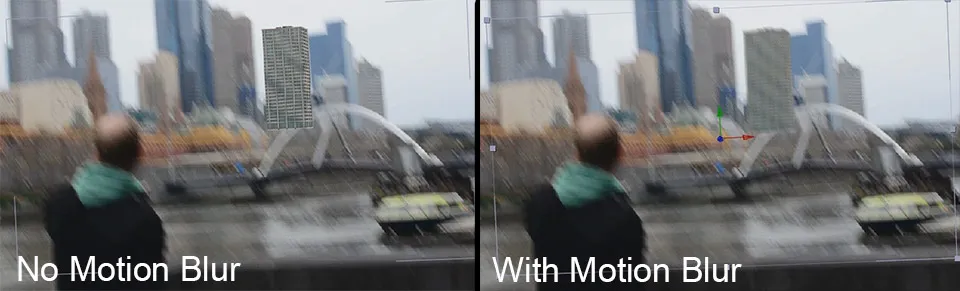
Before we move on, there are 2 small things we need to fix to ensure the building image blends a bit more naturally into our scene.
Blending The Building Image Into The Scene
There are 2 important things you need to do to composite the fake building more realistically into the scene. For one, you should enable motion blur on the layer and on your composition so that if the 3D camera moves quickly, the building image is correctly blurred to match the movement. Without motion blur, your image will stand out unnaturally in the scene during fast camera movement.
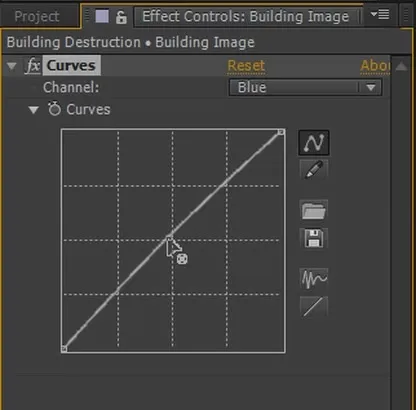
Next, you need to make sure that the building matches your original footage in terms of brightness and colour. For this I usually love to use the Curves effect. Simply apply it to the building layer. The skyline is quite far away from where I am standing and the buildings are all tinted slightly blue due to the particles in the air. I will use the Curves effect and increase the Blue colour channel a little bit to give my building the same tint.
We have placed a fake building on top of our base footage, but we have not yet placed it in the scene. It overlaps all other buildings rather than standing in between them. Let’s fix that up and prepare a track matte to help us place all other elements in rather than on top of the city.
Creating The Skyline Matte
We will create a 3D track matte to define the elements in the skyline that we want to sit on top of/in front of our fake building. For this, you first need to duplicate the Tracking Solid we already created. Rename the layer to ‘Skyline Matte’ and place it directly above the Building Image layer.
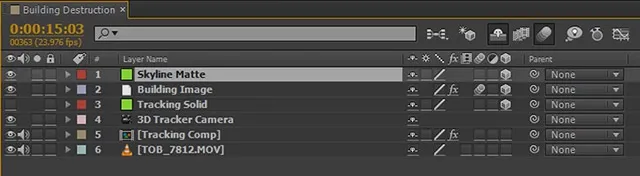
When you selected ‘Create Solid and Camera’ earlier, the Tracking Solid we created has a pretty low resolution (usually 200 x 200 pixels) and so does our new Skyline Matte. Since we will draw a detailed mask onto the Skyline Matte, we need to increase the resolution so the track matte does not end up being pixelated. Open up the Solid Settings dialog and set the resolution to something large like 3000 x 3000.
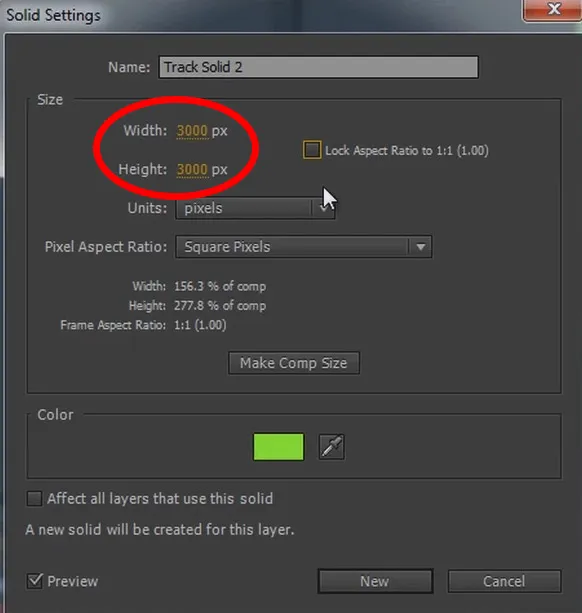
Since we increased the resolution and therefore the size of the solid, you will have to zoom out of your composition and scale it back down so it fits more tightly around our actual scene. Throughout the shot, the entire frame should always be covered by this Skyline Matte layer.
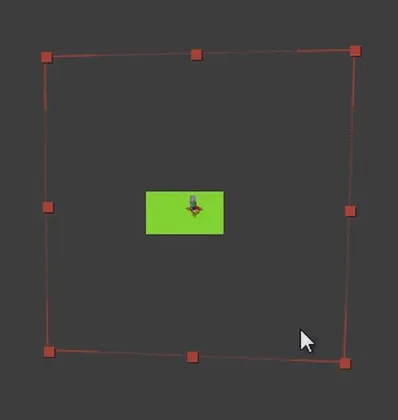
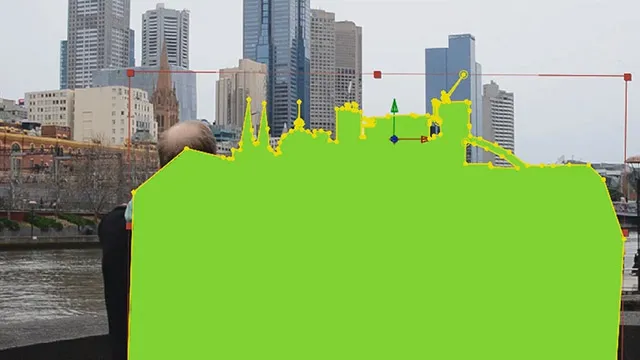
Next, using the masking tools available in Adobe After Effects, draw detailed masks onto the Skyline Matte layer to outline the elements you want to sit in front of our fake building. You want to do this as precisely as possible. The screenshot below shows my Skyline Matte.
Ensure that the Skyline Matte layer sits directly above your Building Image and set the track matte option on the Building Image layer to ‘Alpha Inverted’.
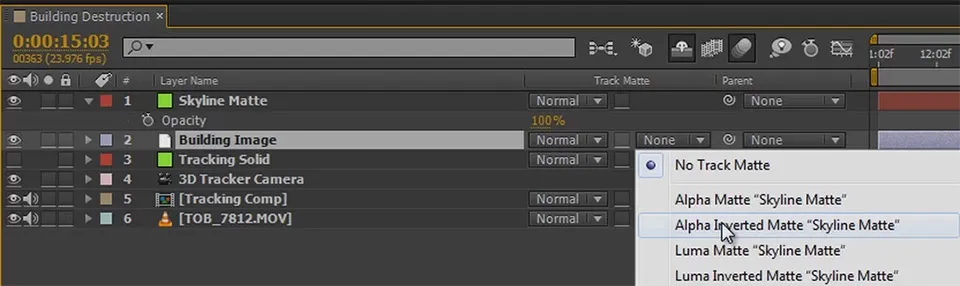
The Skyline Matte layer will become invisible and, everywhere where it was visible, the building will become invisible. Assuming that your masks are accurate, this will give the illusion that our fake building actually sits behind some of the buildings in the background.
Let’s get started adding some of the destruction elements!
Adding The Building Explosion
The Skyline Matte now properly covers up the lower part of building throughout the entire shot. But what if we want to add other elements like explosions, smoke, and debris to our destruction effect? We’d want all of those elements to affected by the Skyline Matte as well so they appear to sit behind the buildings in the foreground.
Since you can apply a track matte in Adobe After Effects to only a single layer, we need to pre-compose the building and all other destruction elements that we want to apply the Skyline Matte to.
One difficulty we have to overcome with this shot is that we have a 3D tracked scene and the layers we are working with are 3D layers. If you pre-compose the layers, they will no longer be properly placed in your 3D scene. One way to get around this issue is to make sure you nest a copy of the 3D camera together with your 3D layers. I also recommend nesting a copy of your base footage so you can see what is going on when working in the pre-composition.
So, duplicate the 3D camera and the base footage. Select these 2 layers together with the Building Image layer and pre-compose them.
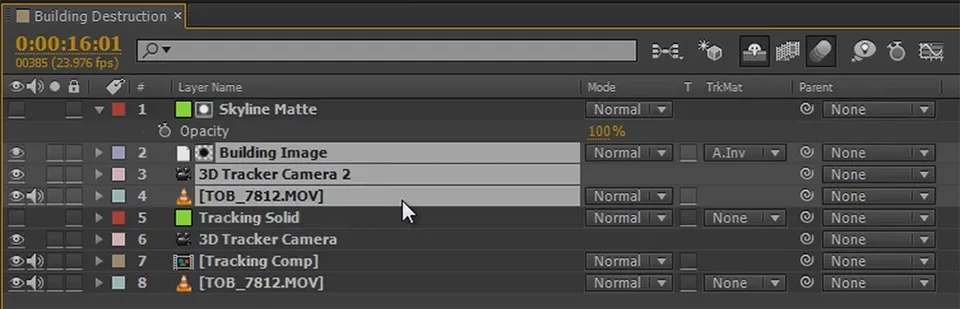
I will call this composition ‘Building Comp’. Ensure that the track matte option for the new composition is set back to Alpha Inverted so the Skyline Matte now applies to all elements within the nested composition.
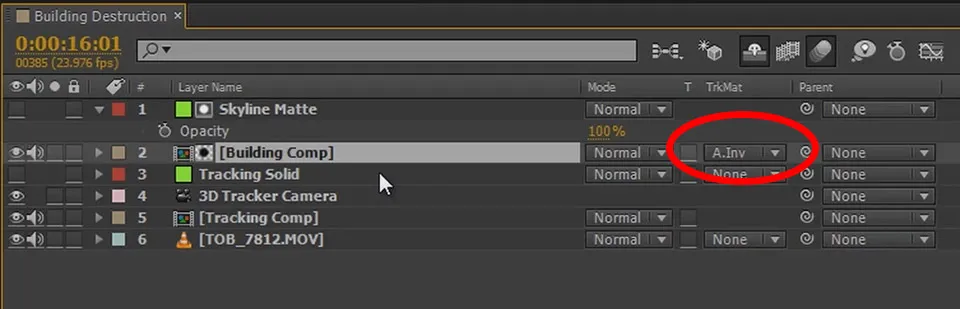
Next, go into the Building Comp and set the base footage layer to be a guide layer only. We do not want the footage to be rendered within this composition but just help us out when we go and position the explosions and any other destruction elements.
To easily place the explosions correctly in the 3D scene I recommend duplicating your Building Image layer and replacing it with the explosion footage. If you don’t have any explosion stock footage, you can find free explosion stock footage on detonationfilms.com.
Add any number of explosions in your scene and position them where you want them to hit the building. In the screenshot below you will see that I have also animated the opacity of the explosions because I wanted them to fade out a little faster.
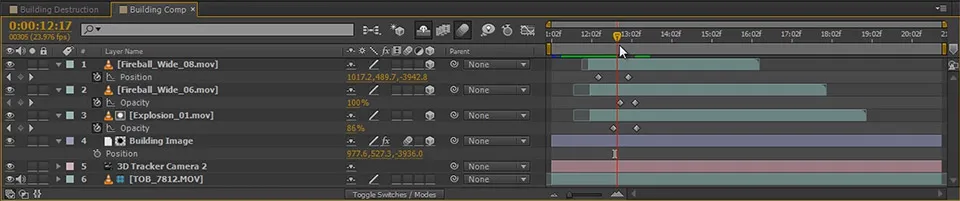
Playing back the Building Comp, you should now have explosions strike the building. Note that within this composition the elements will overlap the city footage again as we don’t have apply the Skyline Matte here. They will all be properly covered up when we go back to the parent composition.
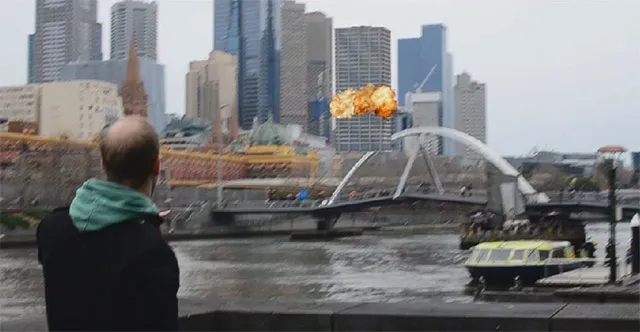
I duplicated the explosions a couple of times and moved them around in the scene to pack some more action into the destruction effect. How much and how many is totally up to you.

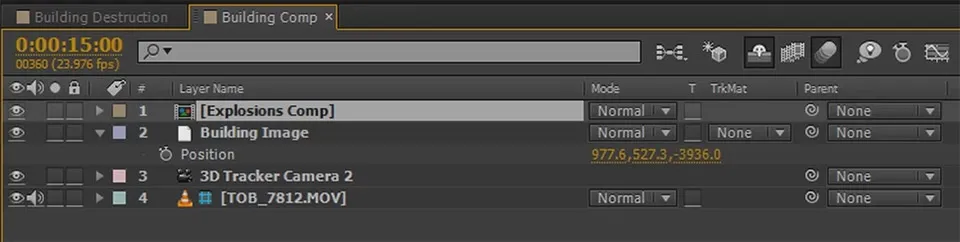
To keep things neat, I recommend pre-composing the explosion layers. Again, remember to also nest a copy of the 3D camera within this new composition or the explosion elements will not appear where you’d expect them to. I called my layer ‘Explosions Comp’.
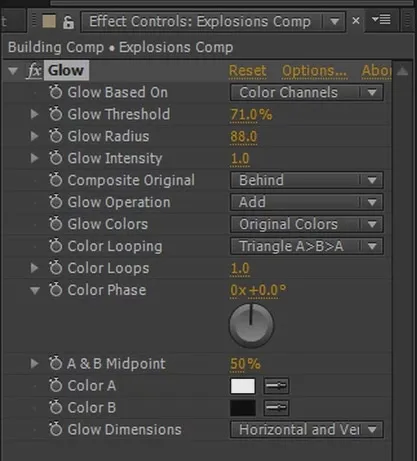
To add a bit of glow to the explosions and make them sit a bit better in the scene, I then applied a Glow effect to the Explosions Comp layer. The settings are up to you, just tweak them until you are happy with the glow the explosions are giving off.
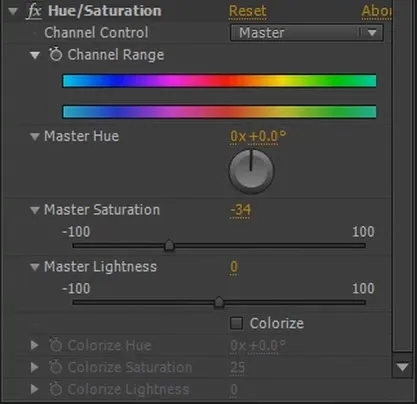
The explosion elements I used were a little bit too saturated for the footage I was placing them on so I also applied a Hue/Saturation effect to drain some of the colour out of them.
And that’s it for the explosions. As a last step for the destruction effect, let’s make the building ‘collapse’ after it has been bombed.
Making The Building Collapse
If you’ve seen actual footage of buildings collapsing, they usually fall in on themselves because the structure no longer supports their own weight. We will simulate this by animating the building image to sink behind the other buildings. This is a bit of a cheat, but the smoke and debris elements we will add later will cover up the fact that we’re simply faking it.
Keyframe the position of the Building Image to slowly sink downwards after the explosions hit. I also gave the building just a tiny bit of rotation so it appears as if the building is leaning as it collapses.

This will cause the building to sink downwards. Of course, within the Building Comp, all elements still sit on top of the city.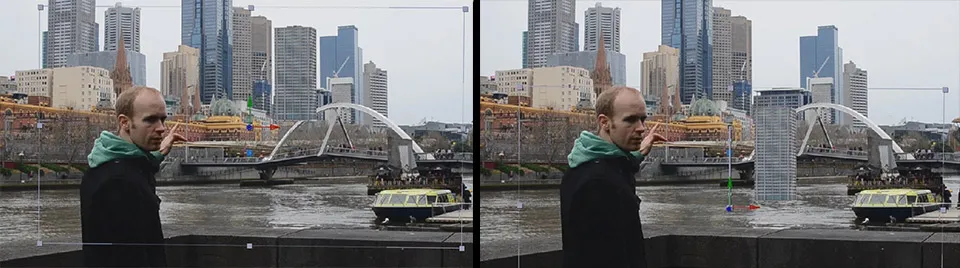
If you now return to the parent composition, the Skyline Matte is applied to all layers within our Building Comp and elements will sit behind the foreground buildings again. You should now have a cool effect of a number of explosions going off on the building, followed by the building slowly collapsing behind the other structures.
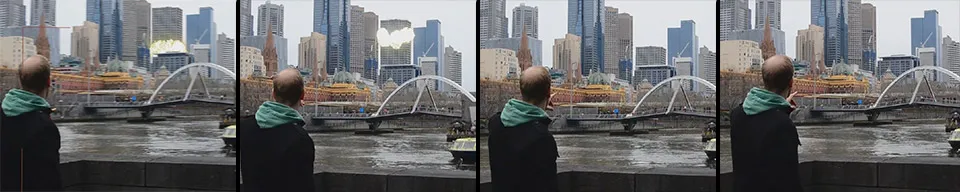
And that’s it for the first part of the building destruction effect. In the second part of this tutorial I will show you how to add smoke, debris as well as realistic lighting to finish off this visual effect.