Accessories for Film Makers
This page is part of my larger Resources For Film Makers section. I own a ton of different accessories that I use whenever required, some cheap, some expensive, some store bought and some self made. This list contains my most frequently used store bought accessories as well as a few things to keep in mind if you are considering using them for your own film projects.
Manfrotto 190XPro4

After I burnt through a couple of Vanguard tripods (issues with leg joints) I decided to upgrade to something a bit more sturdy and got my hands on a Manfrotto 190XPro4 Tripod with Ball Head . This tripod is a beast and it feels solid enough to break down a door, weighing in at just over 2kg. It extends to a height of up to 160cm and has a flexible center column that can be set up horizontally. I am also a big fan of the ball head that comes with it as it makes it really easy to level out the camera even if the tripod stands on uneven ground. I wouldn’t take this tripod with me on travel, but for all of my shoots and filming tutorials it is ideal. I don’t have to worry about accidentally breaking it and it can hold up to 7kg which is much more than I need to support my Canon 5D Mark III and the EF 24-70mm F/2.8 lens.
Zoom H2N
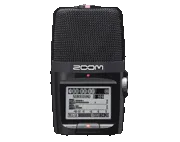
Before I started to record my tutorials using the Rode SmartLav microphone, I was using my Zoom H2N Handy Recorder . I still use it to capture most sound effects for my short films because it’s easy to use and the audio quality is superb! I never had any issue with the battery running out and since it uses an SD card, I can just use the same memory cards I use for my camera. I usually place it on a tripod just outside the view of the camera to record my audio. The only issues I sometimes have with the H2N is that it picks up handling sounds and ambient noise a little bit too easily. You also definitely want to get a wind shield for the recorder if you intend to take it outside.
Zoom H1

The Zoom H1 Handy Recorder is the little brother to the H2N and while it comes with a slightly smaller feature set, it also costs a fair bit less. The audio quality is just as good as on the H2N and if you’re looking for something a little smaller that you can use more like an interview microphone or mount on top of your DSLR like a shotgun mic, the H1 is worth considering!
Rode SmartLav Lavalier Microphone
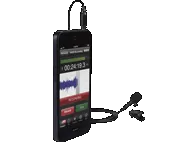
Because I film my tutorials in my living room and the Zoom H2N ended up picking a bit too much ambience noise and reverb I decided to buy a Rode SmartLav Lavalier Microphone for iPhone and Smartphones . The microphone clips to your shirt (can you see it in my newer tutorials) and records straight into your mobile phone. There is a recording app available with a ton of different settings and filters, but it is currently only available for the iPhone. I did have to tweak the settings on the app a little bit to disable an overly aggressive noise gate, but I am much happier with the sound from the Rode SmartLav than I was with the sound from the H2N - for tutorials. The H2N does not have bad audio by any means and I still use it for all of my short films, but for talking to the camera I prefer the dry, direct sound from the lavalier microphone.
SD Cards
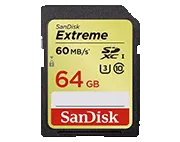
Listing SD cards as accessories might sound silly, but I actually have a little pool of SD cards and only one or two of them that I actually use. The most important aspect when shooting video at high definition is to use an SD card that has sufficient write speed. When filming with my Canon 5D Mark III at 1080p I need my SanDisk Extreme 64GB SDXC Memory Card with a write speed of 60MB/sec to be able to capture the video stream without the recording being aborted due to buffer overflow. You want to get at least a Class 10 SD card when filming with a DSLR. If you are shooting with a compact camera or at lower resolution a slower SD card will likely suffice.
Pop up green / blue screen
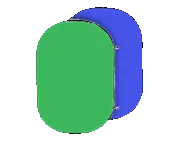
Most recently used to shoot our Halloween horror special ‘The Ring’, I really like my Blue / Green Pop Out Background Panel . It is basically a portable green/blue screen that is easy to just pop up and use wherever we are filming. I do find that it is a little bit small at times and you will have to be careful that your subject doesn’t leave the area of the popup screen, but it makes life a lot easier than having to lug around and set up a full blown green screen backdrop every time.
Rhino Camera Slider
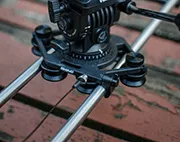
I backed the Rhino camera slider when it was still a Kickstarter project. I did end up buying the Pro version of the slider and to be honest, I haven’t used it very much over the last few years, mainly because of its size and weight and the effort it takes to set up. I have no quarrels with the quality of the slider shots, it works exceptionally well and you can see a few sample shots in my Rhino Camera Slider review. We did use the slider with great results for our recent Halloween horror special ‘The Ring’ to create some very cinematic looking shots. Unless you plan to mount a huge camera on the slider and have a professional set of camera tripod legs to hold it all up, I would recommend going for the carbon fiber model instead of the Pro. You will likely get much more use out of a model that is a fraction of the weight and therefore easier to take with you and set up.
LED Lights
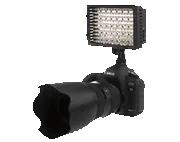
I bought a cheap, small and battery powered LED panel off eBay that I can mount onto my DSLR camera using the hot shoe adapter. The closest LED light I could find on Amazon is the NEEWER 160 LED CN-160 Dimmable Video Light which you can get for around $30. Quite frankly I don’t usually have it mounted on top of my camera as I’m not a big fan of the ‘light directly from the front’ look in my videos, but I use the LED light a lot off camera or bounce it off walls to fill in dark areas or even out the light when shooting in bright environments.
Lilliput 7” HDMI monitor
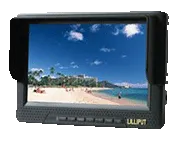
I used to own the Lilliput 7” LCD monitor with HDMI and had it connected to my Nikon D7000 when filming tutorials so I could see what I was recording. I ended up trading it in once I upgraded to the Canon 5D Mark III because it was easy enough to get the framing and focus right with my wide EF 24-70mm lens and the infrared remote control. This is a fairly affordable field monitor and while the quality isn’t bad, it didn’t quite win me over mainly due to it being a bit clunky to set up. I am still in the market for a smaller, more portable field monitor and am looking for a potential wireless solution.