Creating a Muzzle Flash
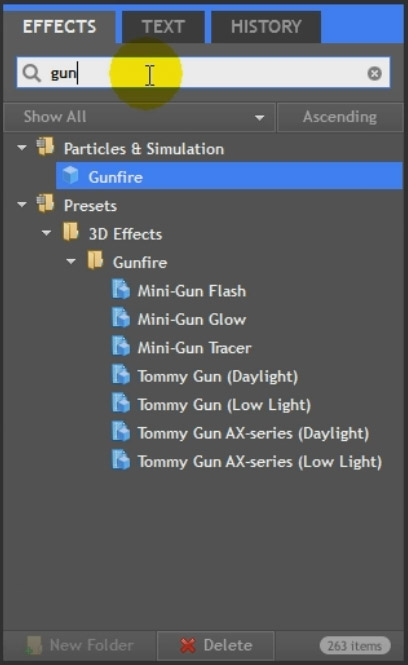
Create a new Composite Shot in HitFilm 2. You can do this by selecting a clip in your editor window and right clicking it or by right clicking in your project window and selecting to create a new composite shot. Initially, you will see nothing but a black background in your preview window. Let’s jazz it up with some effects! In the effects panel, search for ‘Gunfire’. Note that HitFilm 2 does contain a Gunfire particle effect and a variety of presets.
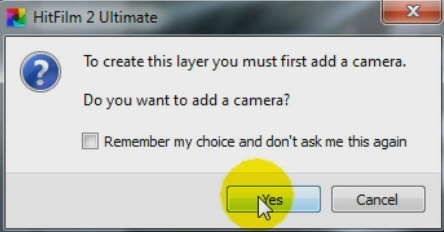
Drag the ‘Gunfire’ effect preset into your composite shot. This will create a brand new layer and HitFilm 2 will ask you if you want to add a camera into your scene. The muzzle flash effect in HitFilm 2 uses a 3D particle system to create a 3D effect and in order to view it properly, you need a camera in your scene. Just click ‘Yes’.
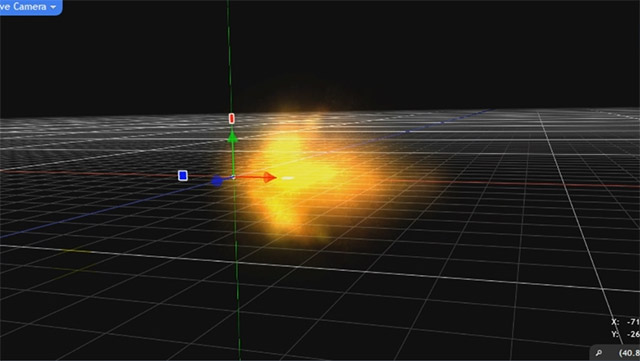
If you rotate your camera around the Gunfire effect, you will see that rather than a flat piece of stock footage, the muzzle flash is fully volumetric. This is great because it allows you to place the gunfire in your scene exactly where you need it, no matter which direction the gun is pointed.
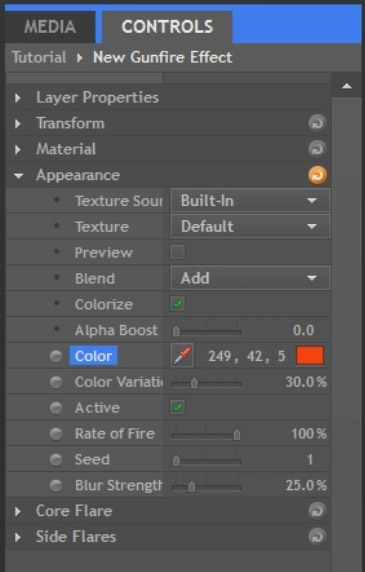
Select the Gunfire layer and go over to the left side to select the ‘Controls’ tab. This tab contains all the settings available for the layer and the Gunfire effect that has been applied to it. This is where the fun begins! Open up the Appearance tab on the layer. This is where you can control the appearance of the entire effect layer.
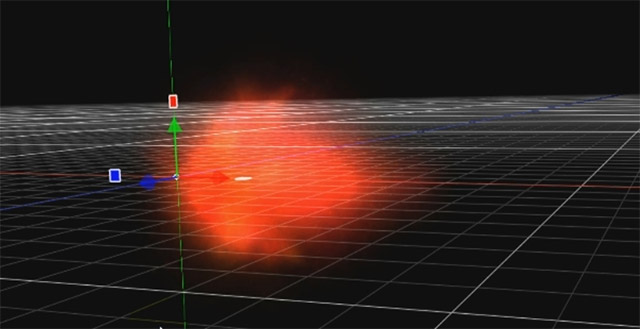
Play around with the properties and tweak some of them. You should immediately see the Gunfire effect reflect your changes. Here is the Gunfire effect after I changed the colour from yellow to a dark red. Try out some other properties to get a feel for what they do.
Besides the Appearance tab, the Gunfire effect layer has two other important tabs: Core Flare and Side Flares and they contain all the effect parameters to control the main burst of fire and the side flames for the gunfire effect. Because HitFilm 2 gives you full control over all of the effect parameters, you can shape and style your gunfire effect however you like to fit your scene.
You can even turn the gunfire particles into something entirely different. Just for fun, let’s quickly create a laser beam by tweaking the Core and the Side Flares settings!


