Zombie Hunter VFX Short Film Colour Grading
The first clip we will work with is the short sequence from our Zombie Hunter VFX short film that we colour corrected in the last part of this tutorial. Here is the corrected scene we ended up with: 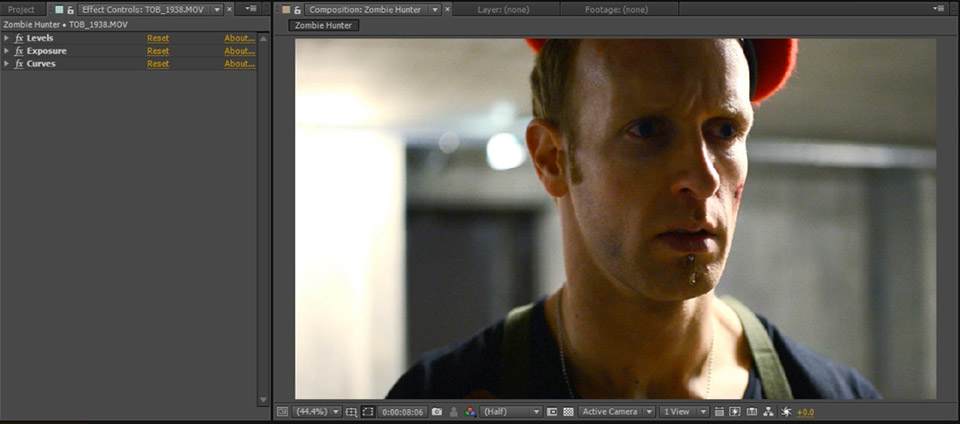
When performing colour grading in Adobe After Effects or Premiere Pro, I like to use Adjustment Layers. Adjustment Layers allow you to gather all the colour grading effects in one place, apply them to all clips below the layer and easily control the strength of the effect by altering the opacity of the adjustment layer.
If your software does not support adjustment layers, simply apply the colour grading effects to the individual clips. Since I am working in After Effects, I created a new adjustment layer, called it ‘Colour Grading’ and extended it to cover all clips in my composition.

First, I wanted to add some more contrast to the footage to give it a more edgy look. For this, search for and apply a Curves effect. As we did in the colour correction tutorial, add some contrast into your footage by raising the upper end and lowering the bottom end of the curve.
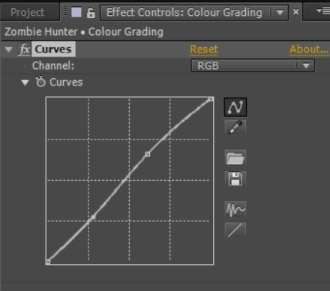
This will give our footage a harsher, grittier look.
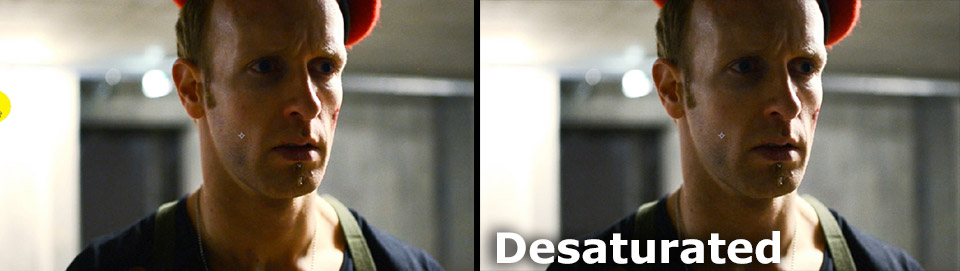
Next, to make the footage look colder and prepare it to receive a nice colour tint, I decided to apply a Hue & Saturation effect and drain about 20% of saturation out of it.

This makes the zombie hunter clips look much colder.
You can push this effect much further, but for me, it’s time to start tinting the footage!
For this, apply another Curves effect. While you could go back and change the Curves effect we already applied, I prefer to layer small changes on top of each other since it makes it easier for me to go back and disable specific elements of my grading pipeline.
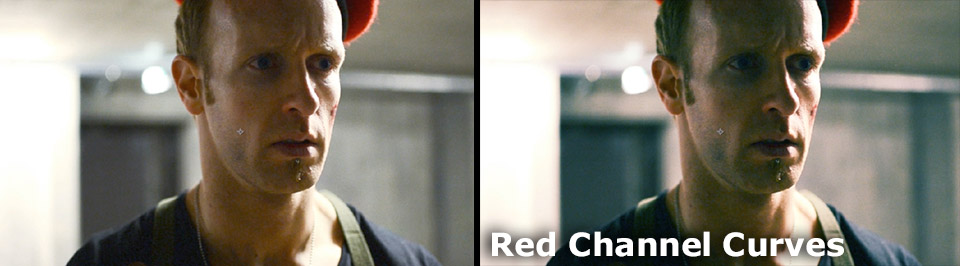
In the Curves effect, go over to the Red channel and drain the red colour from the lower end of the video.
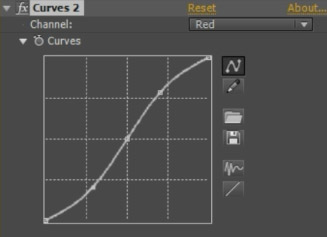
Because we are modifying a single colour channel, removing the red colour from the shadows of our video will tint the dark areas cyan.
Now go over to the green channel and bump up only the middle of the curve. I added two additional points on either side to keep the rest of the curve unchanged.
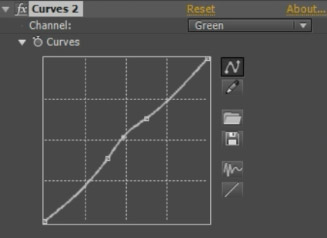
Our Zombie Hunter clip now has an interesting green look in the mid tones.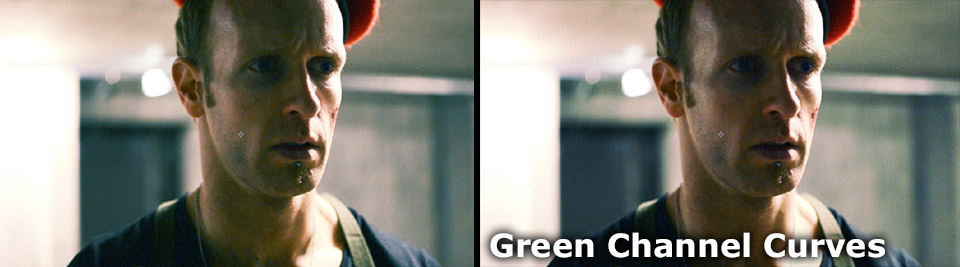
Now go over to the blue channel and push up the lower end of the curve to introduce some more blue into the shadows of the footage.
Blue channel curves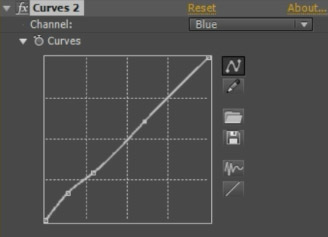
It’s a fairly subtle effect, but the blue curves drain some more of the warm colours out of the shadows and round off the colour tint nicely.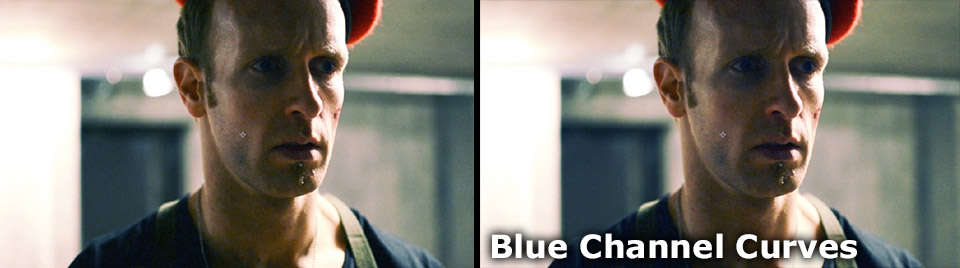
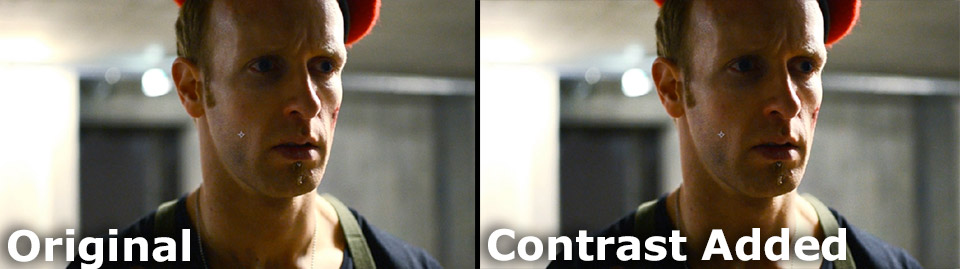
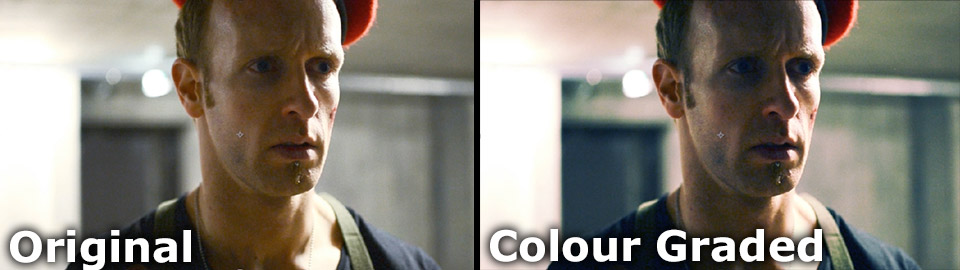
If we compare the original footage to the version with added contrast and colour tint, we can slowly start to see the final look taking shape.
While scrubbing through my footage I did notice however that the highlights of the image appeared rather red. Have a look at how the bright areas behind me in the screenshot have a strong reddish tint.
This took away from the dark and gritty look I was going for so I decided to fix that up. For that, go back to the curves effect and bring down the highlights of the Red channel. Then go over to the blue channel and increase the highlights. This will replace the red tinted highlights with a subtle blue colour tone.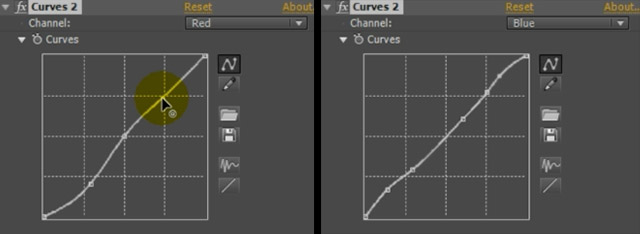
This looks much better! Our footage now has a much more consistent and darker look.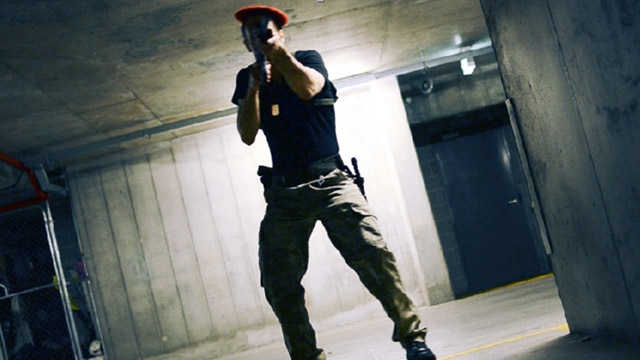
The footage now no longer looks plain and boring, but is starting to look a lot more moody and cinematic. Finally, because I think it really suits the style of the Zombie Hunter video, I am going to add a vignette.


One Response
Thanks for helping me learn more about color grading. I actually had no idea that it could help achieve an emotional impact you want from the footage. Perhaps it could also be important to understand the basics of color theory to understand when certain colors should be used.