Fixing the Exposure of your Footage
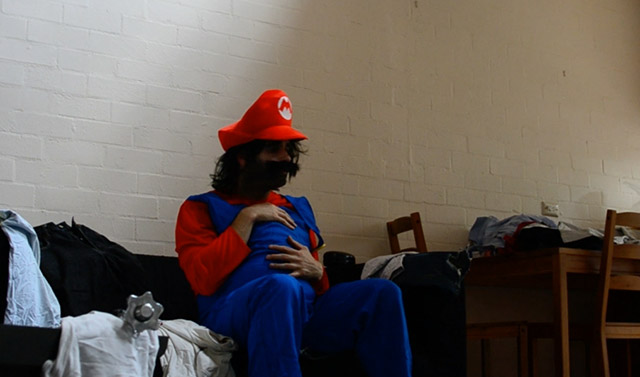
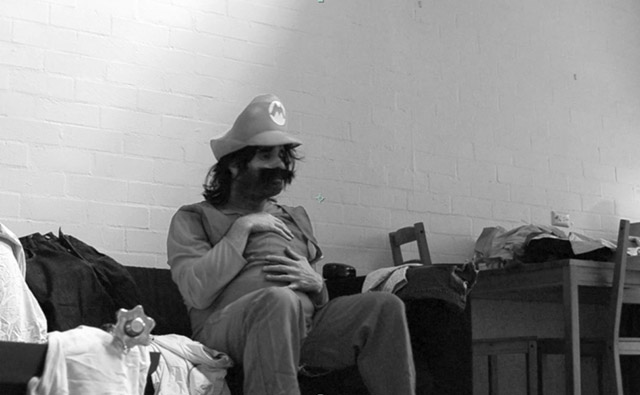
Here is a screen from the original footage for the Super Mario Bros VFX short film Mario’s Magic Mushroom that I released a little while ago. Notice that the footage seems way too dark, especially around Mario’s face, and that the white balance is a little bit off.
The first thing I like to do when correcting colour is to fix up the exposure of the clip. We want to make sure that the brightness of the pixels is distributed properly from dark to bright to give a pleasing image. One little trick I learned from FilmRiot is to desaturate the footage first to make it easier to see the bright and dark areas and whether something is fully black or white.
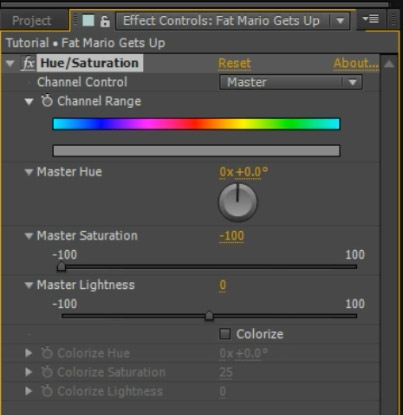
To achieve this, you can simply apply the Hue/Saturation effect in Adobe After Effects to your footage and reduce the Master Saturation property to -100.
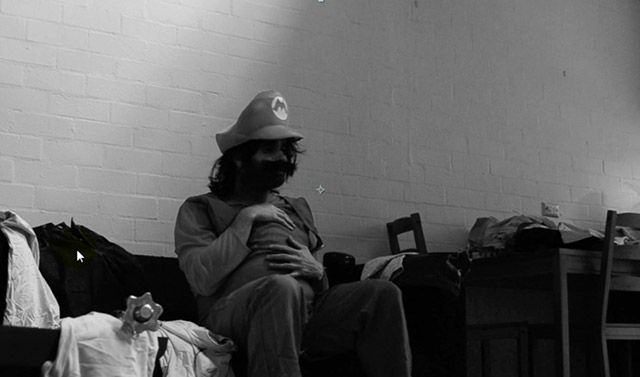
This will desaturate your footage and you can clearly see how well the clip is exposed.
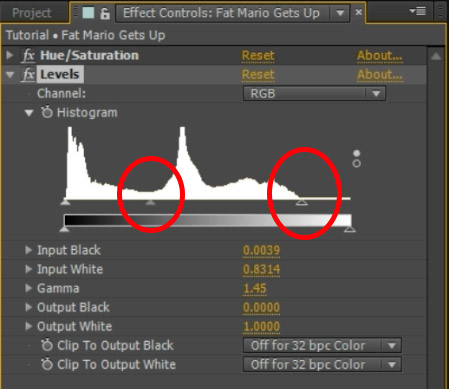
In order to change the exposure you have a couple of options and it will depend on which video software you are working with. In Adobe After Effects, my first stop is the Levels effect. Apply the effect to your clip and open up the effect settings. You will see a histogram showing the distribution of dark (left), mid (middle) and bright (right) pixels in your image.
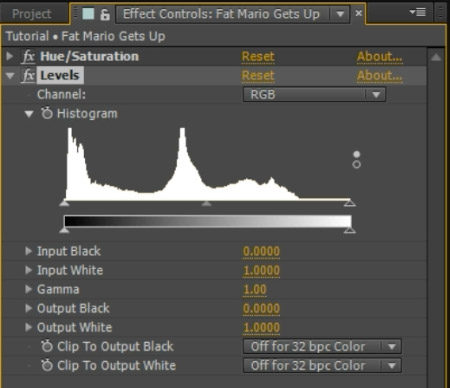
You can see 2 big spikes in the histogram, one at the dark end and one in the mid-tones. If you look at the footage you can clearly see why: the lower half of the footage is very dark, especially the shape of the couch is barely visible. This causes the spike on the left side of the histogram. The wall behind Mario is a rather flat grey which causes a spike in the middle of the histogram as the footage contains a lot of mid-tones.
Notice that the right side of the histogram is entirely empty, indicating that there are no bright pixels in the image. The brightest pixels lie at around 75% brightness – our footage is definitely underexposed.
To stretch out the brightness distribution of the footage, drag the little triangle on the right side of the histogram inwards until it sits just below where the right side of the histogram curve ends. This will push the overall exposure of the footage up and the range of brightness for the pixels will now reach from solid black to solid white. I also decided to push the middle triangle further towards the left. This will brighten the mid-tones of the footage.
The footage is now much better exposed and we can see all the elements that had previously been hidden in shadow.
Just as a note, if we wanted to darken the dark pixels (which we are not going to do here because the footage is already dark enough), you can drag the little triangle on the left side of the histogram towards the right. I would do this if there was a gap on the left side of the histogram which would indicate an overexposed image.
Remember to not overdo the levels adjustment, otherwise you might accidentally clip the brightness of the pixels and cause some of them to either go solid white or solid black. We want a nice, even exposure spanning the entire spectrum.
How you need to adjust your brightness depends a lot on the footage you are working with so feel free to experiment. After the levels adjustments, our original footage is now properly exposed.
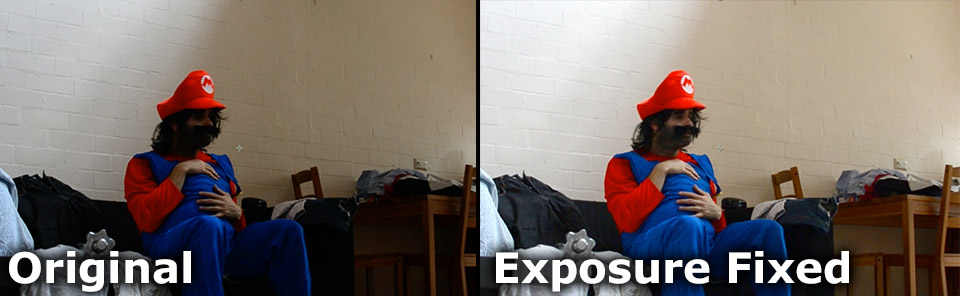
Brightness wise we are good, but brightening up the mid-tones has sucked quite a bit of contrast out of our image. This can make the clip seem rather flat and dull so let’s fix that up!


8 Responses
which software do you use for editing these videos. i don’t know the software name..
I edit all my videos in Premiere Pro
You are awesome!
Hello, thanks so much for your tutorial, my videos look so good and neat because of you!, Now I will check out regularly your website
I havent even completely read your post or tried this but just scrolling through I already know you have given us a good coaching. Id be stuck on your blog now as I learn along. thank you so much
Haha, thanks for the feedback :) Glad to hear you’re finding my content useful!
How can I remove the background from video
There are different techniques that you can use depending on what your footage looks like. Check out my tutorials on green screening (the recommended approach) or, if you didn’t film with a green screen you can use rotoscoping. Again I have a few tutorials for that that on my YouTube channel and this website :)