Create a sphere directly below the grid of roof tiles. Scale it to match the approximate size of the giant smashing through the roof.
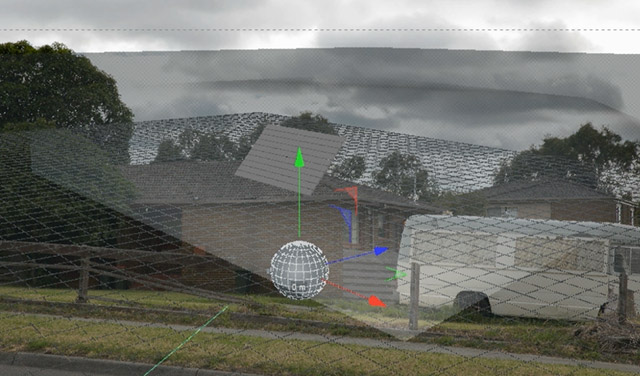
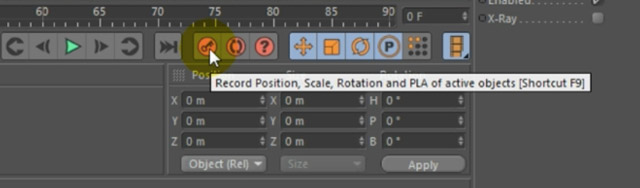
Now animate this sphere to move upwards through the grid of roof tiles. For this, simply create a keyframe at the start of the animation by clicking on the Keyframe button in Cinema 4D. Then move forward a couple of frames and move the sphere upwards through the roof files. Add another keyframe to animate the sphere moving.
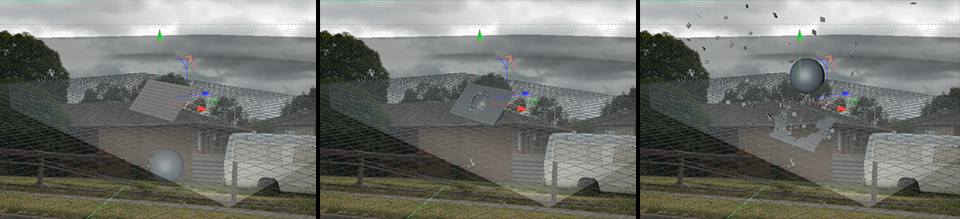
If you play back your animation, the sphere shoots upwards through the roof tiles, but right now it just passes through rather than collide with them. We still have to set up the physics simulation in Cinema 4D for that to happen. Fortunately that is actually very easy!
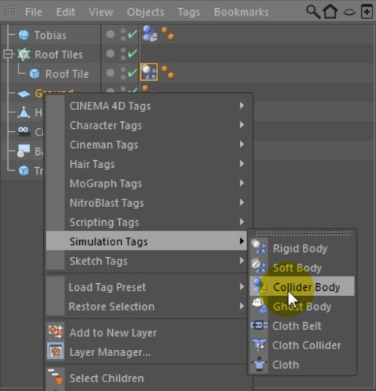
Cinema 4D uses tags to allow you to define and manage all sorts of properties on the objects in your scene. We want to mark the sphere, the roof tiles and the scene geometry as physics objects so they interact realistically. First, right click on the sphere – I called mine ‘Tobias’ – and go to Simulation Tags -> Collider Body.
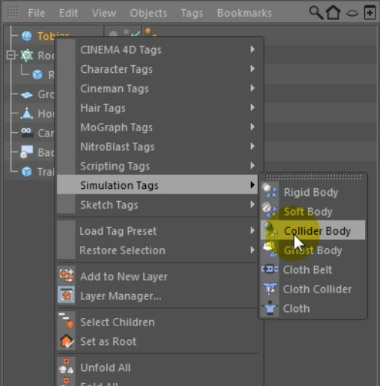
This will add the Collider Body tag to the sphere. Next, select the Roof Tile object – the individual tile, not the Cloner – and add a Rigid Body tag from the Simulation Tags -> Rigid Body context menu.

This will use rigid body physics to animate the roof tiles realistically and the sphere will smash through the tiles because we have marked it to be a Collider Body. A collider object interacts with other physics objects in the scene, but does not have gravity applied to itself.
We are starting to get some cool looking destruction happening!
You may notice that the roof tiles are affected by gravity and start to fall even before the sphere smashes through them. We do not want the physics simulation to be applied to the roof tiles until they are hit by the sphere. For this, select the Rigid Body tag on the roof tiles and go to the settings tab. Change the Trigger property to ‘On Collision’.
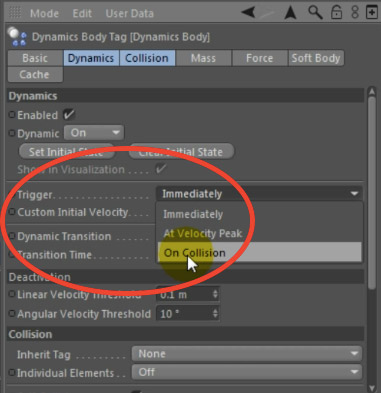
This will cause the physics simulation to be frozen for the roof tiles until they are being hit by another physics object – in our case the sphere. Finally, add a Collider Body tag to the ground, the house, the trailer and any other geometry you might have set up in the scene. This will ensure that the roof tiles do not pass through these object and therefore appear to be interacting with these elements.
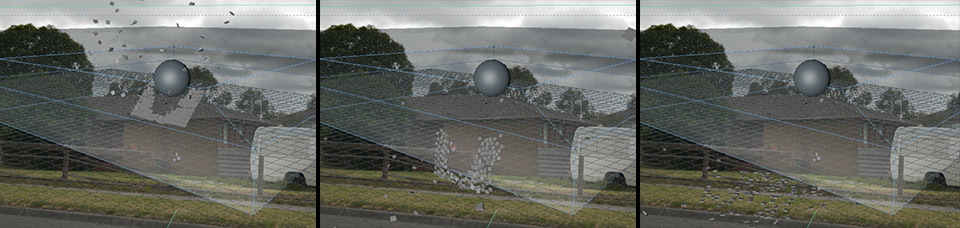
If you play back the animation in Cinema 4D now, you should see the sphere smash through the roof tiles. Some of them will slide off the roof, others will be flung off and bounce across the geometry in your scene. Very cool!
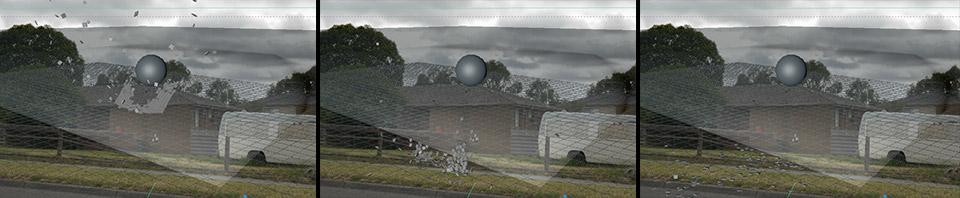
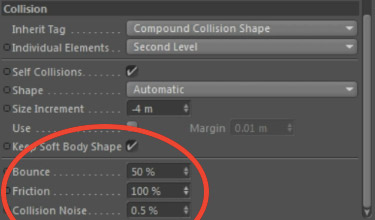
You may notice that the tiles slide a little bit too smoothly along the ground or that they bounce too strongly off the geometry in the scene. You can adjust this behaviour by changing the Bounce and Friction properties found in the Collision settings for the physics tags. I brought down the Bounce and increased the Friction properties for my roof tiles.
After adjusting these properties, the roof tiles behave a lot more realistically as they are scattered all over the scene.
Now let’s look at setting up some materials and rendering out this roof destruction sequence so we can composite it back into our scene in Adobe After Effects!


2 Responses
you guys are great thanks so much
Thank you for the comment!