Here are my top 5 QUICK TIPS for INSTANTLY making better videos! No extra equipment needed, just some smarts when filming your footage.
Add More Light
The first tip for filming better videos is to add more light when filming your scene. Your camera can not see as well in the dark as your eyes. It may adjust the aperture, shutter speed or ISO to deal with low light. This however can make your footage look grainy and dull.
Ensure you have plenty of light when you film your scene. Natural, diffuse light will make your footage look its best. Film near a window or outside if that is an option.
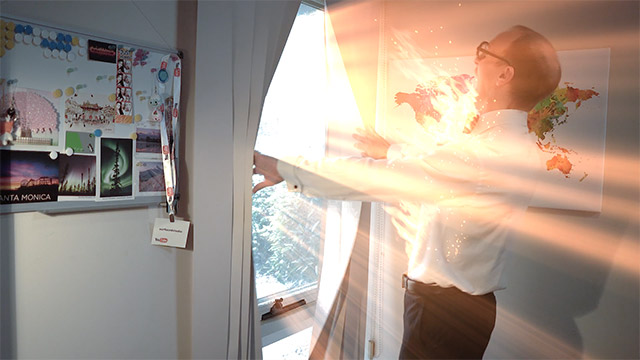
You can also get some cheap video lights like the Yongnuo YN600 Air to brighten up your scene. With enough light, even mobile phone footage can come out looking great!
Shoot in Manual Mode
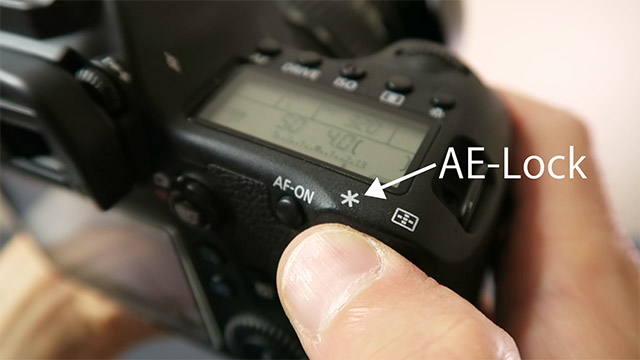
The second tip for getting better videos is to switch your camera to manual mode if you have the option. When you film your video, your camera will do its best to keep the brightness of the image consistent. If left on automatic, it will do one of three things on the fly:
- Adjust the shutter speed – which can impact the feel of the video
- Adjust the aperture – which can impact the focus
- Adjust the ISO – which can lead to grainy footage
This can lead to all sorts of ugly artefacts and make your video look low quality. Always set your camera to manual mode when filming. You can also enable auto exposure lock (AE-lock) if it’s available on your camera. This will stop your camera from trying to keep your image brightness consistent and it will no longer adjust these settings on the fly.
If you are filming on on a mobile phone, there are plenty of apps available that you can use to shoot video. These apps can give you full manual control over all settings for the camera of your mobile phone.
Disable Auto White Balance
Tip number 3 for filming better videos is to disable auto white balance on your camera. White balance is used to define true white in your video. If set incorrectly it can lead to blue, pink or yellow tinted video.
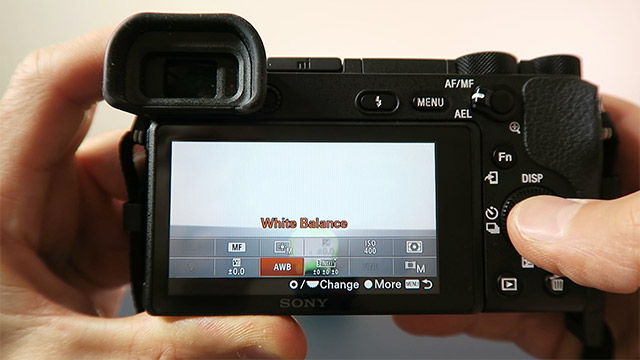
Worse, if left on automatic, this colour tint can shift as you film your video. Not something you’d like to see in a professional video.
Always set your white balance to manual mode to avoid shifting colour tints. Even if you set your white balance a little wrong initially, as long as it’s constant you can always fix it up in post.
Stabilise Your Camera
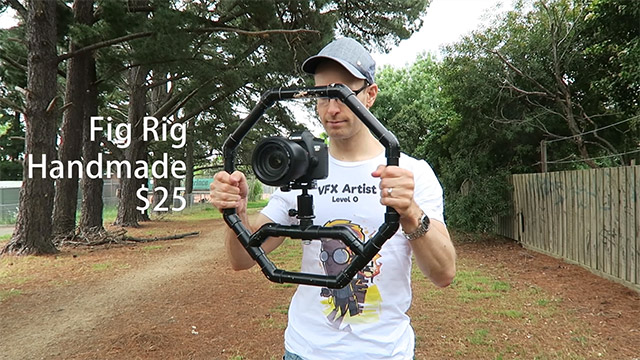
The fourth tip for creating better videos is to stabilise your camera. Avoid hand-holding your camera. Having your hands directly on the camera introduces a lot of small jitters that make your video look very home made.
Invest in a good tripod. You can also mount the camera on a tripod and then hold the tripod to stabilise your camera. Or build yourself a cheap Fig Rig ($25) or get a professional grade Gimbal (like the DJI Osmo+) to get smooth footage even while hand holding your camera.
Do Simple Colour Correction in Your Editing Software
The last tip for creating better looking videos is to perform at least some basic colour correction in post production.
Most people tend to skip this step. However, it is a quick and easy way to make your video look a whole lot better. Use your editing software to adjust the brightness or contrast of your video. You can also tweak and fix the white balance if it was a little bit off – again, assuming it was set to manual.
The great thing is that the video effect you need for colour correction are available in almost ANY video editing software you may be using.
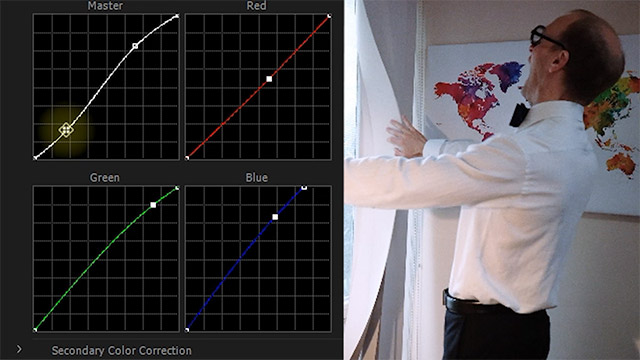
It will not take you more than a few minutes and I have a lot of tutorials on colour correction and colour grading to get you started.


