Fixing the Contrast of your Footage
If you have to do a lot of fixing on the exposure of your footage, you may end up with a clip that looks rather flat. To add some contrast back into the image i like to use the Curves effect in Adobe After Effects. Simply apply the effect to your clip and go to the effect settings.
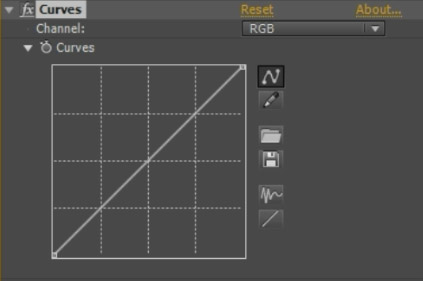
You will see a little drop down button on the top right that allows you to determine if you want to modify the RGB (luminance) channel or the Red, Green, Blue or Alpha channel individually. Leave this option on RGB for now.
The curves effect will – no surprise – display a curve representing the input and output intensity of the pixels in your image.
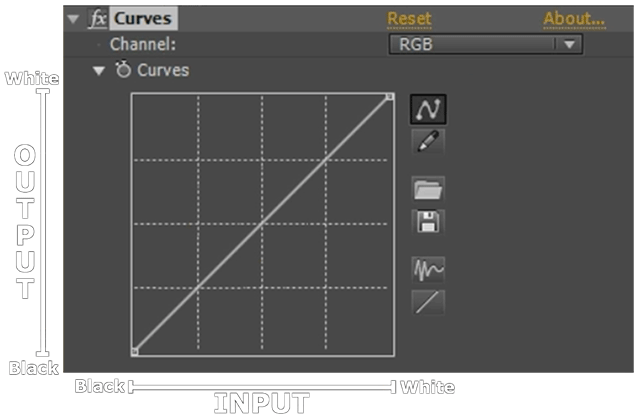
The horizontal axis represents the input brightness of the pixels in your footage with left being black and right being white. The vertical axis represents the output brightness of the pixels with bottom being black and top being white. The curve is a diagonal line because by default the pixels are output at the exact brightness they come in.
You can change the curve by adding points to it and dragging them around. Simply click on the curve to add a point. To remove a point, drag the point out of the graph area and let go of the mouse button.
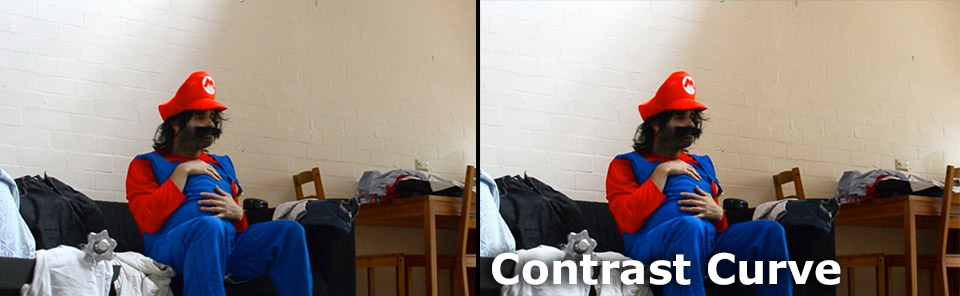
To add contrast to the curve, add one point right in the middle to anchor it. Then add another point on the right side of the curve and push it up a little bit. This will brighten up the highlights in your footage. Add one more point on the left side of the curve and push it down a little. This will darken the shadows some more.

Notice how the contrast has been enhanced by the Curves effect we applied!
And with that, we are done correcting the exposure of our footage. Let’s move on to correcting the white balance!
Fixing the White Balance of your Footage
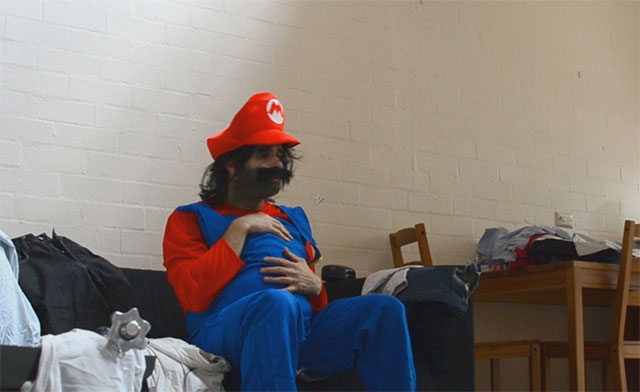
It is important to ensure that your white balance is properly set up when shooting your footage or your clips might come out rather discoloured. If that happens, we have to correct the white balance in post production.
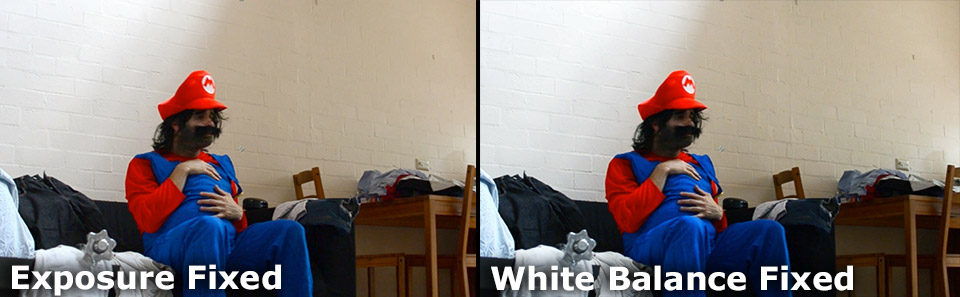
For the Mario footage, I felt the clip had turned out a little bit too yellow and decided to fix that up. Note the slight yellow tint on the wall behind Mario.
To fix the white balance, go back to the Curves effect. This time, rather than working with the RGB channel, chose the Red channel from the drop down menu. The Curves effect will show the graphical representation of only the red channel of your footage.
Reduce the red colour in the midtones of your footage by adding a single point to the middle of the curve and pulling it down slightly. This will drain some of the red from the clip and will likely add a slight cyan tint to it.
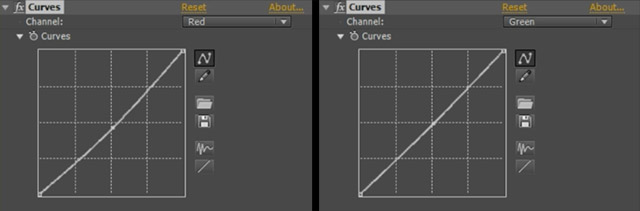
To counter the cyan tint, go over to the Green channel for the Curves effect. Add a point in the middle of the curve and bring the green up until it balances out the footage again. You generally want to avoid overly dramatic changes with the Curves effect and make small, deliberate adjustments.
With the green channel pushed up, our footage looks properly white balanced and the yellow tint is gone!
Let me quickly run you through how you can do Colour Correction in Adobe Premiere Pro.


8 Responses
which software do you use for editing these videos. i don’t know the software name..
I edit all my videos in Premiere Pro
You are awesome!
Hello, thanks so much for your tutorial, my videos look so good and neat because of you!, Now I will check out regularly your website
I havent even completely read your post or tried this but just scrolling through I already know you have given us a good coaching. Id be stuck on your blog now as I learn along. thank you so much
Haha, thanks for the feedback :) Glad to hear you’re finding my content useful!
How can I remove the background from video
There are different techniques that you can use depending on what your footage looks like. Check out my tutorials on green screening (the recommended approach) or, if you didn’t film with a green screen you can use rotoscoping. Again I have a few tutorials for that that on my YouTube channel and this website :)