How To Green Screen a Giant
In order to create the effect of me growing into a giant and smashing through the roof, I recorded a little clip of me standing up in front of a green screen. There are a number of things to watch out for when using a green screen and you can learn more about them in my Common Green Screen Mistakes tutorial.

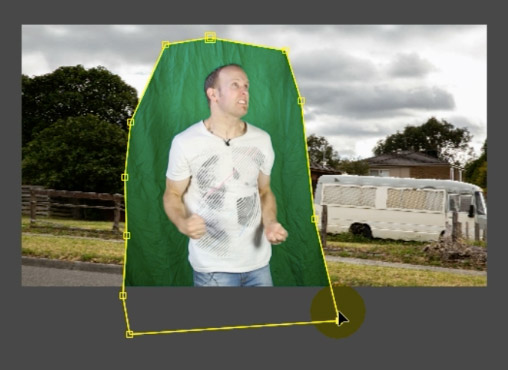
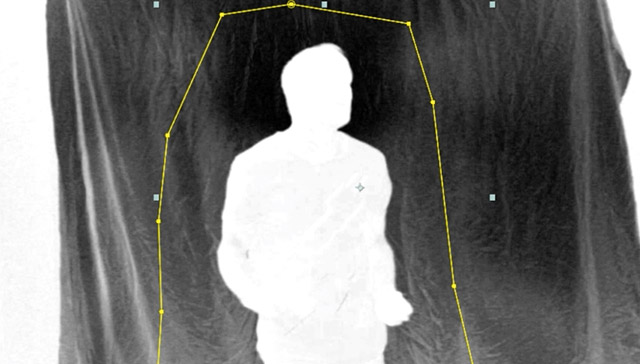
Import the footage into your composition and let’s remove the green screen. We will use the Keylight effect in Adobe After Effects, but because the effect itself is rather computationally expensive, I like to first restrict my footage to only the parts that I actually need. For this you can apply a simple mask around your body and animate it to follow your movement. Leave plenty of space around the edges.
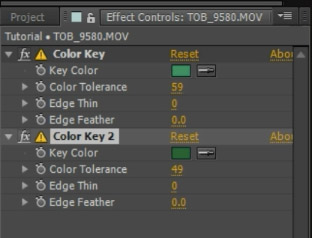
Before applying the Keylight effect, you can use simple (and quick) Color Key effects to remove the majority of the green pixels. Simply apply the effect to your layer, use the Key Color picker to select a green part of the footage and adjust the Color Tolerance.
Make sure you don’t accidentally remove parts of the person in the footage, we only want to remove the main parts of the green screen. After applying the mask and the Color Key effects to your video, you should end up with something like this:
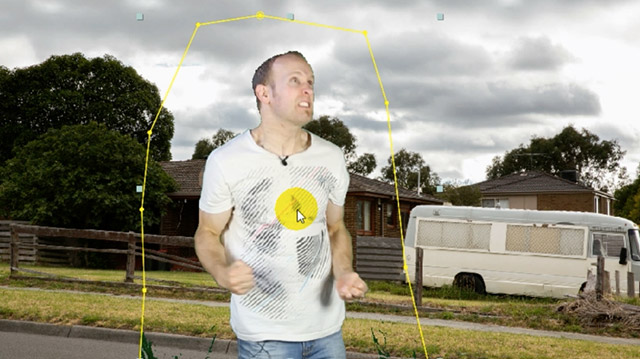
It is still a bit rough around the edges and there are some green bits and pieces left from the green screen.
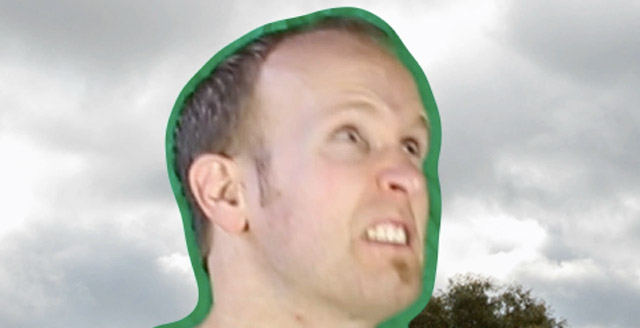
Because the Color Key effects have made the edges of the person look rather ragged, we want to pull back the green screen a little bit. For this you can use the Simple Choker effect. Apply this effect to the layer and decrease the Choke Matte property until you have a smooth green outline around the elements you want to cut out from the footage.

You want the green outline to be thick enough to contain any detail items, for example my hair, in it. This will allow us to cleanly remove the green screen without destroying these details when we apply the Keylight effect.
Finally, apply the Keylight effect to the clip and use the color picker to select the green Screen Colour.
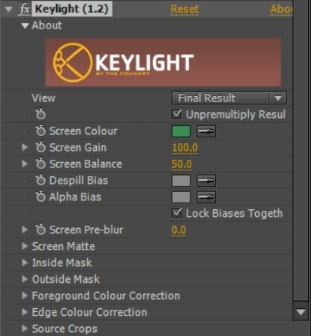
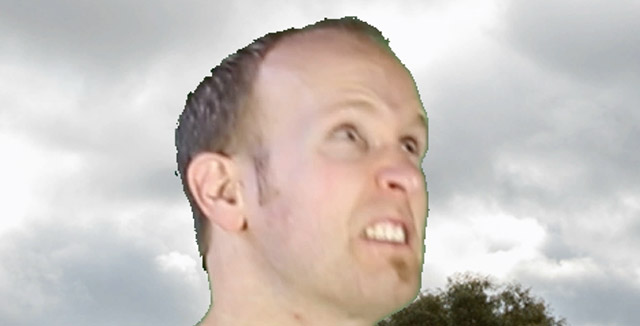
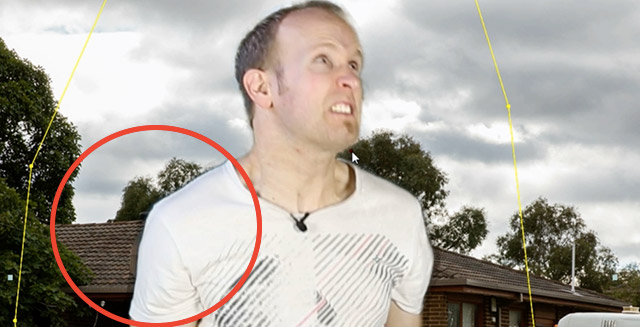
The Keylight effect will intelligently remove the green from your footage and should leave details like hair intact, giving you a much nicer result. However, we do need to do a little bit more tweaking as I can see a dark shadow/outline around my body.
We need to adjust the Keylight effect so it can determine more precisely which areas of the footage represent the green screen and which ones represent the content we want to keep. For that, go back to the effect parameters and change the View property to ‘Screen Matte’.
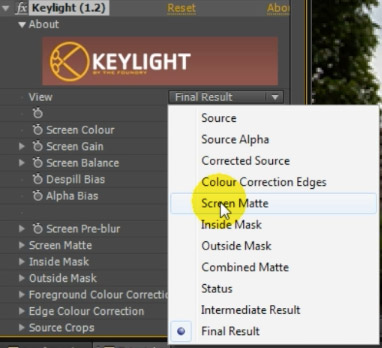
This will give you a greyscale representation of your footage and show you which parts of the footage the Keylight effect is going to remove. Evey part of the image that is black will be removed, every part that is white will remain opaque and the grey pixels represent semi-transparent areas.
To adjust the Keylight effect, you have to adjust two main properties: Clip Black and Clip White. These can be found in the Screen Matte tab in the Keylight effect parameters.
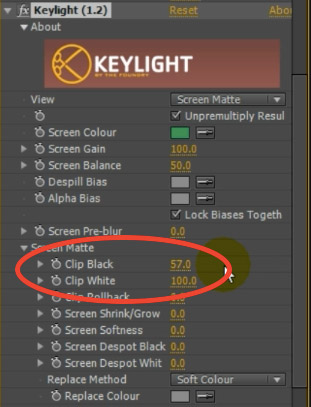
Increase the Clip Black property and decrease the Clip White property to find the best balance that gives you a clean white matte over only the elements you want to extract from the footage. The green screen should be entirely black.

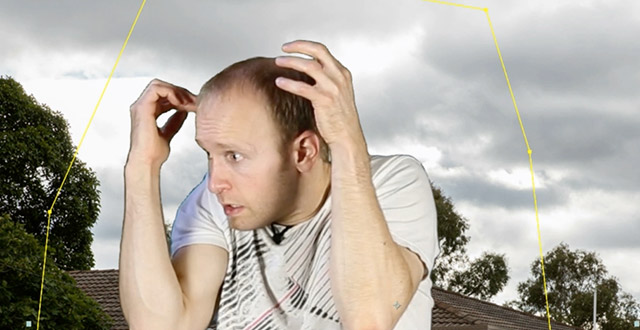
If you switch the View mode back to ‘Final Result’, you should now see the fruits of all your labour: a properly green screened person.
Let’s get this giant integrated into our scene!


